How To Clean NuTone
We may receive a commission on purchases made from links.
Bathroom fans play an important role in keeping bathrooms in good shape, removing excess moisture from the air, helping get rid of odors and even reducing airborne contaminants such as dust, particulates and fumes from household cleaners. NuTone has a series of popular bathroom exhaust fans installed in many houses today. However, to operate efficiently, fans need to be cleaned. Fortunately, cleaning your bathroom fan is not overly difficult.
Cleaning NuTone Bathroom Fans
Cleaning NuTone Bathroom Fans
You should clean bathroom fans at least once every six months. If a fan is not cleaned regularly, excess moisture from regular use of the bathroom will not be removed from the air, leading to mold and mildew. If you haven't cleaned your bathroom fan in a long time, or if it's making unusual noises when it's on, it's time to give it a thorough cleaning.
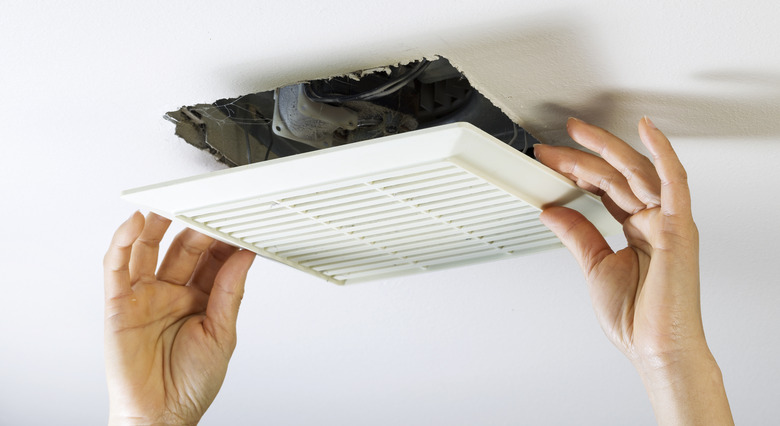
To clean a NuTone bathroom fan, first, make sure it is off. For safety, Better Homes & Gardens recommends turning off the fan at the circuit breaker. Once you're sure the unit doesn't have power, remove the cover.
Gently pull it away from the housing until you can get your fingers along either side of it. This should expose the slider spring clip mounting wires. These are V-shaped wire clips that snug the cover into place when expanded. Squeeze the mounting wires and pull to remove them from their slots. The cover should now come off all the way.
Cleaning the Fan Cover
Cleaning the Fan Cover
Place the cover on some newspaper and clean it with a vacuum with a bristle brush attachment. Once the worst of the dry dust is off, clean off the remaining dust and grime by washing the cover with soap and warm water. Dry the cover with a lint-free towel and set it aside.
Clean the Fan Assembly
Clean the Fan Assembly
To clean the fan assembly, remove the fan and clean the housing. To remove the fan, it may be necessary to unscrew it first. Keep in mind that it is attached by a cord. You may be able to unplug the cord from the housing, or you may have to remove the fan only as far as the cord will let it go.
Do not tug on the cord if it can't be unplugged. Once the fan is as far removed as it will go, gently vacuum the fan with a bristle brush or dusting attachment to remove the dry dust. Next, gently clean the fan blades with a damp microfiber cloth to remove built-up grime. Be sure not to bend or strain the fan blades as you clean them.
Cleaning the Fan Housing
Cleaning the Fan Housing
Finally, clean the fan housing. Use the bristle brush or dusting attachment on your vacuum cleaner to give an overall cleaning, then switch to the crevice attachment to get into corners and tight spaces. Give the entire housing a wipe down with a damp cloth and all-purpose cleaner to remove grime.
Reassembling the Fan
Reassembling the Fan
Insert the fan back into the assembly, plugging it back in and screwing it back in if necessary. Ensure the cover is dry and gently pinch the mounting wires on one side to reinsert them back into their slots. Then align the cover and pinch and insert the mounting wires on the other side. Snug the cover back in place, turn the circuit breaker for the fan back on and test to make sure it's running smoothly again. The fan noise should be even and quiet.