How To Add An Ice Maker To Your Fridge
We may receive a commission on purchases made from links.
An automatic ice maker is to a refrigerator what heated seats are to a car. If you don't have one, you can't understand what all the fuss is about. As with heated seats, once you experience always having the ice cube tray full of individual cubes whenever you need ice, you won't know how you managed to get by without one.
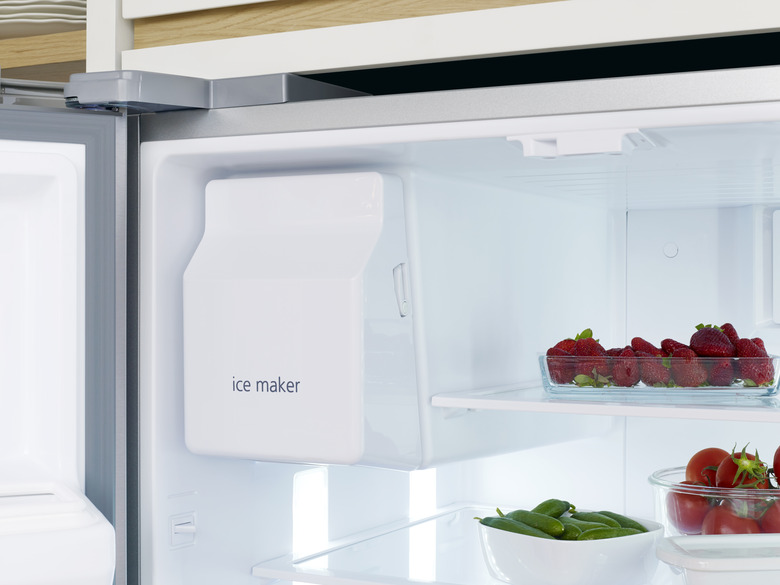
Ice makers are popular and convenient. That's why so many new refrigerators come equipped with them. If your refrigerator does not have one or if it has an ice maker that is not working and can't be fixed, you can easily install a new one. Most refrigerator manufacturers already include the internal plumbing and wiring as well as a dedicated installation space needed for an ice maker.
Ice Maker Basics
Ice Maker Basics
Ice makers require electrical power and a water source in order to operate. When you install one, there is no complicated wiring with which to contend because the ice maker will run off the power from the refrigerator, but you do need to tap into an external water source. Most people run a line from the refrigerator to the cold water pipe that supplies the kitchen faucet.
For an ice maker to work, a solenoid valve at the bottom of the refrigerator in the back opens to fill the ice tray. The cold temperatures in the freezer then turn the water to ice. When the temperature in the tray hits the single digits, a heating element clicks on for an instant to separate the cubes from the tray. Then, the motor on the ice maker activates a set of ejector blades that move the cubes from the tray to the ice bin. Then, the process starts again.
Selecting an Ice Maker
Selecting an Ice Maker
Most modern refrigerators have the space and the mounting brackets set aside for an ice maker. You will need to find an ice maker that is compatible with your make and model of refrigerator. The easiest way to do that is to find the model number of the refrigerator. It is usually located on the door, wall, or ceiling of the refrigerator part of the unit. It is not in the freezer.
Model numbers located on the ceiling of the refrigerator compartment are difficult to read. You could hold a mirror under the sticker, but the number will appear backward and upside down. A better solution is to photograph the sticker using a cellphone. Turn the lens around as if you were taking a selfie; this will help you position the phone. Snap the picture and then rotate the phone to read the number.
Once you have the number, you can match it with the appropriate ice maker. Ice makers are available at home centers and plumbing supply stores. You can also go to the website of the refrigerator manufacturer to find out where to purchase the right ice maker. You'll find that one type of ice maker is often compatible with a number of different refrigerator models.
The ice maker may come with all of the parts needed for the installation. If it doesn't, there are installation kits available.
 JazzIRT/iStock/GettyImages
Ice Maker Installation Kits
Ice Maker Installation Kits
Many kits contain saddle valves for connecting the ice maker supply line to the cold water pipe that supplies the kitchen faucet. The valve clamps down over the pipe, and a pin is turned to pierce the pipe to start the flow of water. They often fail. You won't need a permit to install an ice maker, but if you did, the building inspector would fail the installation if it contains a saddle valve.
There are other alternatives available, including cutting into the pipe to solder a new fitting. Another possible option is to replace the shutoff valve under the sink with a dual-outlet, dual-stop valve that provides an outlet port for the water line that runs to the refrigerator as well as an outlet for the sink faucet. Dual stops mean you can control each outlet independently. These usually use compression fittings for attachment. There are some that use push-to-fit fittings.
Many installation kits come with 1/4-inch-diameter tubing in either plastic or copper piping. A good option is stainless steel braided water lines. These are flexible, and they resist damage because of the tough outer sheath.
The stainless steel may surround a vinyl line or a PEX water line. Braided lines have built-in 1/4-inch compression fittings that you simply screw on. They come in lengths up to 25 feet.
How to Install an Ice Maker
1. Unplug the Refrigerator
This project could take some time, so it is best to keep the refrigerator portion of the unit closed or move perishables to another location. Remove everything from the freezer to give you room to work. If there is a shelf in the freezer, remove it.
2. Prepare the Installation Site
Most refrigerators are ready for an ice maker installation. There are mounting holes on the left wall of the freezer as well as a plastic cover on the back wall of the unit in the upper left-hand corner.
- Use a flat-head screwdriver to remove the plugs that cover the mounting holes.
- Remove the cover on the back wall by inserting the screwdriver into the opening and releasing the tab holding the cover in place. This will reveal a hole that will later hold the ice maker fill tube and a wiring harness that will connect to a wiring harness on the ice maker.
3. Prepare the Back of the Refrigerator
Pull the refrigerator away from the wall, and be sure to give yourself plenty of room to work. You will need to connect the ice maker inlet valve, or fill valve, which you will install near the bottom of the refrigerator to the water inlet tube that feeds directly into the ice maker. Both locations are usually marked on the back of the refrigerator.
4. Install the Inlet Tube
Look for the location for the water inlet tube near the top right-hand corner of the refrigerator for top-mount freezers. It will be located lower down for bottom-mount freezers. You will use the tubing that came with the ice maker to connect the fill tube to the water inlet valve.
- Use a utility knife to cut the sticker that covers the inlet tube opening. There should be directions on the sticker for how to make the cuts.
- Pull the foam insulation out of the tube opening using needle-nose pliers.
- Insert the inlet fill tube. The tube will extend into the freezer compartment.
- Place the rubber seal over the end of the fill tube on the outside back of the refrigerator. This seals the opening and holds the tube in place. Your kit may require a different attachment technique.
- Connect the water line that came with the installation kit to the fill tube. Hand-tighten the compression fitting and then give it a quarter turn using the pliers.
- Secure the tubing to the back of the refrigerator using the clips provided. Some clips have adhesive backing, or you may have to screw them to the refrigerator at pre-drilled locations.
5. Install the Ice Maker Fill Valve
Most refrigerators have a cardboard cover near the bottom of the unit to access the refrigerator's motor and compressor. The water inlet valve will be located in the lower right corner of the unit. If there isn't already an opening for the valve, it will be marked on the cover.
- Remove the cover using a nut driver.
- Connect the supply tubing you just installed to the outlet port on the valve. Firmly push in the tubing until it reaches the bottom of the fitting. The tubing may be marked to help you know when it is installed properly. Give it a tug to make sure it is firmly installed.
- Connect the wiring harness on the valve to a mating connection that will be near the bottom of the refrigerator.
- Attach the valve to the refrigerator frame in the pre-drilled holes using the nut driver.
- Replace the cardboard cover.
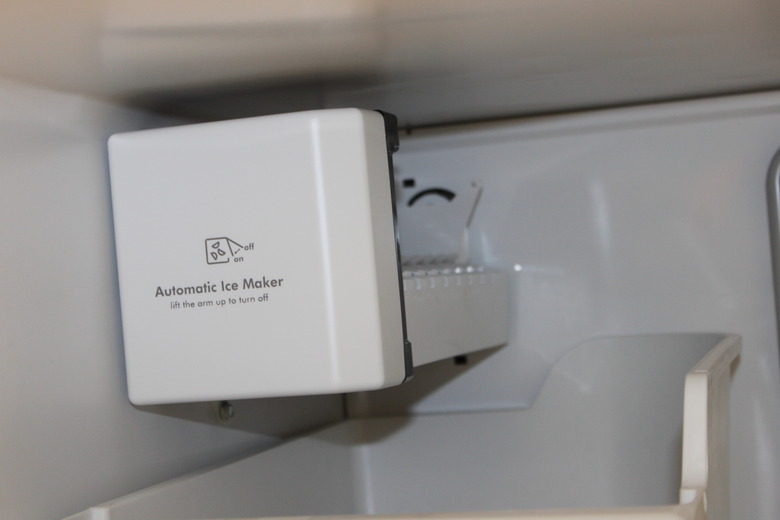
6. Install the Ice Maker
The ice maker will be attached to the sidewall of the freezer using the mounting screws that come with the ice maker kit. You will need to level the unit and also make sure that the fill cup of the ice maker — the component that receives the water from the fill tube that you installed earlier — is in line with the fill tube coming through the wall of the freezer.
- Screw the leveling bracket to the bottom of the ice maker.
- Insert the mounting screws into the mounting holes but don't tighten them all the way.
- Hang the unit on the screws, making sure the fill cup on the ice maker is aligned with the inlet tube.
- Plug in the wiring harness to the mate that is in the freezer wall.
- Adjust the ice maker so that there is an equal amount of space — usually 1/8 to 1/4 inch — between the ice maker and the freezer wall from the top of the ice maker to the bottom. Tighten the leveling screw.
- Tighten the mounting screws.
- Replace the cover over the wire harness opening if there is one.
- Place the ice bin that collects the ice cubes under the ice maker.
7. Install the New Shutoff Valve
While any cold water pipe can be used, most people connect the ice maker water line to the cold water pipe that supplies the kitchen faucet. There are a number of ways to connect the valve to the pipe, including soldering the fitting and using push-to-fit connections. Using compression fittings is one of the most often used. The new valve should be able to accommodate the sizes of the faucet supply line, usually 3/8 or 1/2 inch, and the ice maker water line, always 1/4 inch.
- Turn off the water. Because you will be replacing the existing shutoff valve, turn off the water to the whole house.
- Use a wrench to disconnect the compression nut on the existing valve. Place one wrench on the fitting to hold it steady and loosen the nut with another wrench.
- Remove the compression ring and nut and clean off the end of the pipe.
- Slip a new nut onto the pipe followed by a compression ring. Attach the new valve by hand-tightening the compression nut. Follow by holding the valve steady with one wrench while tightening the nut with another. The outlet port for the faucet supply line should face up.
- Attach the faucet water supply line to the new valve using compression fittings.
8. Install the Ice Maker Supply Line
Run the supply line using the shortest route between the new under-sink valve and the ice maker inlet valve on the refrigerator. Most people run the line through base cabinetry, so drill the necessary holes in the cabinets. When you measure the length of the water line you will need, include an extra 6 feet that you can coil behind the refrigerator. This will allow you to pull out the refrigerator for cleaning without disconnecting the ice maker.
- Run the water line between the shutoff valve and the ice maker water inlet.
- Attach the water line to the new shutoff valve using compression fittings. If you use braided line, the fittings will already be attached to the line.
- Attach the other end of the line to the inlet port on the ice maker water valve. First hand-tighten and then use a wrench to finish tightening the compression fitting.
- Turn on the water to check for leaks.
- Move the refrigerator back into position and plug in the power cord.
- Test the ice maker.