How To Use Compression Fittings With Copper Pipe
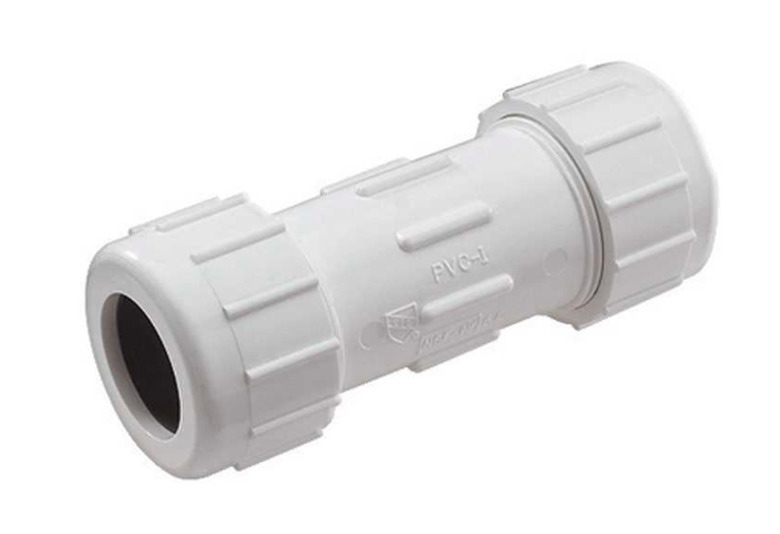
Compression fittings create removable plumbing connections on standard rigid and flexible copper pipe and tubing. They are most commonly found on water shutoff valves, or stop valves, the type used on faucet and toilet water supply pipes. There are also compression union fittings that join two pipes in a straight line. Compression fittings offer an easy-to-install alternative to traditional soldered plumbing connections. The trick to a leak-free installation is making sure the pipe end is cut square and is smooth and clean. A square cut is easiest to make with a tubing cutter.
 PlumbingSupply.com
Warning
Compression fittings are suitable only for visible or accessible locations—places where you can see them or get to them easily—because they are more prone to leaks than permanently soldered fittings. Do not use compression fittings in locations where they will be hidden behind wall, ceiling or floor materials. Never use compression fittings for gas-line connections.
How Compression Fittings Work
How Compression Fittings Work
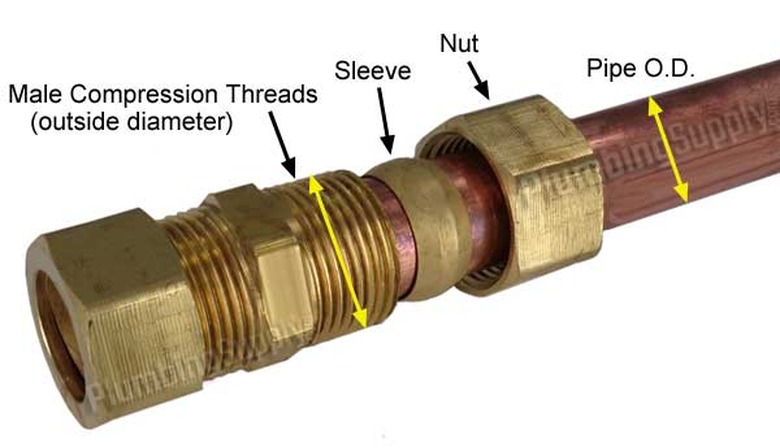
A compression fitting is not a specific plumbing part but rather a type of fastening system for valves, water supply tubes and other plumbing fittings. The valve (or other part) has a port where the pipe slips in, and the port has male threads on the outside. Before you fit the parts together, you slide a compression nut and a compression ring onto the end of the pipe.
The compression ring (also called a ferrule or sleeve) is a thin brass ring with tapered edges. Once the pipe and fitting are together, you slide the ring against the fitting, then thread the nut onto the fitting. The nut compresses the ring between itself and the fitting, and the tapered edges of the ring are wedged tight inside the fitting and the nut, creating a watertight seal. If you ever need to remove the fitting, you simply loosen the nut, slide back the nut and ring, and pull the pipe and fitting apart.
 Ace Hardware
Things Needed
-
Tubing cutter (as needed)
-
Rag
-
Compression fitting
-
Pipe joint compound or thread-seal tape (optional)
-
Two adjustable or open-end wrenches
How to Install a Compression Fitting on Copper Pipe
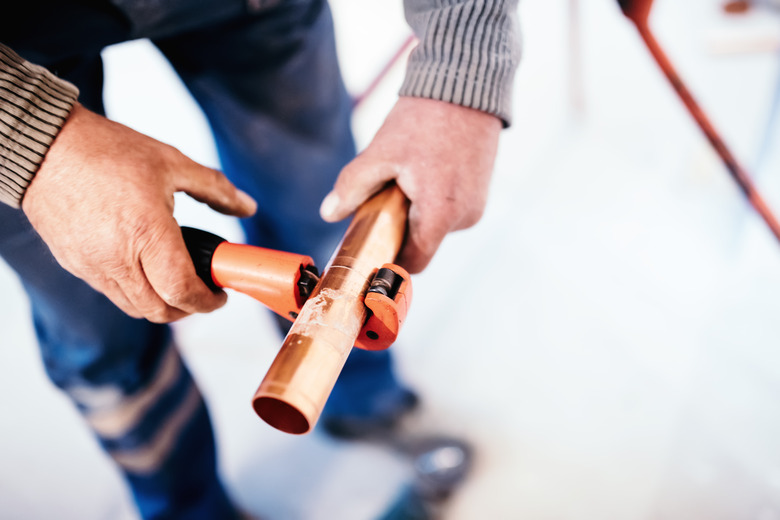
1. Cut the Pipe
Cut the end of the pipe, if necessary, using a tubing cutter. Open the jaws of the tubing cutter and fit it onto the pipe so the pipe rests squarely against the two flat rollers of the cutter. Tighten the cutter so the cutting wheel is snug against the pipe. Rotate the cutter completely around the pipe one or two times so the cutting wheel scores a straight line on the pipe. Rotate the cutter once or twice in the reverse direction. Tighten the tool slightly, and rotate once or twice in both directions again. Repeat the process until the cutting wheel cuts all the way through the pipe.
 Bogdanhoda/iStock/GettyImages
2. Ream and Clean the Pipe
Remove the sharp, ragged edge inside the end of the pipe, using a reaming tool (most pipe cutters include a triangle-shaped reamer that retracts into the body of the tool). Insert the reamer into the pipe and rotate it back on forth, making a few complete rotations, while applying pressure into the pipe. Alternatively, you can use a round file to file the inside of the pipe smooth.
Use your finger to pull out any debris from inside the pipe. Clean the outside of the pipe with a rag; it must be clean, with no paint or other contaminants. If necessary, apply a cleaner or solvent to the rag to clean the pipe.
3. Install the Fitting
Slip the compression nut from the compression fitting onto the pipe, then slip on the compression ring. Slide both pieces down so they are 1 inch or so from the end of the pipe. Fit the compression fitting onto the pipe (or fit the pipe into the fitting, as applicable) until the pipe stops inside the fitting.
Tip
Apply pipe joint compound or thread-seal tape (also called Teflon tape) to the threads of the fitting, if desired. Compound or tape provide lubrication to the threads and can help prevent leaks, but valve manufacturers often do not specify using compound or tape with their compression fittings.
4. Tighten the Fitting
Hold the fitting against the pipe, and slide the compression ring up against the fitting. Slide the nut over the ring and thread it onto the fitting until it is hand-tight. Be careful not to cross-thread the nut.
Fit one wrench onto the body of the fitting and hold it so that the fitting doesn't move. Use another wrench to tighten the compression nut about one-half to three-quarters of a turn. Be careful not to overtighten the nut.
 Assotherm
5. Check for Leaks
Check the compression fitting for leaks after you've completed all of the other plumbing connections and turned on the water supply to the pipe. If the compression fitting leaks, use both wrenches to tighten the compression nut gently until the leak stops.
If you can't get a leak to stop, you may have cross-threaded the compression nut, or the compression ring may not be seated properly against the fitting. Remove the nut and check the ring, then reinstall the nut. If the fitting or nut threads are damaged, replace the fitting.