Kitchen Sink Plumbing: A How-To Guide

We may receive a commission on purchases made from links.
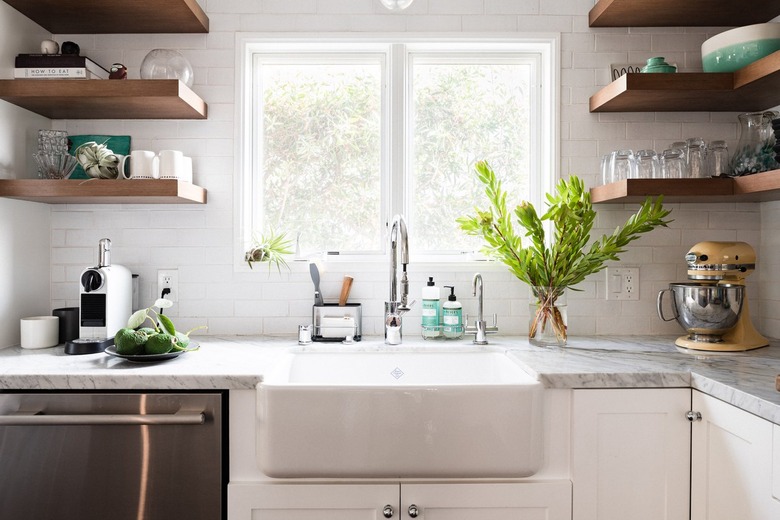
If you've updated your kitchen and added a new sink or moved the old one, you'll need to install updated plumbing for the drainage and water supply under the basin. This can be a very intimidating DIY project for many homeowners, particularly those with no prior plumbing experience. However, most people find that with the proper knowledge, they can do most if not all of the necessary plumbing work themselves.
That's not to say that it will be simple. This type of home improvement undertaking often looks difficult, and it is. In fact, there are some aspects that a homeowner may decide are best handled by a professional, like installing a garbage disposal. However, with a knowledge of the plumbing under your sink, you can get the job done.
Before You Begin
Before You Begin
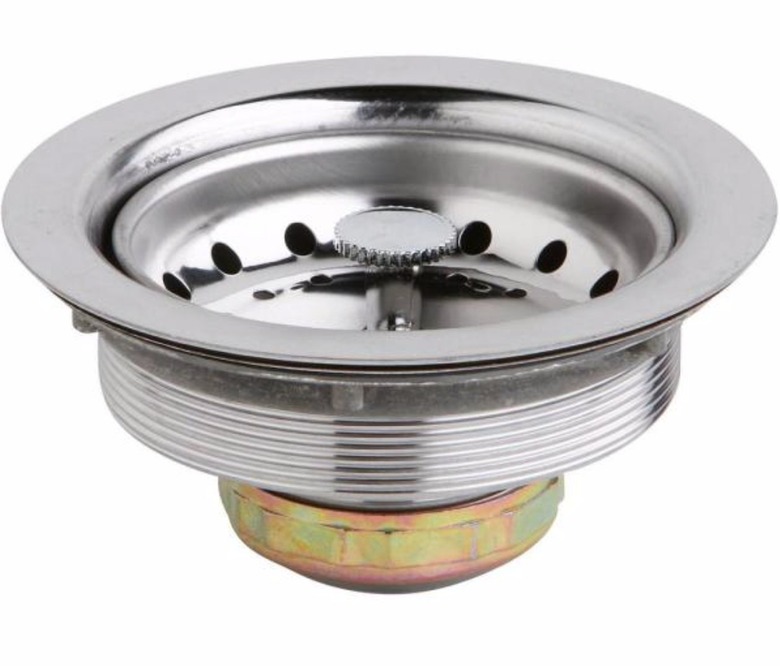
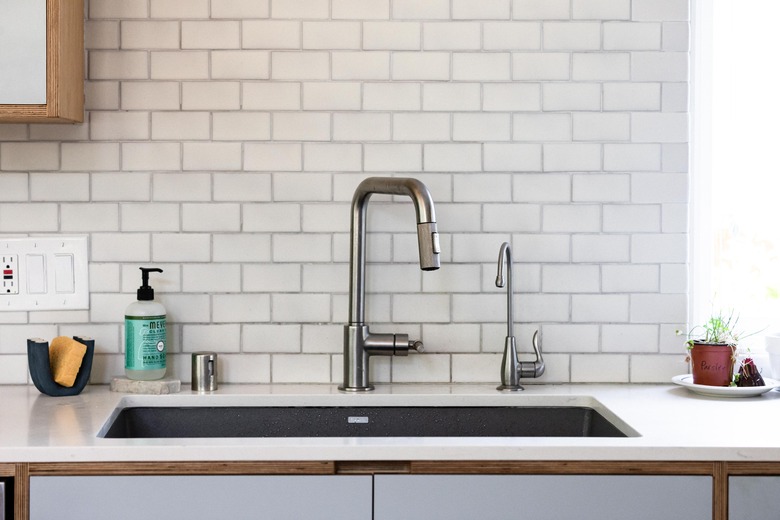
Of all the drainage plumbing required for your kitchen sink, the basket strainers and spout stoppers are the only parts visible from the top of the basin. For many homeowners, the strainer is known as the sink drain. Of course, there is a lot more to it, as anyone who has looked under a sink can tell you. The basket strainer, also known as a sink strainer, connects the basin with the rest of the necessary pipes.
The strainer itself is the small slotted piece in the drain hole at the bottom of the sink basin. It is designed to allow water through while filtering out and capturing larger items. It is also used to block off the drain and hold water in the sink. The strainer flows into an undermount basket.
Though installing the basket strainer is not too difficult, it's important to make sure it is done properly. And the whole part consists of the basket, a locknut, a rubber gasket, and a cardboard friction ring.
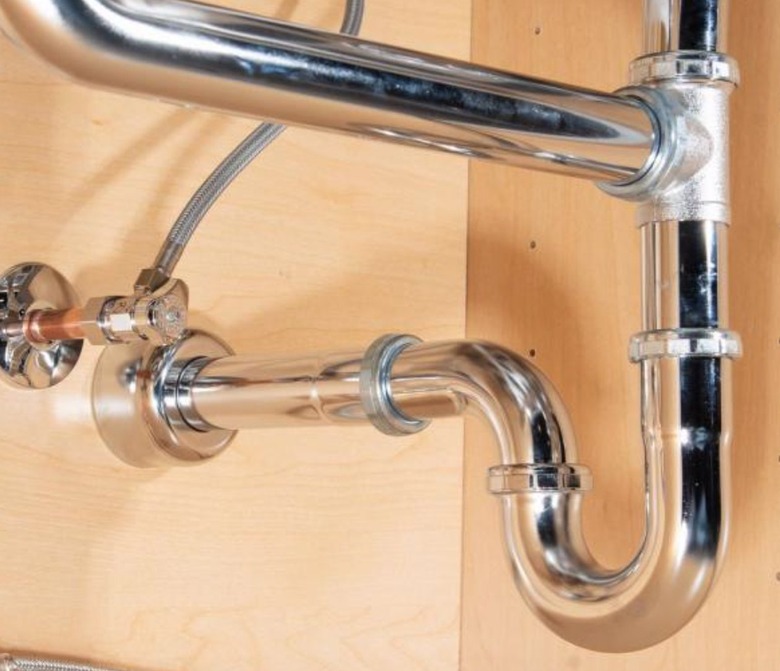
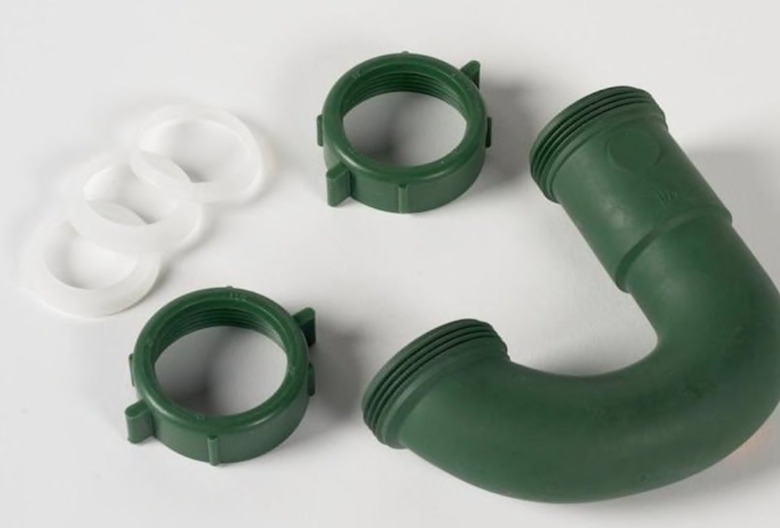
Most plumbers like to work from the bottom up. This means that after installing the basket strainers and tailpieces or continuous waste pipes, you do not continue working down to the branch drain pipe. Instead, you should connect the P-trap to the drain pipe and then connect that to the tailpieces.
A P-trap is an essential part of your kitchen drain because every plumbing fixture in the home is required to have one. The name is a little misleading, though, because the piece is actually U-shaped. Designed to stay full of water, it creates a seal that prevents dangerous sewer gas from escaping the pipes and entering your home.
Before you start, here is a list of important items that will help get the job done:
Things Needed
How to Install Sink Plumbing

How to Install Sink Plumbing
If you're doing the kitchen sink plumbing solo, after getting the right supplies, you'll need to take your time and follow each step in a particular order. Here's a guide that outlines the entire process.
1. Use Plumber's Putty
1. Use Plumber's Putty
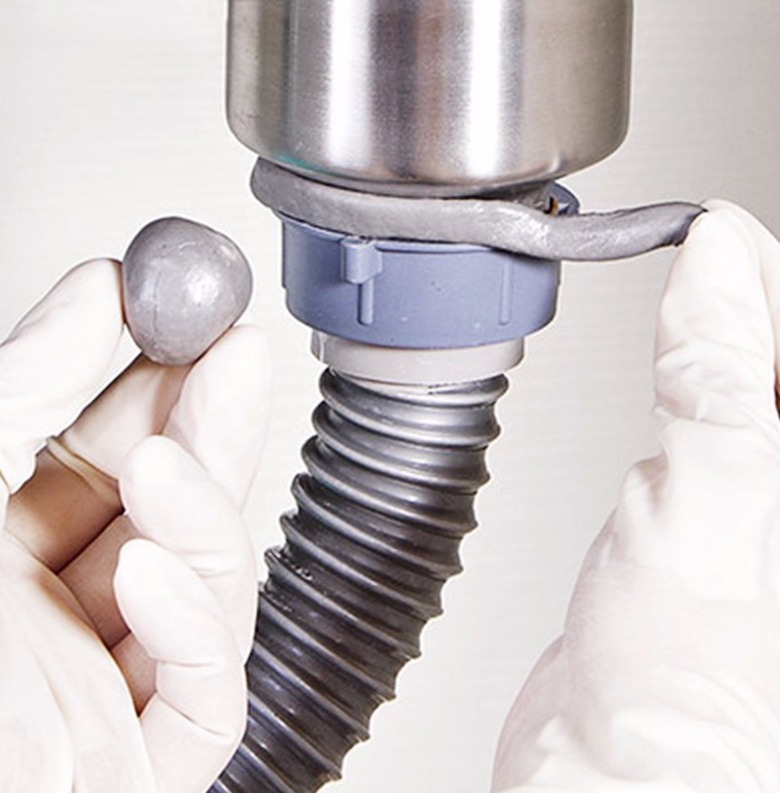
Begin installing a basket strainer by running plumber's putty along the underside of the basket rim, and then press the basket firmly into the sink. You can soften the putty by running it between your hands and making a sort of rope that can be looped around the basket-strainer rim.
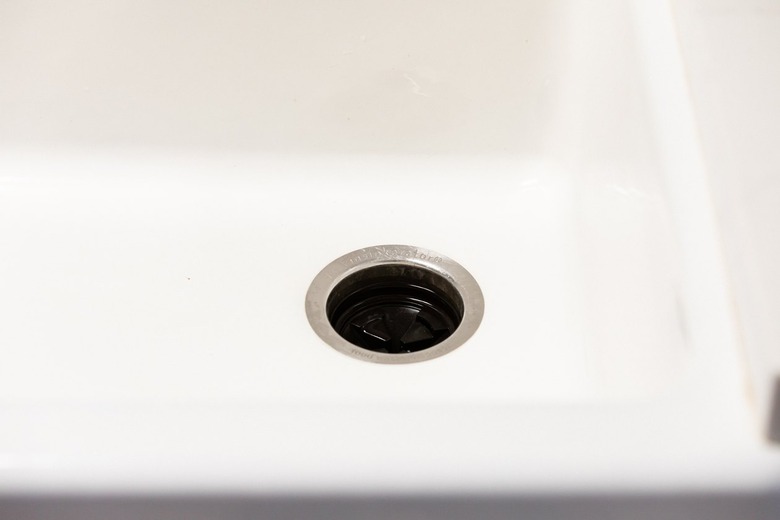
Make sure the basket is centered in the sink hole to avoid leaks. Then, from the bottom, wipe up any excess putty with a cloth or gently scrape it away with the edge of a screwdriver or putty knife. Add the gasket and cardboard friction ring, and turn the nut onto the basket threads until it is snug. Tighten the nut a bit further with tongue-and-groove pliers.
2. Center the Basket Strainer
2. Center the Basket Strainer
Remove any excess putty that has squeezed out from the lip into the sink basin. If the basket appears to be a bit off-center, you can loosen the nut, gently slide the basket until it is centered, and retighten the nut. Some plumbers prefer to use silicone caulk instead of putty because it is less likely to leak, but putty is a lot less messy than silicone.
3. Install a Disposal
3. Install a Disposal
If you are installing a garbage disposal in your drain system, you can do it at the same time as you would a basket strainer. Instead of a strainer, though, you will find a flange fitting that goes into the sink-basin hole. Run a rope of plumber's putty around the underside of the flange, and then press the flange in. Tighten it from under the sink with a mounting ring using a screwdriver, a snap ring, and a lower mounting ring.
The disposal unit is then lifted and fit into the lower mounting ring, which is usually the most difficult part. This step may require two people to lift the unit. In the drain outlet of the disposal, you can fit a straight tailpiece or an elbow to hook up to the drain plumbing.
A disposal requires an electrical cable (for a hard-wired connection) or an outlet (for a cord-and-plug connection). If you are not comfortable with electricity, you may want to hire a professional for this step. One thing to remember is that sink-mounted disposals should not be used with a septic system. If you feel you must have one, you can purchase a septic-safe disposal.
Step 4: Attach a Tailpiece
Step 4: Attach a Tailpiece
Attach a 1 1/2-inch tailpiece to the basket strainer with channel-lock pliers, using the provided threaded nut and gasket. These tailpieces are usually made of plastic (polypropylene) or brass. An average tailpiece length will be 4-to-6 inches, but they come in a variety of lengths and can be cut to fit. You may want to go with a plastic tailpiece because it is easier to cut. If the drain pipe comes from the wall, you'll want a shorter tailpiece to prevent clogs.
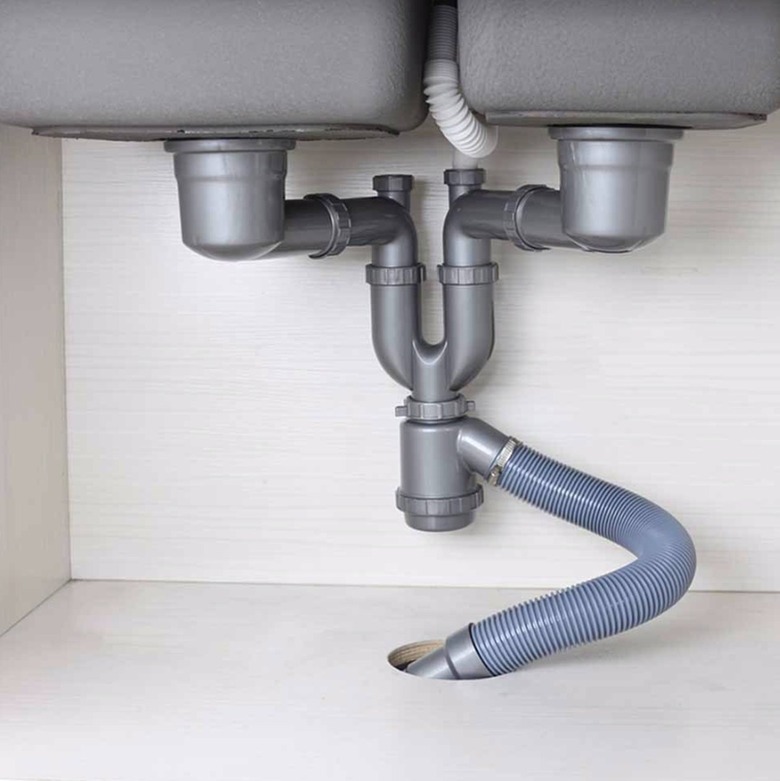
If you have a double-basin sink, you can use two tailpieces. However, a better option is an end outlet waste tee that threads directly onto the basket strainers like a tailpiece. This fitting ties the basins together, allowing them to drain into the trap through the same pipe. An adjustable side outlet waste tee can be adjusted using a nut located near the center of the waste, allowing it to fit basins of different sizes or spacing.
5. Locate the Drain Pipe
5. Locate the Drain Pipe
Locate the drain pipe stubbed into the cabinet. If it is a PVC variety and comes out through the wall, cut it to the required length. This will allow your P-trap to be directly below the tailpiece or waste tee. You can cut the pipe with a hacksaw or specialized PVC saw or cable saw. If the pipe coming out of the wall is too short, glue a 1 1/2-inch coupling on by first cleaning it with PVC cleaner and then swabbing it with PVC cement.
If the drain pipe comes out of the floor, cut it to fit the height you need or add a PVC coupling to raise it. A trap is typically located 6-to-12 inches below the sink, but this can vary. After cutting the floor pipe to the correct height, glue on a 1 1/2-inch PVC elbow. Next, cut a piece of 1 1/2-inch PVC pipe to the proper length to get the P-trap inlet directly below the tailpiece. This pipe should be at least 4 inches in length to prevent turning the P-trap into an S-trap, which can siphon water from the trap. Glue the piece of pipe into the elbow and glue an elbow for the P-trap on the other end of the pipe.
6. Fit the P-Trap
6. Fit the P-Trap
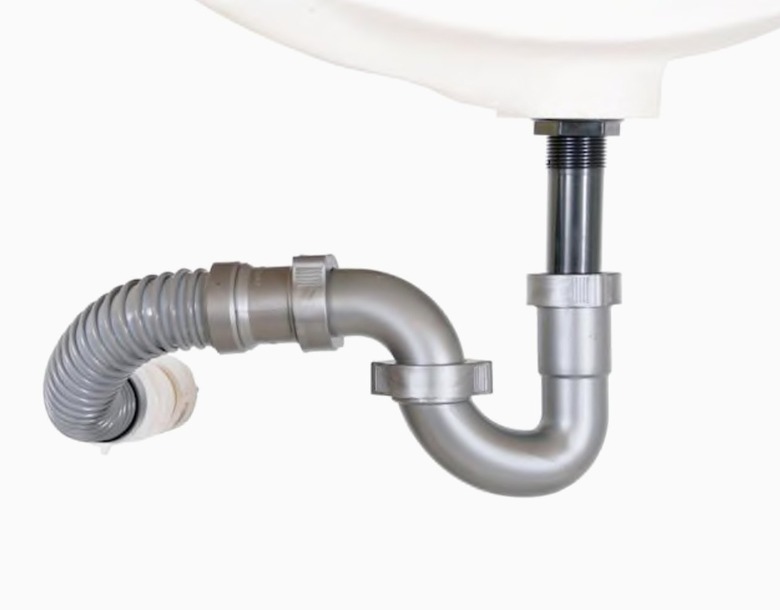
Fit the P-trap on the elbow, but do not glue it on or fully tighten if it is threaded. The tailpiece or continuous waste will drain into the inlet side of the trap, while the outlet side will connect to the drain pipe. Align the trap so the tailpiece is directly above it.
One of the great things about P-traps is they can be moved and adjusted, making installation easier. If everything lines up perfectly, your tailpiece will fit directly inside the trap and can be connected. Usually, though, you'll have to cut one or more straight sections of pipe to get proper alignment.
7. Measure a Piece of Pipe
7. Measure a Piece of Pipe
Measure and cut a piece of PVC pipe to fit from the trap to the tailpiece. Glue the section into a desanco fitting. This part has a nut and gasket on one end, which is tightened onto the tailpiece. The benefit of a desanco and tailpiece is that if the length is off, the desanco nut can be loosened to move the fitting up or down the tailpiece until it fits correctly. Once the pipe is glued into the desanco, slide the entire structure onto the tailpiece and handtighten.
8. Install the P-Trap
8. Install the P-Trap
Glue or tighten the P-trap on the piece of pipe on the inlet side and the elbow on the outlet side. Some traps are connected with PVC cement, while others are connected with nuts and washers. The latter P-trap is easier to disconnect and clean, but more nut joints can mean a higher chance of leaks. Tighten all the nuts with tongue-and-groove pliers, and run water down the drain to check for leaks.
9. Connect the Dishwasher Drain
9. Connect the Dishwasher Drain
The dishwasher drain hose is run under the kitchen sink through a hole in the side of the cabinet. With a clamp, connect the end of the hose to a dishwasher drain fitting on the tailpiece or elsewhere above the trap. Or, if you have a disposal, there is a similar fitting where it can be connected the same way. Make sure you knock out the piece of plastic in the disposal fitting before running the dishwasher, or it won't be able to drain.
A dishwasher drain requires an air gap to prevent dirty water and waste from flowing back into the dishwasher. A simple way to provide an air gap is to run a high loop in the dishwasher drain hose, making sure it is taller than your drain line or disposal. The loop will need to be clamped to the wall of the cabinet because the drain hose can move while in use and can drop.
Alternatively, you can install an air-gap device on the sink or countertop and connect the dishwasher drain hose to the port on the air gap. Then, connect a second hose between the outlet of the air gap and the disposal or a tee on the drain line. Air-gap devices are required in some areas based on local code rules.
10. Install Shutoff Valves
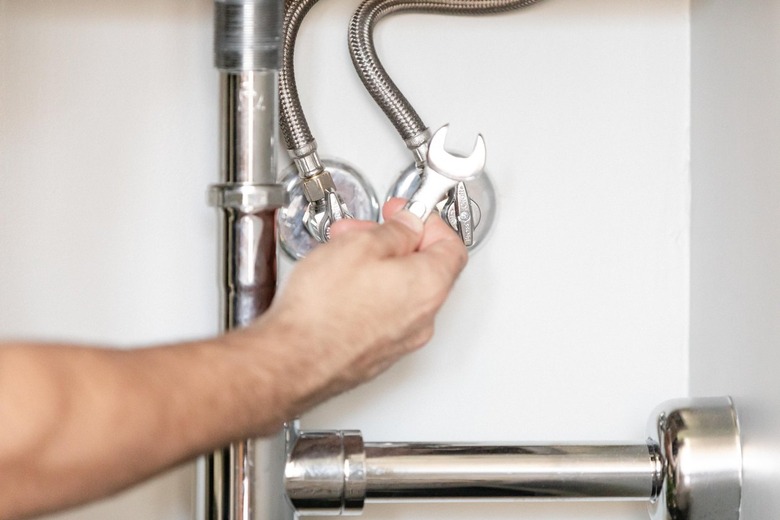
10. Install Shutoff Valves
To connect the water supply to your faucet, first install shutoff valves on the hot and cold pipes. The best way to do this is to use a 1/2-inch by 3/8-inch compression valve. If you are comfortable with soldering a valve, have at it. If not, you can use a SharkBite push-to-connect valve. With these, you simply push it onto your PEX or copper water-supply pipe. It's that simple.
11. Attach Flexible Faucet-Supply Lines

11. Attach Flexible Faucet-Supply Lines
Attach a flexible faucet-supply line to each of the faucet stems using either an adjustable wrench or a basin wrench if there isn't much room. These supply lines are usually braided stainless steel and come in a variety of sizes. They're also flexible enough to be bent and looped, so longer is often better if you are unsure of what size you'll need. Next, connect the 3/8-inch end to the shutoff valve with a wrench. It's important not to over-tighten these connections. Snug is usually enough.
12. Make the Dishwasher Water Connection
12. Make the Dishwasher Water Connection
If you have a dishwasher, you'll need to cut the hot-water pipe and install a tee and a shutoff valve with a 3/8-inch compression fitting on the other side. You can use push-on fittings to make this easier. Be sure to install the dishwasher connection in the hot water line and not the cold. Connect the dishwasher's flexible water line to the 3/8 fitting.
Costs of Kitchen Sink Plumbing
Costs of Kitchen Sink Plumbing
If you do the work yourself, you can save at least a couple hundred dollars on your kitchen sink plumbing. The cost of supplies is well under $50. However, if you feel overwhelmed at the thought of taking on the job yourself — because, let's face it, plumbing can be intimidating — it will cost around $250-$500 to hire a professional. Keep in mind, this is for a somewhat simple readjustment of the plumbing and not the installation of a kitchen sink and any major pipe readjustment.