How To Work With Push-Fit Plumbing Fittings
Installing a push-fit plumbing fitting isn't much harder than putting a cap onto a pen. Once the pipe is cut, cleaned and marked for the fitting depth, all you have to do is push the fitting onto the pipe for a permanent—yet removable—connection. It's that easy, and it's almost that foolproof. For a leak-free connection, you just have to make sure the end of the pipe is cut squarely and is clean and smooth on the outside, and you have to push on the fitting (or push in the pipe) as far as it will go.
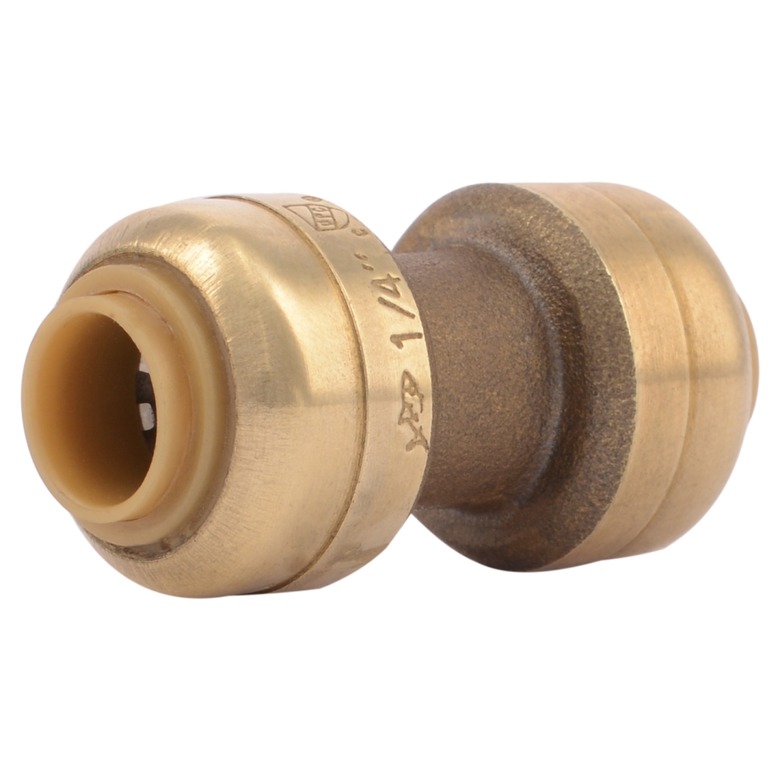 SharkBite
Push-Fit Plumbing Fitting Basics
Push-Fit Plumbing Fitting Basics
Push-fit fittings, also called push-on, push-to-connect or push fittings, generally are designed for use with rigid copper, CPVC (chlorinated polyvinyl chloride) and PEX (cross-linked polyethylene) water pipe. There are also some small fittings that work with polyethylene and other types of plastic tubing for things such as water filters, ice makers and aquariums. Push-fit fittings cannot be used with galvanized steel pipe, and most types cannot work with flexible (soft) copper tubing.
There's a push-fit plumbing fitting for every type of water-supply fitting found in a house, including elbows, tees, unions, shutoff valves, hose bibs, repair couplings and even hookup hoses for hot water heaters. Most plumbing codes permit push-fit fittings inside wall and ceiling cavities, and some fittings can even be buried in the ground (after they are wrapped in a protective tape). If you plan to use push-fit fittings for a large project (which could be very expensive; these fittings aren't cheap), check with the local building department for restrictions on their use.
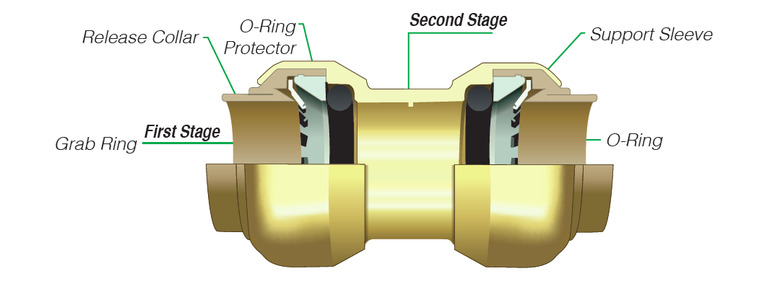
Push-fit plumbing fittings grip the pipe with a ring of stainless steel teeth inside the fitting, while one or more O-rings inside the fitting make a watertight seal around the pipe. If the pipe is not perfectly round or has rough edges or gunk on its surface, the O-rings may not make a perfect seal, leading to leaks. Likewise, if the pipe isn't cut squarely, it might not push in evenly or extend the required distance inside the fitting for a proper seal. This is why you should cut the pipe with a tubing cutter and not a saw.
Things Needed
-
Tubing cutter
-
Deburring depth-gauge tool
-
Emery cloth (optional)
-
Utility knife (optional)
-
Rag
-
Marker
-
Push-fit plumbing fitting
-
Push-fit fitting removal tool (where needed)
How to Install a Push-Fit Plumbing Fitting

How to Install a Push-Fit Plumbing Fitting
1. Cut the Pipe
Cut the pipe, as needed, using the appropriate type of tubing cutter for the pipe material: use a copper tubing cutter for copper; a plastic tubing cutter for CPVC; a PEX cutter for PEX. When measuring for the cut, keep in mind that the pipe will extend about 1 inch into the fitting.
2. Ream and Deburr the Pipe
Ream and deburr the cut end of copper pipe, using a reaming-deburring tool to remove the sharp, jagged edge left by the tubing cutter. A reaming-deburring tool reams the inside of the pipe and deburrs the outside edge at the same time.
Alternatively, you can use the reamer tool on the backside of a tubing cutter to ream the pipe, and use fine-grit emery cloth or sandpaper to deburr the outside edge. Sand only the edge; do not sand the side wall of the pipe.
CPVC pipe and PEX tubing do not need to be reamed or deburred. However, if CPVC pipe has a ridge on the inner edge of the pipe, you can ream the pipe carefully with a utility knife or fine sandpaper or emory cloth.
Remove debris from inside the pipe and wipe the outside of the pipe with a clean rag.
Tip
Some push-fit fitting manufacturers sell multi-size deburring-depth gauge tools that ream and deburr the pipe and also serve as a marking gauge for the marking the depth of the fitting.
3. Mark the Pipe
Mark the pipe to indicate the full depth of the fitting, using a deburring-depth gauge tool and a marker. Slide the tool onto the end of the pipe until it stops, then mark a line along the edge of the tool.
If you don't have a depth gauge tool, measure from the end of the pipe, using a tape measure, and mark the pipe at the manufacturer's specified depth for the fitting.
 Shark Bite
4. Install the Fitting
Push the fitting straight onto the end of the pipe (or push the pipe straight into the fitting, as applicable) until the pipe stops inside the fitting. The end of the fitting should be aligned with the depth mark on the pipe, indicating that the pipe is fully seated inside the fitting.
Once the fitting is installed, you can rotate the pipe or fitting 360 degrees in either direction as needed to facilitate the next step in your plumbing installation.
Note: Most push-fit fittings include a bushing, or PEX stiffener, inside the fitting to stabilize the end of PEX tubing. However, with some fittings, you have to add a bushing (sold separately) before installing the fitting. Built-in bushings do not need to be removed if you are using the fitting copper or CPVC pipe.
Tip
Use a push-fit fitting removal tool to remove a pipe or fitting anytime after installation. The tool is a small, plastic horseshoe-shaped clip that fits over the pipe. Press the tool against the release collar (where the pipe first meets the fitting), then pull out the pipe. Some fittings can be reused after removal, while others are designed for one installation only. If you remove a fitting from PEX tubing, make a fresh cut on the tubing (at least 1 inch from the end) before re-installing the push-fit fitting.