Herringbone Flooring: Choosing The Right Pattern For Your Hardwood Floors
If you long for a kitchen flooring idea that is timeless yet a bit unexpected, you and your remodel are in for a treat. Herringbone (sometimes referred to as parquet block) is a pattern achieved with rectangular planks of brick, tile, or wood. While it's true that the beloved classic is a bit more time-consuming and costly than other flooring options, the end result will be worth the investment.
Herringbone flooring can be installed in any room of the house, but looks especially stunning in larger open spaces — such as the living room, dining room, and kitchen — where you can really see the beautiful pattern repeat. It also works with pretty much any design style. However, keep in mind that the simpler your decor is, the more it will stand out. A herringbone pattern is installed by staggering the pieces so that the side of one plank meets with the end of another, resulting in an interrupted zig-zag pattern. It's similar to, and often confused, with chevron floors, but the main difference is that the end of each plank meets at a point, creating a seamless "V" shape.
Have we piqued your interest? Scroll ahead to learn everything you need to know about herringbone kitchen flooring.
Why Choose a Herringbone Floor Pattern?
Why Choose a Herringbone Floor Pattern?
Although herringbone is an increasingly popular choice, appearing on kitchen and bathroom backsplashes, countertops, and even fabric, its historical roots make it an enduring choice that will stand the test of time. Its origin can be traced back thousands of years to buildings and roadways of the Roman Empire — so, yeah, it's been around for a while.
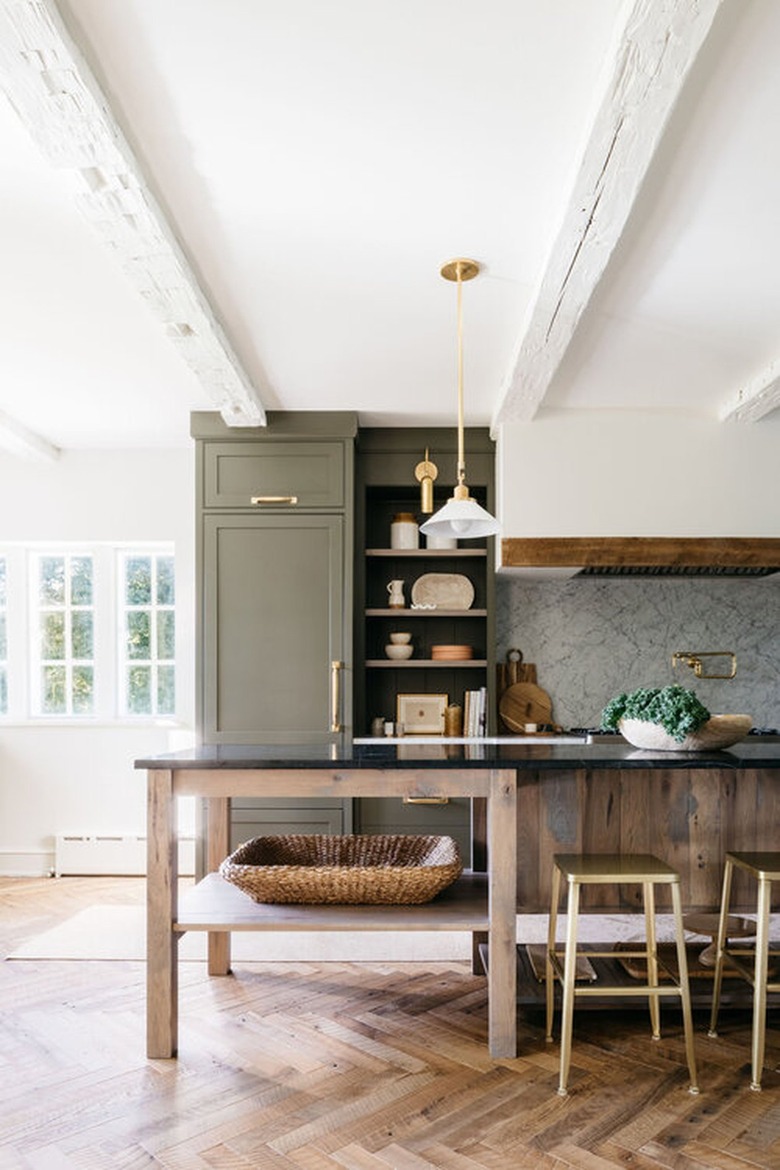
Herringbone floors impart visual interest and elegance without overwhelming a room and the zig-zag pattern adds movement and dimension, giving the illusion of more space. It's a sophisticated alternative that instantly makes any room look a little fancier, as you can see in this flawless country kitchen by Kate Marker Interiors. And regardless of the material used, the fact that it's less ubiquitous than traditional flooring options gives it a luxe and high-end feel.
How Much Do Herringbone Floors Cost?
How Much Do Herringbone Floors Cost?
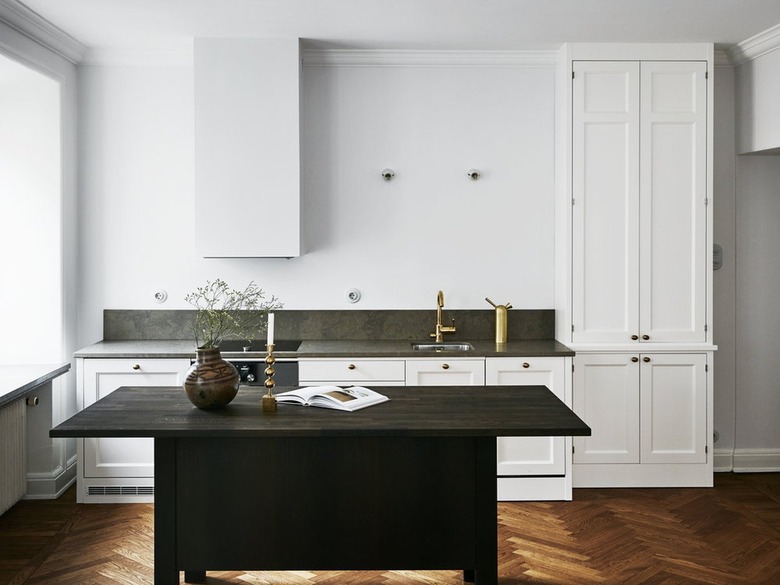
The cost of herringbone floors ranges depending on the material used — between $5 to $16 per square foot. For herringbone wood flooring, expect to pay about 30 percent more than you would for traditional parallel wood floors. But as evidenced by the dreamy herringbone parquet floors in this setup by Kitchen & Beyond, it's well worth the splurge. But because herringbone is installed using angles, there's more waste. Plus, it takes longer to install, increasing both material and labor costs.
Engineered (or prefinished) wood is easier to install and more affordable than other types of hardwood flooring that will need to be stained at the end of the installation process. Although you save money upfront by purchasing engineered wood, the veneer can only be sanded a few times before the particle board below becomes visible. On the other hand, solid hardwood floors can literally last 100 years and can be sanded and refinished countless times.
How Are Herringbone Floors Installed?
How Are Herringbone Floors Installed?
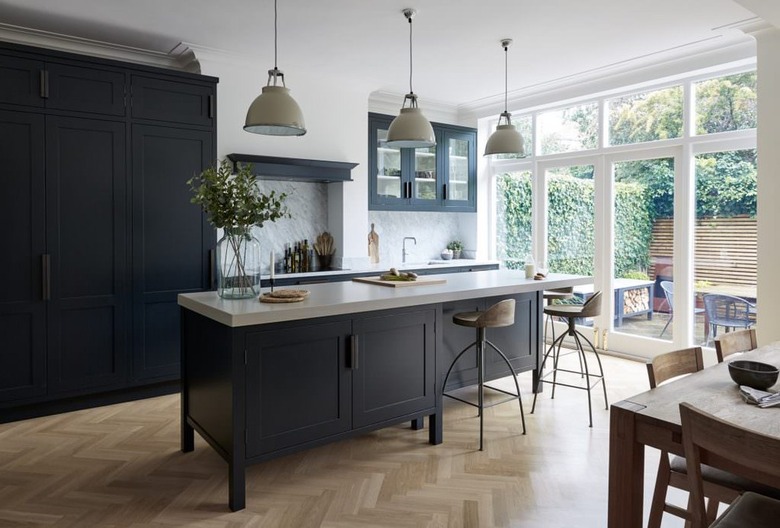
This is one home improvement idea that's best left to the pros — especially if you want to make sure the end result looks on par with this stunning kitchen design from Mowlem & Co. However, if you choose to go the do-it-yourself route, keep in mind that it's a painstaking process that requires meticulous precision. In fact, it's often categorized as one of the most difficult DIY projects that a homeowner can undertake. So, allow plenty of time (and patience) to tackle this venture.
The first thing to consider before you begin installation is the orientation of the pattern. This becomes more challenging if several rooms are involved — say a pantry or bathroom off of the kitchen — because the pattern should follow the same line as it transitions from one room to the next. A rough (hand-drawn) floor plan marking the pattern is a helpful tool for visualizing the layout. Once you determine which direction your pattern will run, mark the center of the room and draw a straight line through it from one wall to the other — that's where the pattern will begin and it will move outward from there.
1. Setting Slat Length
To find out the optimal slat length for your design, lay out part of the flooring and use rafter squares to keep the slats at 90-degree angles. The slats must be trimmed to a multiple of their width to work with a given design.
2. Cutting the Floorboards
Using a circular saw, cut the hardwood pieces to size. You can set the saw so that it makes the same cut for each piece, which is more efficient than measuring each plank.
3. Marking the Pattern
Create a triangular template, or jig, from the backer board — this will be what you base the pattern off of and will function as the starting point. Nail it down to ensure it's secure — if it shifts, the floorboards will get off track and the pattern won't be straight (not good).
4. Installing the Slats
Using a router with a tongue and groove bit, cut a groove into both short ends of the plank. This enables them to lock together properly. Push two pieces of wood perpendicular to each other, locking the tongue-and-groove up against the jig, and hammer them together with a rubber mallet. Next, secure them with a flooring nailer.
5. Trimming Excess Material
Trim the extra material that overlaps the border. With a strip of painter's tape, mark where you'll cut, and use a circular saw to make the borders nice and neat.
6. Add Finishing Pieces
Once most of the flooring is installed, you'll need to cut smaller pieces for the perimeter of the room. You don't want them to fit too tight, so cut them just slightly smaller than the space — they will go in easily and allow for expansion and contraction.
In Conclusion
In Conclusion
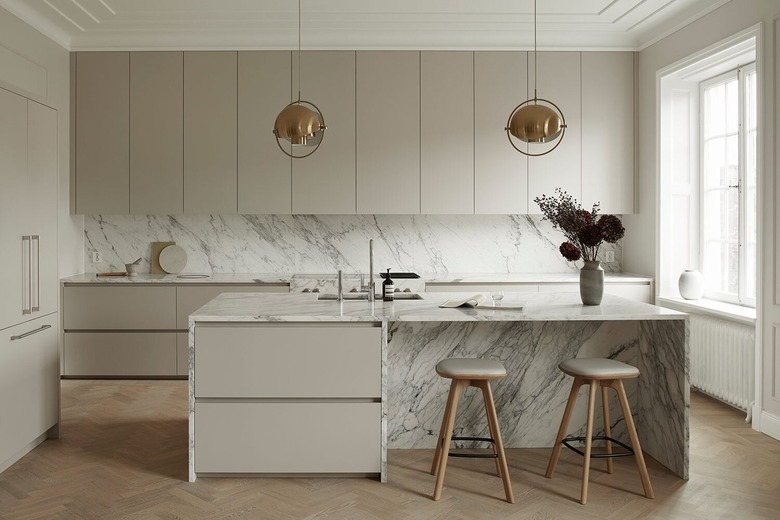
Herringbone wood floors — à la the light planks spotted in this culinary space by Nordiska Kök — are a classic and sophisticated choice that works with a variety of different aesthetics, from farmhouse to contemporary. The eye-catching flooring option tends to look its best when paired with streamlined design schemes that won't compete with the repeating pattern. While this style of flooring requires an investment in time and money, its distinctive appearance and European sensibility make herringbone flooring worth all the fuss.