Heater Or Air Conditioning Acting Funny? Your Thermostat May Just Need A Good Cleaning
We may receive a commission on purchases made from links.
If your HVAC system is running erratically, the thermostat could be responsible. A common problem with wall thermostats is that they are installed in a location that isn't representative of the climate in the house, but sometimes, all that's wrong is that the thermostat needs a good cleaning. This is especially true if you have an electromechanical thermostat, which has actual moving parts under the cover. Like a car needs a good tune-up periodically to keep the engine running smoothly, an electromechanical thermostat needs a periodic cleaning to be able to sense the temperature correctly and maintain the climate in your house just the way you like it.
To add some numbers to the discussion, a dirty thermostat can raise your energy bill by as much as 7 percent, which amounts to $21 per month if your total gas and electricity bill is $300. Over the course of a six-month winter, that adds up to $126, and if your HVAC system includes air conditioning, you can double that number. That's a lot of cash — and it's a completely unnecessary expenditure, considering how easy it is to clean the thermostat.
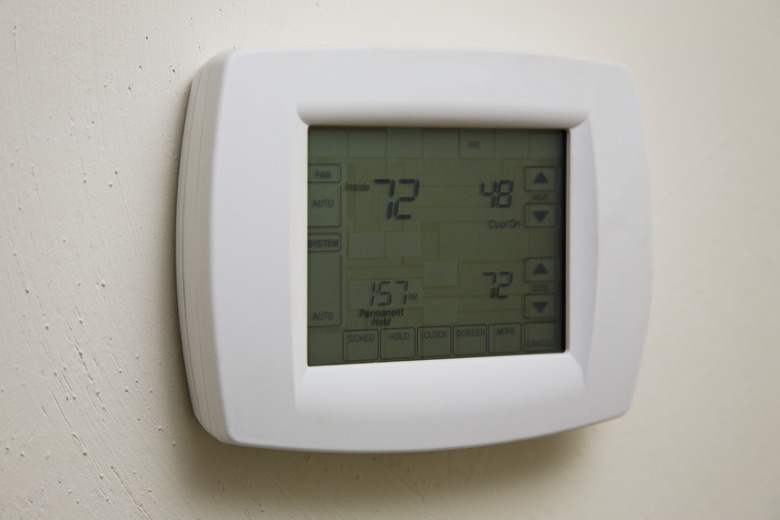
Electronic thermostats and smart thermostats don't have moving parts, so they don't need internal cleaning. It's easy to distinguish between these types of thermostats. If it has an LED display, it's a electronic thermostat, also known as a digital thermostat. Although digital thermostats don't need internal cleaning, they can still malfunction if the wire connections are loose, and that's something you can easily check. They also benefit from a surface cleaning, and if you have a touch-screen programmable thermostat, it should have a setting for cleaning.
Which Parts of a Thermostat Need Cleaning?
Which Parts of a Thermostat Need Cleaning?
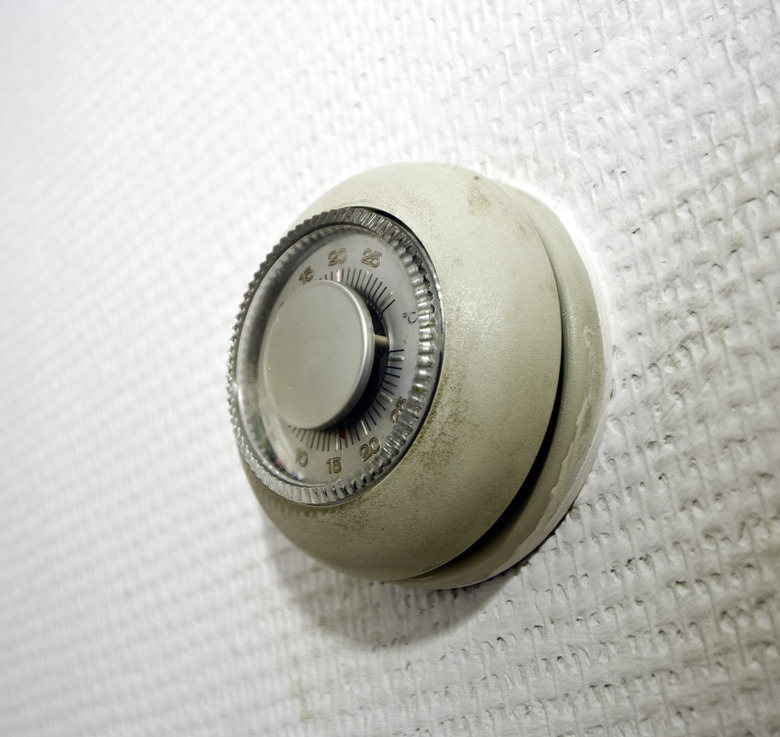
Like a smart thermostat, an electromechanical thermostat is often round, although some are rectangular, and both work the same way. When you remove the cover, which typically snaps and unsnaps, you'll typically see a bimetal coil, a pair of wires and a contact point that opens and closes. In some older models, the contacts are controlled by a glass vial filled with mercury, and some models have a heat anticipator, which is another metal wire or coil situated next to the main coil.
The bimetal coil, being composed of two separate metals with different thermal responses, expands and contracts with temperature changes and at some point upsets the mercury vial (a little glass container), which tips and closes the contacts. You regulate at which point this happens by setting the temperature dial. If there is a heat anticipator, it actually heats up independently and forces the coil to close the contacts early, thus shutting off the furnace and allowing the blower to circulate all the warmed air in the furnace.
The coil and the contact points are the most critical parts and the ones that most need cleaning because any dirt that collects on them affects their ability to sense temperature and transmit electricity. The heat anticipator will also malfunction if it gets dirty, but the result will be only that the furnace stays on a little longer, resulting in a modest increase in energy usage. Because they contain only electronic circuitry, digital and smart thermostats generally don't need internal cleaning, but you may want to clean the display periodically to make the settings easier to read.
Things Needed
How to Clean an Electromechanical Thermostat
1. Turn Off the Power
Locate the circuit breaker in the main panel that controls the HVAC system and turn it off. This is especially important if you're cleaning a line-voltage thermostat that controls a baseboard heater because this type of thermostat operates at 120 to 240 volts and can give you a dangerous shock. A thermostat controlling a central air system typically operates at 24 volts, which isn't dangerous, but the thermostat or wiring could short circuit and damage some of the sensitive system control components.
2. Remove the Thermostat Cover
Most thermostat covers snap on, and to remove the cover, simply grasp it and pull. A few models have screws to hold the cover. If present, they are clearly visible. Unscrew them with a Phillips screwdriver.
3. Clean the Contact Points
Toggle the temperature selector to a higher temperature and stop as soon as the contacts close. Slip a thin piece of paper, such as a dollar bill, between the contacts. Move it gently back and forth and then remove it. If the thermostat also controls an air conditioner, toggle the temperature selector toward colder temperatures until the contacts close again and then use the same dollar bill to clean the contact points. Finish by blowing away debris with a can of compressed air. Do not touch any of the thermostat components with your fingers.
4. Clean the Bimetal Coil and Heat Anticipator
Gently brush dirt buildup off the bimetal coil using a soft paintbrush. If there is a heat anticipator (typically a little arm or arrow), brush it off as well. Finish by blowing both the coil and anticipator with compressed air.
5. Clean the Switch Contacts
Instead of bimetal coil, most contemporary thermostats have a bimetal strip that distorts to open and close contacts without the need for a mercury vial. The switch contacts are exposed, and you can clean them by dipping a cotton swab in isopropyl (rubbing) alcohol and lightly rubbing them to remove dirt.
6. Check the Thermostat Level
To work properly, an electromechanical thermostat has to be level. Check the level with a torpedo level and readjust the thermostat if necessary by loosening the screws holding it to the wall and tilting it as necessary.
7. Replace the Cover and Turn On the Breaker
Snap the cover back onto the thermostat and turn on the breaker to restore power. Set the temperature to a high setting to make sure the furnace switches on. If the thermostat also controls a cooling system, set the thermostat to a low temperature to make sure that system switches on.
 Mint Images/Mint Images RF/GettyImages
Thermostat Cleaning and Troubleshooting Tips
Thermostat Cleaning and Troubleshooting Tips
To clean the display on a touch-screen thermostat, you have to put the thermostat into cleaning mode so you can touch the screen without altering any of the settings. The procedure for doing this varies, so consult your owners' manual for the proper method. Clean the display with a soft cloth lightly moistened with isopropyl alcohol.
You can use your thermostat to improve the air quality while you're cleaning dust from around the vents or elsewhere in the house. Change the fan setting from "auto" to "on" and set the temperature low so the system blows only cold air. Wait for the blower to start. Now, when you raise dust, it will be sucked into the air system and trapped by the air filter, which you can clean or replace.
A clean thermostat can still malfunction, and when it does, the problem is often because of dirty or loose wires or wire terminals. To troubleshoot this problem, you have to expose the wires, which for some thermostats means unscrewing and removing the plate holding the temperature sensor after you kill the power and remove the cover. Sometimes, all that's needed is a blast of compressed air directed at the terminals, but you may find a loose wire that you need to remove and reset. The thermostat may be malfunctioning because the installer didn't expose enough bare wire on some of the wires, so have wire strippers handy to remedy this.