How To Replace A Gas Furnace Thermocouple
We may receive a commission on purchases made from links.
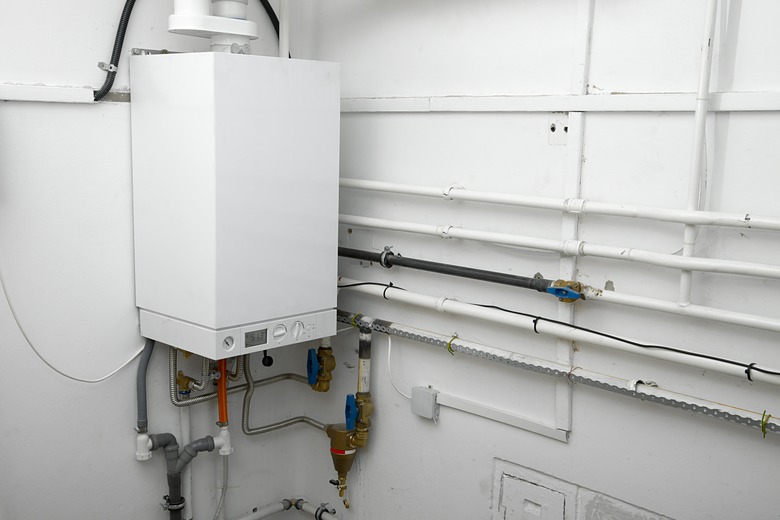
In older furnaces and boilers, the thermocouple is a simple safety device that prevents gas from flowing to the burners unless a pilot flame is present to ignite it. This ensures that natural gas won't fill your home if there's a problem with the furnace. This simple but important part is found only on older furnaces and boilers that have a standing pilot light, which is a tiny flame that remains burning all the time, waiting to ignite the flow of gas to the furnace's burners when the thermostat sends the signal to begin heating.
Thermocouples are common in furnaces manufactured before 2000, but later furnaces and boilers generally use electronic "direct spark" or hot surface igniter systems. Because there is no standing pilot that burns gas constantly, these newer furnaces are considerably more efficient than older designs.
With the average forced air furnace lasting about 20 years or so, furnaces with standing pilots and thermocouples are gradually phasing out in favor of newer designs. If your furnace is less than 20 years old, there's a good chance it doesn't have a thermocouple or standing pilot at all. Boilers, however, sometimes have a longer life span, and there are plenty of hot water/steam heating systems with standing pilots and thermocouples still in operation.
How a Thermocouple Works
How a Thermocouple Works
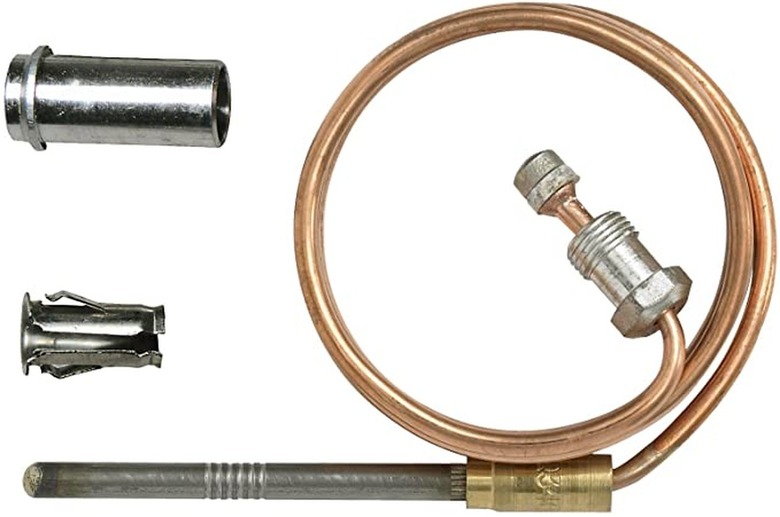
The thermocouple is a device that converts heat to an electrical charge, a process that naturally occurs when heat passes through two dissimilar metals in contact with one another. You will find the thermocouple in the burner chamber of your furnace. It consists of a long, thin wire or tube with a rod-shaped flame sensor on one end. The sensor rod fits into a bracket positioned so its tip extends into the tiny pilot flame at the end of the pilot gas jet. At the opposite end of the thermocouple, the wire or tube is connected to a fitting on the main gas valve.
As long as the sensor rod remains heated by the pilot flame, it keeps a faint electrical current running to the gas valve. This signal tells the gas valve it is safe to open and allow the flow of gas to the burners, where it will be ignited by the pilot flame.
Should the pilot flame go out, no electrical signal is sent to the gas valve, and no gas is allowed to flow. Thus, the thermocouple is a critical safety device, preventing gas from flowing unless the pilot flame is present to ignite it.
Symptoms of a Bad Thermocouple
Symptoms of a Bad Thermocouple
When a gas furnace stops producing heat, it may be because the standing pilot is out. It's not uncommon for a standing pilot to go out, but if your pilot flame refuses to stay lit when you try to relight it, there's a good chance that the thermocouple needs to be replaced.
Before replacing the thermocouple, it's worth trying to clean the tip of the thermocouple and make sure the tip is properly placed in the pilot gas jet. Cleaning a thermocouple is a simple matter of using emery cloth or steel wool to remove any corrosion from the sensor tip of the thermocouple. Make sure to brush away or vacuum out any sooty residue removed from the thermocouple sensor. At the same time, check the adjustment of the tip within the bracket. The thermocouple won't operate correctly unless the tip is in the center of the small flame emerging from the pilot gas jet.
If these fixes don't solve the problem, then it's time to buy and install a new thermocouple.
 Amazon
How to Replace a Furnace Thermocouple
How to Replace a Furnace Thermocouple
Thermocouples come in many sizes and lengths. There are universal aftermarket thermocouples widely available that will usually work just fine. The thermocouples for furnaces usually produce 30 millivolt (mV) current but make sure to buy one that's the same length as your old thermocouple. Lengths of 18, 24, 30 and 36 inches are standard.
You can also order a thermocouple that meets the original manufacturer's specifications from an online parts retailer, such as Repair Clinic or Appliance Parts Pro. You will need to specify the manufacturer and model number of your furnace to ensure you're getting the right part.
Things Needed
-
New thermocouple
-
Screwdriver
-
Flashlight or work light
1. Shut Off the Furnace
Begin by turning off the switch that powers the furnace or boiler. This is usually an ordinary wall switch mounted on the side of the furnace, but it may also be mounted on a nearby wall. If there is no switch present, you can also turn off the furnace's circuit breaker at the main service panel (breaker box).
2. Shut Off the Gas
Locate the shutoff valve on the gas supply pipe leading to the furnace. Turn the valve so its handle is perpendicular to the pipe; this turns off the gas supply. Also, turn the knob on the furnace's gas control valve to the "off" position.
3. Open the Access Panel
Use a nut driver or screwdriver to loosen the mounting screws on the upper access panel on the furnace as applicable (some panels do not have screws) and then remove the panel and set it aside. Use a flashlight or work light to locate the thermocouple within the compartment. The thermocouple consists of a wire or tube that ends in a thicker sensor rod mounted to a bracket adjacent to a small pilot gas jet, immediately next to the furnace's main burners. The opposite end of the thermocouple connects to a fitting on the gas control valve.
If you wish, you can first clean the sensor rod on the old thermocouple, adjust its position and then try to relight the pilot— in some cases, this may solve the problem without replacing the thermocouple.
4. Loosen and Remove the Thermocouple
To remove the thermocouple, start by loosening the nuts that connect the wire/tube end to the gas control valve as well as the nut that holds the sensor rod to the bracket next to the pilot gas jet. (In some cases, the sensor rod end is merely clipped in place.) Slide the sensor out through the bracket and then carefully remove the entire thermocouple.
5. Install the New Thermocouple
Uncoil the new thermocouple and thread the rod end into the bracket near the pilot gas jet and the wire end into the fitting on the gas control valve. Route the wire within the compartment in the same fashion as the old thermocouple.
Use an adjustable wrench to snug up the nuts. Make sure the tip of the rod is positioned so it will be squarely in the flame of the pilot gas jet.
6. Turn On the Furnace and Gas
Open the shutoff valve on the gas supply pipe (the handle should be parallel to the pipe) and then turn on the power switch for the furnace.
7. Relight the Pilot
Turn the control knob on the gas valve to the "pilot" setting. Push in the knob and hold it in. Push the "ignite" button or if there is no "ignite" button present, hold a match or lighter to the pilot tube jet. Keep holding the knob in for about 20 seconds after the pilot flame lights. Release the knob and make sure the flame continues to burn. If not, repeat the lighting procedure.
8. Replace the Access Panel
Reattach the access panel on the burner chamber and then test the furnace by adjusting the thermostat up and down several times to make sure the furnace starts and stops correctly.