How To Install A Wood Countertop
Wood countertops can bring charm and character to everything from rustic cottages to contemporary kitchens. One of the most popular options for wood countertops is butcher block slabs. Sturdy and affordable, they're also available in a wide variety of rich wood colors and designs. Whether you're building a new kitchen from scratch or considering a remodel, better understanding butcher block and its installation process can help you decide if it's a DIY project you want to tackle.
What Is Butcher Block?
What Is Butcher Block?
Butcher block is made by gluing straight cuts of wood together into slabs. The thickness and sturdiness of the slabs combined with the rich character of wood make it both a practical and gorgeous countertop option.
You can find butcher-block countertops in a variety of wood types, with the most common being maple, red oak, American walnut and American cherry. If you're interested in environmentally conscious options, check for butcher-block countertops that have been certified by the Forest Stewardship Council.
There are three different types of butcher-block configurations: edge grain, end grain and blended or face grain. Face grain is not popular for countertops since marks from knives and other activities start to show quickly. In edge grain, full-length planks of wood are placed next to each other in parallel lines, whereas with end grain, smaller squares of wood are placed ring-side up for more of a checkerboard appearance.
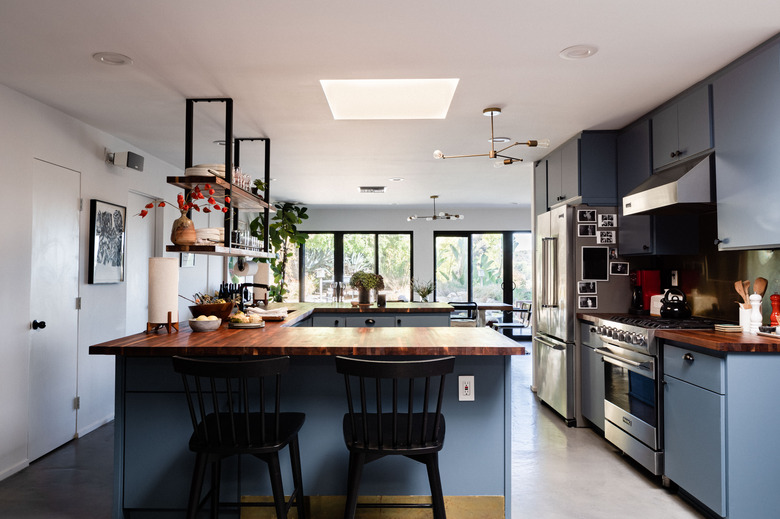
 Nicole Mason
End grain holds up against wear and tear the best but is also the most expensive option, and not everyone likes its distinctive look. In the end, edge grain is the most common choice for kitchen countertops.
Where to Buy Butcher Block Wood Countertops
Where to Buy Butcher Block Wood Countertops
Though some wood retailers offer customized butcher block countertops, many homeowners decide to buy them off the shelf to cut back on labor costs. This means that each piece of wood will arrive as a single slab. In addition to the installation job of templating, joining and mounting the counters, you are also responsible for any cuts that you might need to make in order to fit the countertops in your home as well as sealing the wood.
Off-the-shelf butcher block slabs typically come in lengths from 6 to 8 feet and 2-feet widths with a thickness of around 1 1/4 inches or more. You can find them at brick-and-mortar retailers as well as through online suppliers.
Before You DIY
Before You DIY
In order to install your own butcher block countertops, you'll need to be comfortable using a circular saw, a sander and a router. You'll also likely need to be comfortable with a jigsaw, a hole saw and basic woodworking joinery (unless your counter is a single slab, like a kitchen island). Remember to use the proper safety equipment with these tools.
Things Needed
-
Stiff cardboard or project panel
-
Painters' tape (as needed)
-
Hot glue or strong tape
-
Clamps (as needed)
-
Miter bolts
-
Wood screws
-
Washers
-
150- and 220-grit sandpaper
-
Food-safe sealant or mineral oil
-
Utility knife
-
Pencil
-
Saw guide
-
Circular saw
-
Saw shoe
-
Hole saw
-
Jigsaw
-
Router
-
1/8-inch roundover router bit (as needed)
-
Pocket hole jig (as needed)
-
1/2-inch straight-cut router bit
-
Wrench
-
Drill
-
Palm sander
-
Hand-held vacuum (as needed)
-
Gentle cloth
How To Install a Wood Countertop
1. Make a Template
Making a template is an important step to help you order the right amount of butcher block as well as to make accurate cuts around obstructions. You can make the template over existing cabinets if you're working on a remodel and want the countertop sizes to match or over empty cabinet boxes. If you're working with simply the cabinet boxes, account for an overhang if desired.
- Lay strips of cardboard or cheap project panel along all the edges of the countertops or cabinet bases as well as along the edges of a cutout, such as a sink. Use a utility knife to cut a template of your countertops.
- For a sink cutout, use your pencil to mark the center of the back of the sink on the wall. Mark the corners and the front of the sink on pieces of painters' tape.
- Connect template pieces with hot glue or strong tape.
- Write measurements on the template as well as any reminders, such as "faucet here" or "seam here."
- Figure out how much butcher block you'll need based on these specifications and place your order.
2. Make Any Necessary Cuts
Once your wood has arrived, follow the manufacturer's instructions about whether or not it needs to acclimate. When it's ready, cut the wood to your specifications.
- Set countertops on a work table and lay the template on top to act as a guide.
- Start with the simplest cut, like cutting off a rounded edge for a flat seam. Use a pencil to mark the length of the cut on your wood.
- Put down a saw guide to guarantee a straight cut and apply painters' tape to the side of the cut to avoid chipped wood.
- On your circular saw, measure the distance between the side of the blade and the saw shoe and note that on your wood. Then, clamp the saw guide to the wood and carefully make your cut. If needed, do the same thing on another part of that slab and then check the fit atop the cabinet boxes. Continue straight cuts as needed.
- If you need to make a sink or cooktop cutout, transfer the butcher block to the cabinet boxes so that you can make a mark on the wood where the center and corners of the sink will be (as you noted before on the wall and painters' tape).
- Move the butcher block to a work table and, using a hole saw, drill 2-inch starter holes in the back corners of the sink to begin the sink cutout. If necessary, also make them in the front, though some sinks will have no wood countertop reveal at the front of the sink.
- Using the circular saw and saw guide again, carefully make straight cuts between the holes, stopping just short of the hole each time.
- Use a jigsaw to carefully finish the cut near the starter holes, completing the entire cut.
- If any of the cuts still seem slightly rough or uneven, you can use an 1/8-inch roundover router bit to smooth the edges.
3. Join and Install the Countertops
- Be sure that the base cabinets are clean and free of debris.
- If necessary, join pieces of the countertop together using a pocket hole jig. Lay the butcher block top-side down and mark where you'll connect the pieces. You'll want holes about every 6 to 8 inches apart.
- Using a 1/2-inch straight-cut router bit, cut the space needed for both a miter bolt and a wrench to tighten the bolts. Cut about an inch channel into the wood first and then the wider space on either side of that channel to accommodate the wrench. The end shape will be similar to a lowercase letter 't.' Line up the wood so that the cuts on each piece match when needed.
- When all the cuts are made, loosely secure the pieces together using miter bolts.
- Once all the pieces are secured, flip the countertops and set them on top of the cabinet base. Fully tighten the miter bolts into place and clamp the wood to the cabinet base.
- Approaching the countertop from beneath, drill 1 1/4-inch wood screws and washers through the underside of the cabinet to secure the butcher block in place.
4. Finish and Seal the Countertops
If you'd like, you could also do this step before you install the countertops, though many people find that it's easier to visualize what you want with the sanding and finish when the countertops are already in place.
- Use a palm sander to make your countertops smooth to the touch. You can start with 150-grit sandpaper and finish with a 220 grit. If any edges are particularly rough, you may want to do them by hand.
- Use a hand-held vacuum or cloth to make sure that the surface is completely free of sawdust and dry.
- Apply a sealant. It's critical that you apply a safe sealer if you'll be using the countertops for any kind of food preparation. If that's the case, stay away from any finishes with polyurethane, which can release what the Environmental Protection Agency calls harmful VOCs. Instead, you can use a food-safe mineral oil, but steer clear of any mineral oils with nut products (such as walnut oil) if you or anyone in your home has a nut allergy.
- With a gentle cloth, liberally apply the mineral oil to all sections of the countertops in large, circular motions.
- The wood countertops should be ready to use. Keep them in great condition by applying mineral oil about once a month. In addition, make sure to immediately dry any big spills since water damage can lead to warping.
References
- Environmental Protection Agency: Volatile Organic Compounds' Impact on Indoor Air Quality
- Green Building Supply: Eco-Friendly Countertop Buyers Guide
- Butcher Block Co.: FAQS About Boos Butcher Block Countertops
- HomeAdvisor: How Much Do Butcher Block Countertops Cost?
- Green Home Guide: Can I Safely Seal and Waterproof My Butcher Block Countertops?
- Forest Stewardship Council: Home