Create A Winter Garland Centerpiece Using Seasonal Foliage
We may receive a commission on purchases made from links.
This winter, bring both beauty and cheer to your dining table with a fresh garland made from seasonal branches and foliage. If you think you'll be too busy on the day of your holiday gathering to create this, you're in luck — these materials are hardy enough so that you can make this garland a day in advance and simply store in a cool place. This makes one 4 ½-foot-long garland.
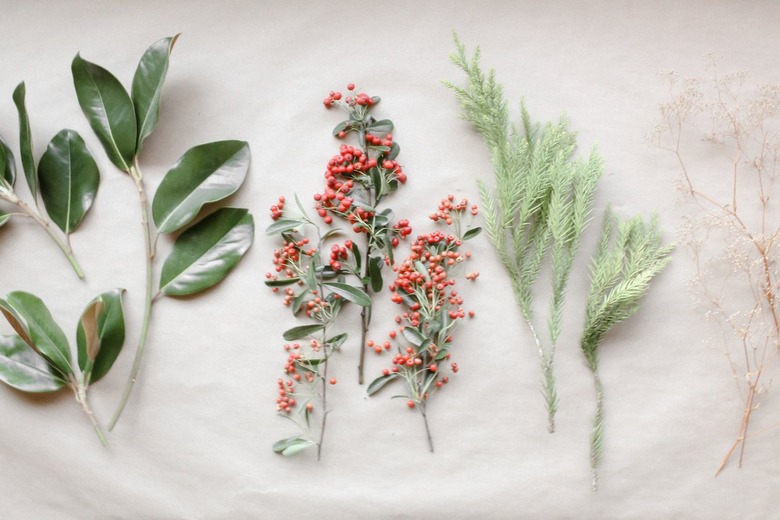
Things Needed
-
Magnolia branches, (5)
-
10 pine branches, (10)
-
Branches of berries, such as holly, rose hips, or similar variety (7)
-
Dried baby's breath, (½ bunch)
-
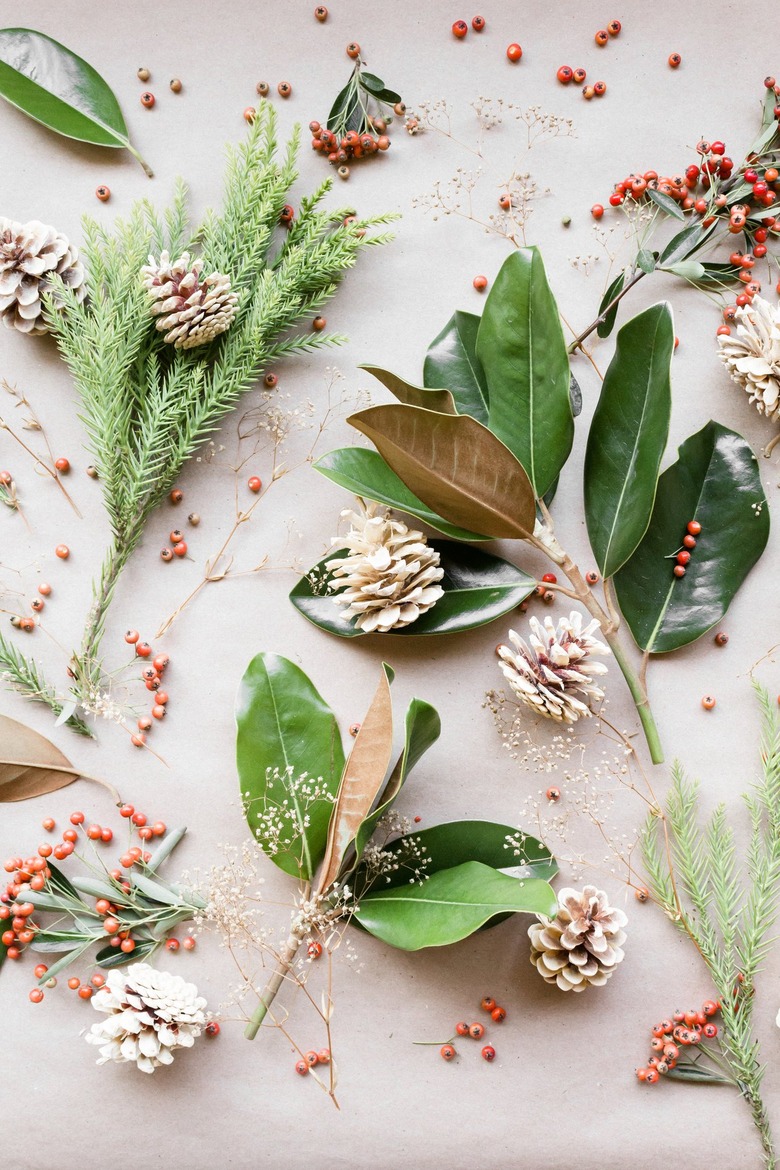
Bleached pine cones, (8), or forage for fallen ones on a
walk -
Green paddle wire, 22-gauge
 Caroline Burke for Hunker
Step 1
To determine the length of your garland, measure your table. If people will be sitting at the ends, you'll want to save about a foot from each end of the table in order to have enough room for their place settings.
Step 2
Gather your different branches and cut them into smaller sections with your floral shears (approximately six to eight inches per piece). Creating smaller pieces ahead of time will make them more manageable and easier to assemble when you're actually building your garland.
 Caroline Burke for Hunker
Step 3
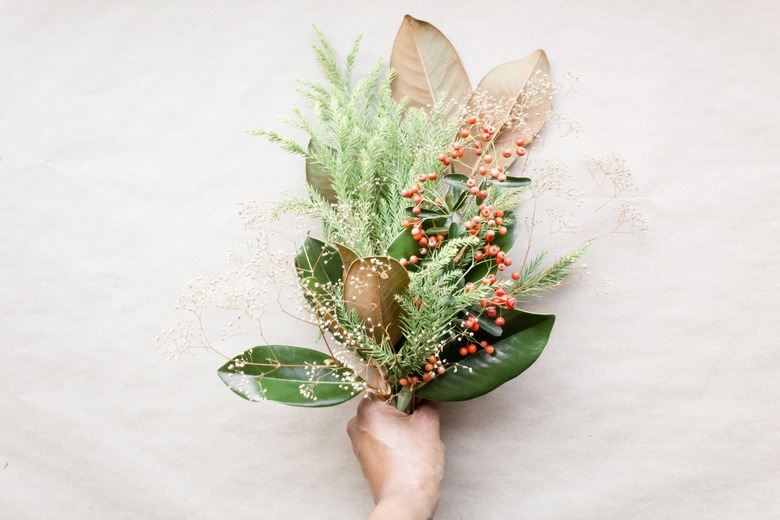
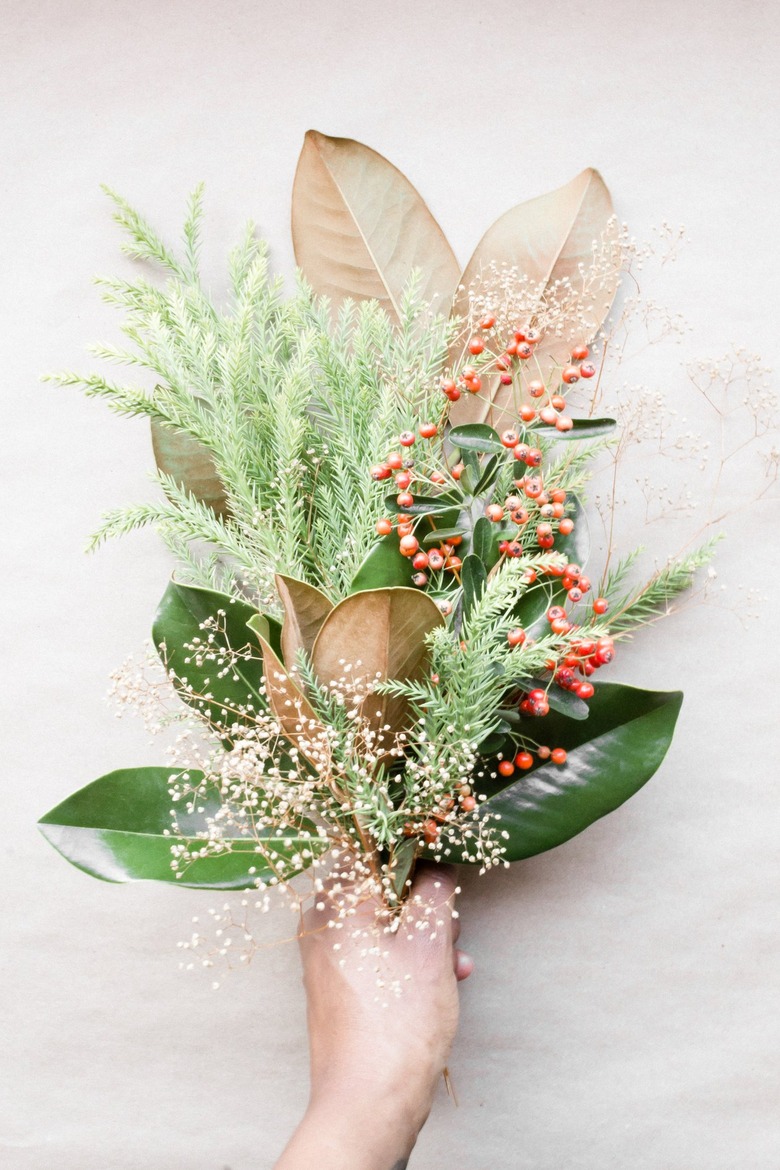
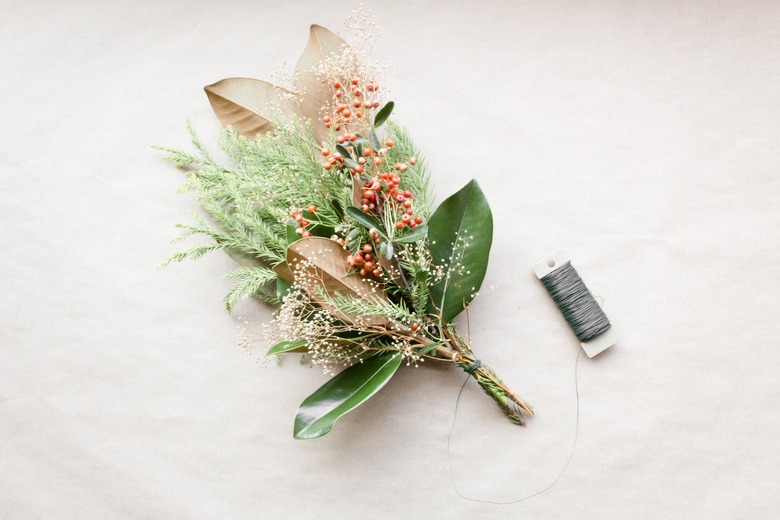
Let's get started by creating your first bundle, which will be one of the ends of the garland. Grab a branch of each item and assemble them in your hand to your liking. To start, use a piece of magnolia as a base, and then add a couple of pieces of pine, a sprig of berries, and a couple of pieces of dried baby's breath as a whimsical accent. Play around with what looks best to you.
 Caroline Burke for Hunker
Step 4
Next, take your paddle wire and secure the bundle together by wrapping it around the base of your leaves four to five times. Once secure, do not cut the wire — you will continue to use it as your build your garland, and the continuous piece of wire will help make it even sturdier.
 Caroline Burke for Hunker
Step 5
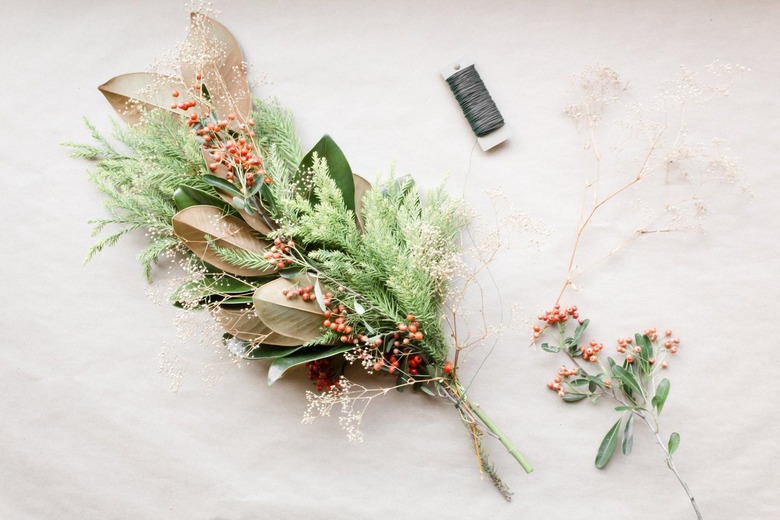
Then, create another bundle. If you like using the magnolia as the base, feel free to place a branch underneath your first bundle, and build the rest of the second section with your other ingredients along the top. When your second bundle is done, take your paddle wire again and wrap around to secure the second bundle to the first. Continue to do this until you are almost to your desired length.
 Caroline Burke for Hunker
TIP: Create visual interest by alternating the sides to weave the different ingredients throughout the garland. It doesn't have to be exact — you can add extra and plug any holes you may see at the end.
Step 6
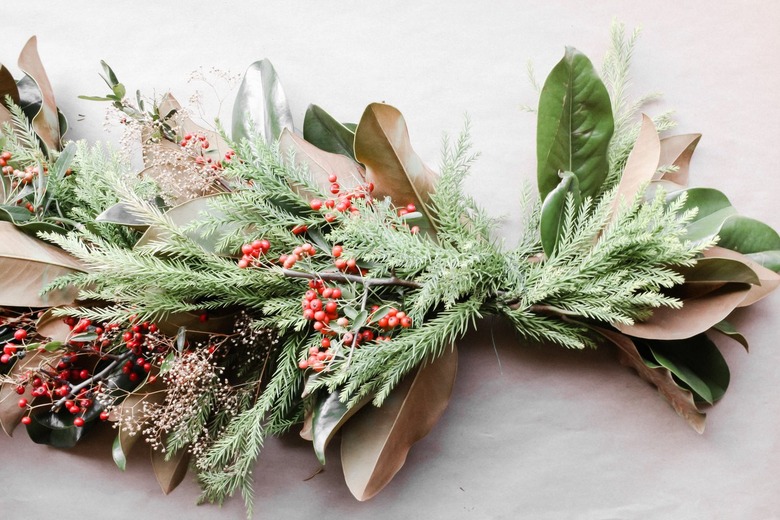
Once you are almost to your desired length, it's time to finish it off. Make one final bundle, and this time, instead of laying it in the same direction as the previous one, flip it so that the ends are meeting each other. Layer the final bundle underneath and secure with paddle wire. With your wire cutters, cut the wire and weave the end through the last loop and tighten. You'll notice a blank spot along the sides and top, but don't fret — just take some extra stems to fill out that space to finish off your garland.
 Caroline Burke for Hunker
Step 7
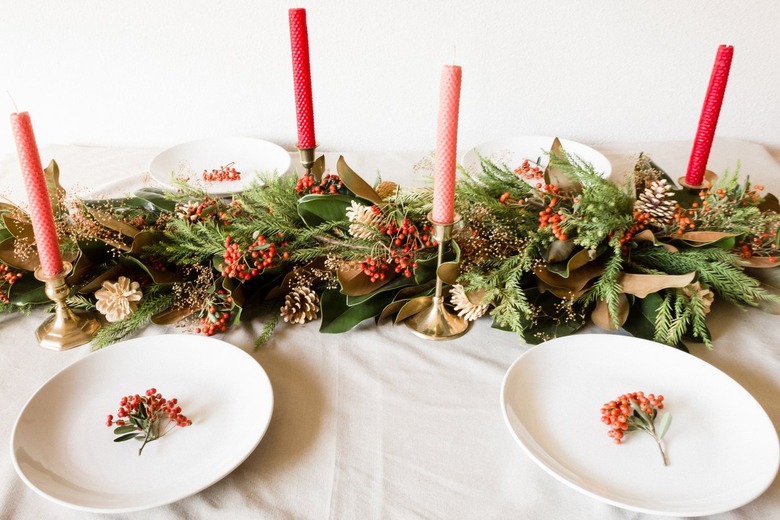
Lastly, place your garland on your table and add the pine cones by placing them throughout the garland. Add a couple of candles, and your holiday tabletop is complete.
 Caroline Burke for Hunker