How To Paint Baseboard Moldings
Of all the woodwork and moldings in a home, baseboards get the most abuse from bumps and scrapes from feet and furniture. And they are collection spots for dust and grime. But a fresh coat of paint (or two) can give them new life.
Things Needed
-
Sponge or microfiber cloths for cleaning
-
Vacuum cleaner (if necessary)
-
TSP or another cleaning solution
-
Spackle
-
Flexible putty knife
-
Latex painter's caulk
-
Caulk gun
-
Sandpaper (fine to extra-fine grit)
-
Primer
-
2-inch angled sash brush (larger for very wide moldings)
-
Painter's tape
-
Canvas drop cloths
-
Small paint bucket
-
12-inch drywall knife or paint shield
-
Paint conditioner
-
Semi-gloss paint
1. Clean and Repair the Molding
Cleaning and repairing often take longer than expected, especially if you have to wait a few hours for the repairs and caulk to dry before you can paint them. Keep that in mind when scheduling the project.
If your house was built before 1978, there is a good chance that it contains lead paint. If you suspect the presence of lead paint, have the paint tested. Once you know the results, you can decide how to proceed.
- Move any furniture away from the wall if it is blocking the molding.
- Dust the surface of the molding with a cloth.
- You may need to use a vacuum cleaner with attachments to clean off baseboard that was behind furniture. If there is wall-to-wall carpeting, vacuum to prevent dust from ending up in the paint finish.
- Give the baseboard a good cleaning with TSP or another cleaner. Surface dirt can keep paint from adhering to the surface properly.
- Use spackle to repair any nicks in the molding. Follow the manufacturer's directions, but usually, you simply apply the spackle to nicks and holes, using a flexible putty knife.
- Allow the spackle to dry, then give it a light sanding. Clean away sanding dust with a rag.
- Spot prime the repairs so that they don't bleed through the finish coat of paint.
- Use caulk to fill spaces where molding joints have separated. Check all inside and outside corners. The caulk will help make the finish job look more professional.
 Scotch Blue 3M
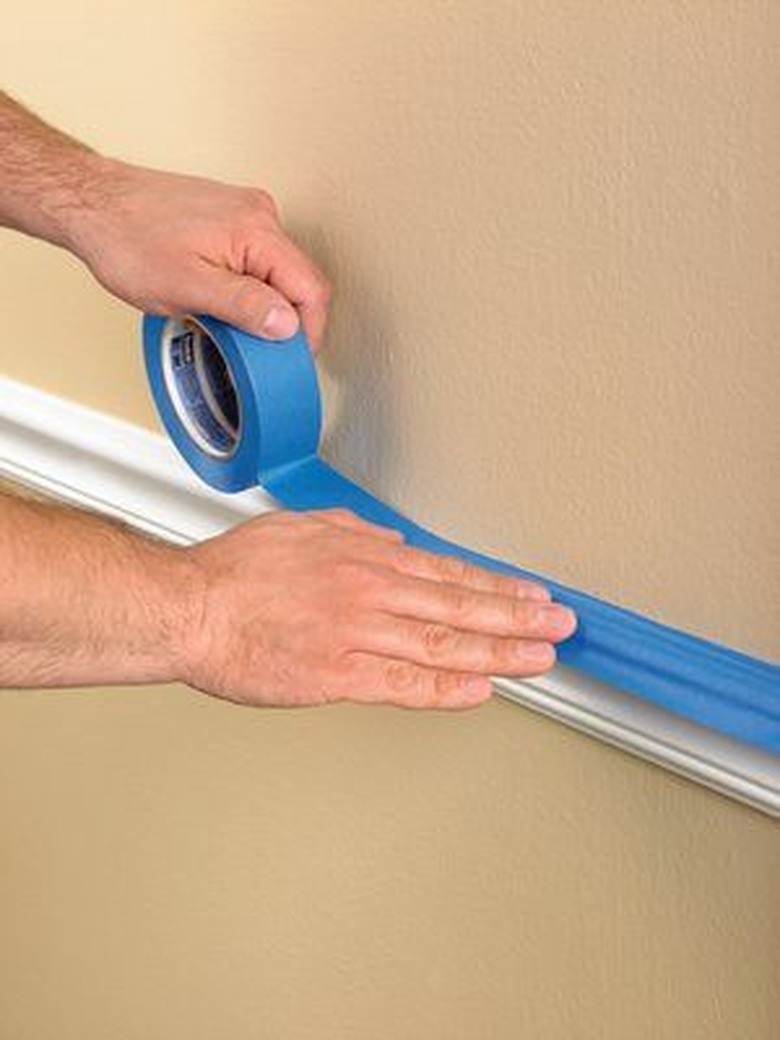
2. Protect Adjoining Surfaces
Attach painter's tape at the border separating the molding from the wall. As you roll out the tape with one hand, set the tape in place by pressing it down with a clean putty knife. For wood or other hard-surface floors, apply tape to the floor. For carpets, apply tape to the carpet, and use a clean putty knife to push the edge of the tape under the molding, if possible.
When the tape is in place, place canvas drop cloths as close to the wall as possible. The tape will help you achieve a clean edge, while the cloth is there to catch splatters.
 Simply Designing
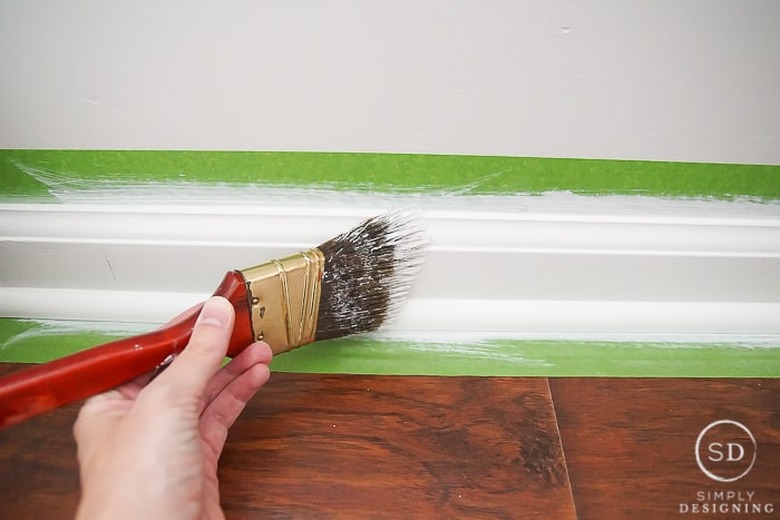
3. Apply the Paint
Paint conditioners help latex and acrylic paints flow better, and they slow down the drying time, giving you a chance to smooth out brush marks.
- Begin by adding paint conditioner to the paint and stirring it. Follow the manufacturer's directions for mixing the paint and the conditioner together.
- Transfer a few inches of paint to the small bucket. It is much easier to handle the bucket than a full gallon of paint.
- Everyone has their own painting style. Here's one technique to try: Dip the brush into the paint so that about one-third of the bristles are loaded. Tap the brush against the sides of the bucket.
- Work on small sections of baseboard at one time. Apply paint to the middle of the molding to get some of the paint off of the brush.
- Then, cut in along at the top of the molding using the tapered edge of the brush. Run the brush about 1/4 inch from the edge. The paint should bead slightly above the brush's bristles.
- If necessary, go back and make another pass to spread the paint even closer to the top of the molding.
- Next, cut in along the bottom of the molding. Work slowly, you can always go back and add more paint if necessary. If necessary, use a wide drywall knife of paint shield to protect the floor as you cut in along the bottom of the molding.
- After you have applied paint to a section, use a light touch to drag the edges of the bristles to smooth over the paint. It's a process called laying off. When laying off, start the bristles on an unpainted portion of the molding, working back over the just applied paint.
- When you are ready to move on to the next section, start the brush on an unpainted portion of the molding. Placing the brush on wet paint will leave a mark that will look like a seam on the molding once the paint has dried.
 Flood
Flood
You will eventually develop a painting rhythm. Here are a few tips to help the job go smoothly:
- If you are painting the baseboard the same color as the original, you can probably skip painting the last 1/16 to 1/8 inch along the bottom because the color change will not be noticeable.
- For carpeted floors, use the taping knife or a paint shield to depress the edge of the carpeting and the painter's tape slightly when cutting in at the bottom of the baseboard. Clean off the bottom of the straightedge after painting each section.
- If you are installing new baseboard, prime and apply a first coat with the baseboard pieces laid over sawhorses before installing it. After installation, you will need to fill nail holes and perhaps some other minor repairs. After the molding is installed, you can give it a finish coat of paint.
4. Finish Up
Clean your tools and brushes when you finish the project, but leave the painter's tape in place. The paint needs to dry completely, so wait about 24 hours before removing the painter's tape. If you have trouble removing the tape, try scoring along the edge of the tape with a sharp utility knife as you pull the tape from the wall or floor.