5 Things To Prep Before You Paint Siding
We may receive a commission on purchases made from links.
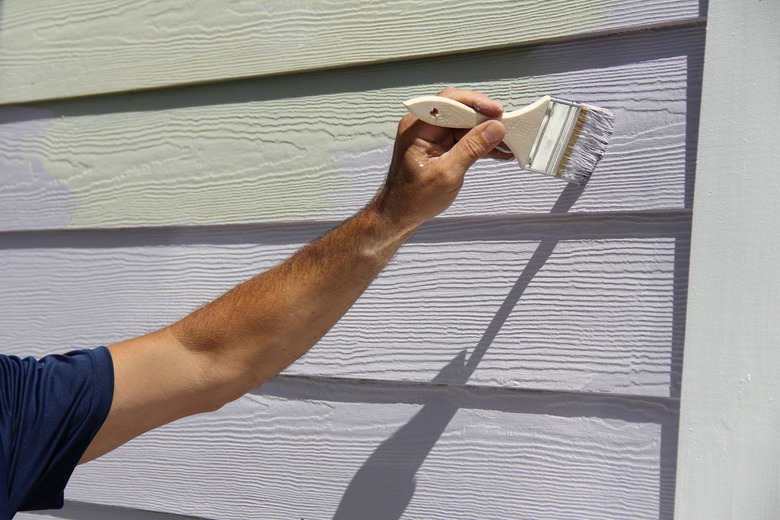
The old saying goes: "A good paint job depends on good surface preparation." Like a lot of old sayings, this one is absolutely true, especially when painting exterior siding. If you want the satisfaction of a freshly painted house, you have to put in the drudge work before you even pick up a paintbrush.
Prep work has one goal: to provide a clean, dry, sound surface to receive the paint. The amount of work involved will depend on the condition of the siding and to a certain extent on the type of siding. Most siding materials, including wood, vinyl, aluminum and fiber cement siding, can be painted.
1. Make Repairs to Siding
1. Make Repairs to Siding
Any number of repairs may be necessary before painting siding, but the goal is to make sure the siding is in good condition to accept paint and that any damaged or loose siding is fixed or replaced. No matter what type of siding you have, repairs may include removing or prying up the row of siding above the damaged area to get at the nails that hold the damaged piece in place. If replacing a section of wood siding, prime the back and ends of the new boards before nailing in place. Siding that has cracks or holes but is otherwise solid can be patched with an exterior filler before painting.
2. Protect the Landscape
2. Protect the Landscape
Most people will cover shrubs, flower beds and sections of lawn with tarps when it is time to paint, but it is a good idea to take the same precautions when starting prep work. Some preparations require cleaning the siding, and the tarps prevent soapy water from landing on shrubs and other landscape plants. For added protection, gently wet down the plants before putting the tarps in place. Follow up with a rinsing to be on the safe side. The tarps also prevent bits of scraped off paint from landing in the plantings.
3. Clean the Siding
3. Clean the Siding
Lightly soiled siding, including wood, vinyl, aluminum and fiber cement, can be cleaned with a garden hose. Work on dirtier areas with a hose, nylon brush, and a mild detergent. Mold and mildew can be cleaned off with a diluted bleach solution—four parts water to one part bleach. If you don't like the idea of using bleach, white vinegar mixed with water can also take care of light mildew. There are also siding cleaners you can buy at hardware stores and home centers.
Working with a pressure washer will make the job go much faster than cleaning with a hose and brushes, and it is a good way to clean off chalk deposits—the powdery residue found on some painted surfaces. Simply rub your hand or a clean cloth over the siding to determine if the surface is chalking.
4. Remove Loose Paint
4. Remove Loose Paint
Any peeling, blistering or other forms of damaged paint needs to be removed. There are a lot of possible causes for damage paint, including a bad paint job in the past. But moisture behind the siding is another cause. Correct any moisture problems before painting.
There are a number of tools to scrape and sand peeling paint, including hand scrapers with razor-sharp tips, attachments for portable drills, heat guns, and power scrapers. Remove all of the damaged paint until you reach a soundly painted surface. Then use sandpaper to feather the edges of the good paint and create a smooth surface. This can be done with a hand sander, but a small 1/4-sheet power sander makes easier work of this task. The best strategy is to make at least two sanding passes, one with a coarser grit paper (such as 80-grit) and a finishing pass with a finer grit (such as 120-grit). Make sure to wear a particle mask and eye protection while scraping and sanding.
Some pros will remove all of the old paint from wood surfaces. This generally leads to a more even, professional-quality job. There are a variety of ways to do this, including softening the paint with a heat gun and scraping it off, or using a grinder or power sander to abrade the entire paint surface down to bare wood. This is very heavy work, though; for most amateurs, it is sufficient to scrape off loose paint and feather the edges of the remaining paint.
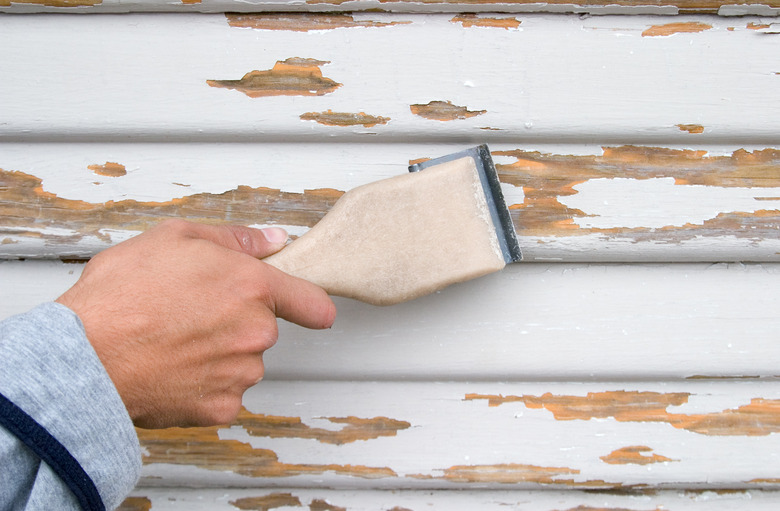 pablohart/iStock/GettyImages
Warning
Houses built before 1978 may contain lead paint. Lead can cause a number of physical problems, which is why its use as a paint additive was banned. The problem for today's painters is that the lead paint may be buried under several coats of non-lead paint. You can buy a test kit to test the paint yourself. If lead is present, arrange for a lead abatement contractor to remove the paint. Don't try to scrape and sand the paint yourself.
5. Prime Bare Wood
5. Prime Bare Wood
Prime all bare wood with an exterior primer. Oil-based primers do a better job of hiding imperfections in the wood than water-based products, and they typically are a better foundation for the surface coat of paint. Oil-based primers are fine to use if you are top-coating with a water-based (acrylic or latex) paint.
Preparing siding for painting is hard work, but thorough preparation is the only way to ensure a good paint job.