

Turn An Old Frying Pan Into Stylish Countertop Storage With Pickle Jar Lids
We may receive a commission on purchases made from links.
Just because your old frying pan is past its prime doesn't mean it doesn't have a use in your home. There are all sorts of genius ways out there to use old pots and pans instead of tossing them, and oftentimes, these DIYs can help you recycle other miscellaneous items that you frequently find in the kitchen, too. For example, if you follow a creative idea from LanaS DIY on YouTube, you could turn your old frying pan and pickle jar lids into a stylish countertop storage tray. This combination of items might not sound the most aesthetically pleasing at first, but the finished project is nothing short of stunning. In a video detailing her process, the content creator first shows how she covered the pan and the jar lids with beige acrylic paint. After the paint dried, she decorated the tray with decoupaged napkins, and then added shine with a touch of gold paint and a layer of acrylic varnish.
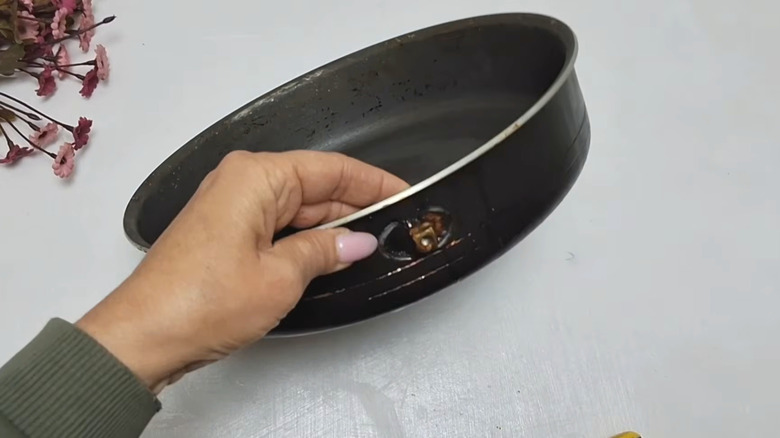
To try this DIY yourself, you'll need to clean an old pan. Remove its handle and other hardware on the outer edge. You'll need a total of eight jar lids of the exact same size and two screw caps. Acrylic paints, varnish, decoupage supplies, and superglue are all necessities for this project as well. What you should end up with here is an easy countertop storage solution that doubles as decor.
Making a countertop storage tray with an old pan
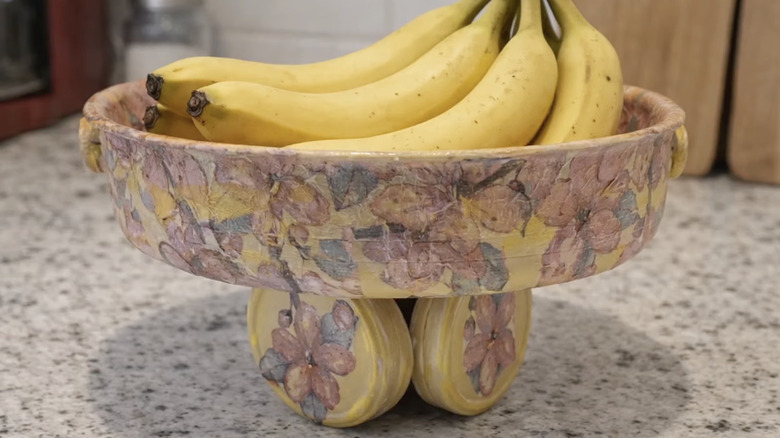
After cleaning the pan and removing any hardware, the first step in this project is to paint the pan with acrylic paint. You can use beige like this DIYer did or choose a color that matches your decor. Once it dries, glue the screw caps over any hardware or holes to which the pan handle was attached. Paint the caps to match the pan, then turn your attention toward your pickle jar lids. You'll need to superglue four pairs of these together so that their raised edges meet. They'll look like wheels. Give them a coating of beige paint, and glue them to the bottom of the pan by their narrow edges in a square configuration. In the original video, the creator uses a glue activator spray to speed up the drying process, but you don't have to use it. If you want a stronger bond, consider replacing the superglue with a product like E6000 craft adhesive.
Next, you can begin decoupaging the pan and jar lids. The easiest way to do this with cutouts from printed paper napkins and a product like Mod Podge matte glue and sealer. Wrapping paper and book pages work well for decoupage, too. If you can't find a pattern you like among paper napkins or wrapping paper, decoupage paper sheets offer a wide array of styles and colors. Add a final touch of glitz and glam to your tray with a thin layer of metallic gold paint across its surface. Lastly, apply a low- or zero-VOC acrylic varnish to all of its surfaces. You could use your tray for tea-making supplies or spices in your kitchen, or for cosmetics in your bathroom. It would even make a stylish desktop holder for office supplies. In any case, it should pair well with some of Martha Stewart's top countertop organizing tips.