

Forget Pricey Aerators: Try These DIY Solutions Using Tools You Already Own
We may receive a commission on purchases made from links.
Before you spend $200 on a spike aerator or well over $300 on a core aerator for your lawn, it's probably a good idea to figure out how much you really need one and how much that need is worth. And maybe, you should even consider DIYing something a bit more affordable. There are a number of aerator designs that you can pull off mostly using stuff you already have on hand, so if you have more time than money, a DIY solution might be a wise move.
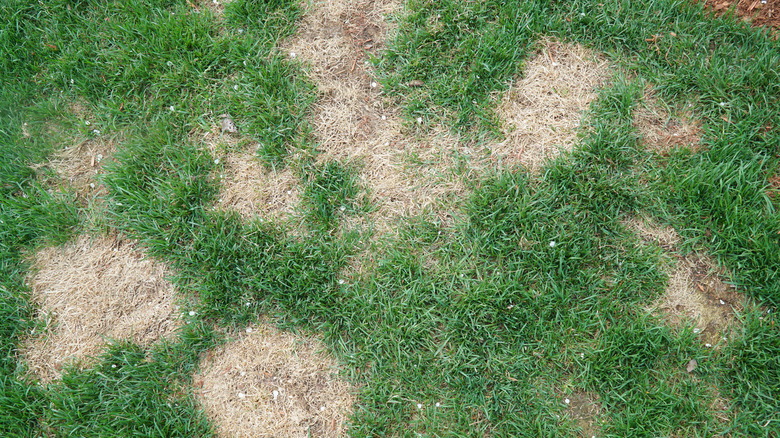
Start by figuring out what you really need. Core (or plug) aeration — the process by which cylindrical cores of soil are removed from the ground mechanically — is usually not necessary for healthy residential lawns, though it might be useful in conjunction with overseeding. Use the simple screwdriver test to tell if it's time to aerate your lawn. If you can drive one 4 or more inches (or a landscape marking flag 6 inches) into the ground at a handful of locations the day after a rain, the soil is not compacted. Remember: Aeration is meant to fix lawns with a problem. For a lawn without significant compaction, the process mostly damages your grass and makes a mess. Instead, focus on watering, mowing, and fertilizing the right amounts at the right times to foster root growth.
Spike aeration has even fewer practical uses. It actually worsens soil compaction, though it does provide shallow, short-term ingress for water and nutrients to move closer to the turf's root zone. But because spike aeration increases compaction in the walls of the holes that it makes, it provides very limited value even for moisture and nutrients.
DIY drum aerator
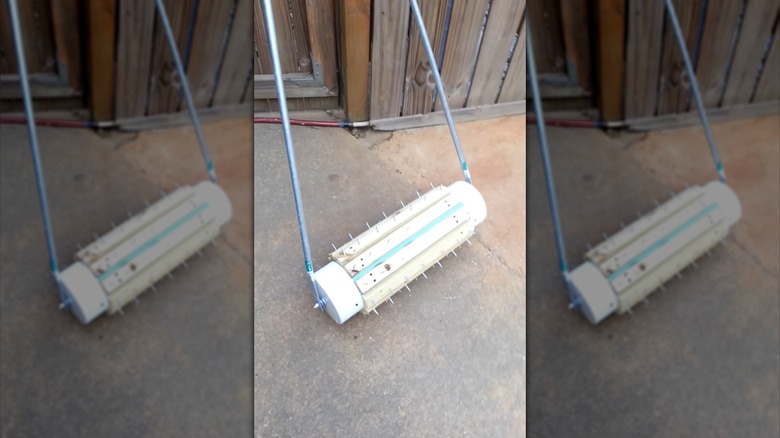
If you really think spike aeration is the approach for your lawn, there are a few DIY approaches you can take. The most robust — and often the most difficult and costly to make yourself — is to replicate the functionality of a drum aerator. This contraption is a sort of wide, heavy wheel with spikes radiating from it like something from a lawn-themed horror movie franchise. People with welding skills and far more time than money have made amazing-looking drum aerators in their workshops, some of which are so refined that you might suspect the maker of flexing a bit.
But there are practical DIY versions, like the roller made by YouTuber @conley0662. It's a simple device with a "drum" made of 6-inch PVC with caps on each end. To this, he attached strips of wood with 2-inch screws driven through them as spikes, assembled with ½-inch electrical conduit connecting the drum and wood handle. If this approach has limitations, it's that the screws could probably stand to be longer and the drum could use more weight — easily accomplished by filling the PVC pipe with sand.
We've also seen a nifty drum aerator made by YouTuber @nighteffects6778 using a log, which brings its own weight to the aeration party. Because of the log with a bunch of nails driven into it, this build might at first seem simpler than it is. But @nighteffects6778 brings meaningful welding and even engineering skills, as with the simple but smart mechanism by which the log rotates around its axis. Without some reinvention on your part, this approach is probably less practical than @conley0662's bolt-together design.
Aerating strap-on shoes
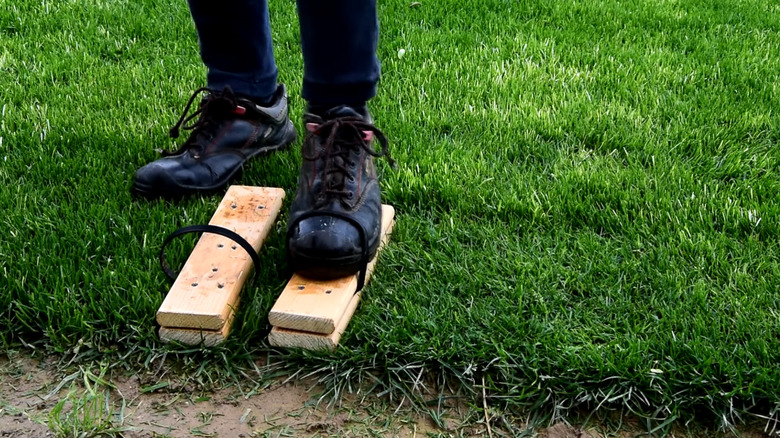
Spike-aeration shoes — another DIY alternative to traditional aerators — probably belong in a category for devices with unintended utility. It's not clear that they will do a lot for actually reducing soil compaction, but they can be useful when seeding a small lawn. And they are probably useful if you get an unexpected ice storm or you want to try that Michael Jackson "Smooth Criminal" move where you lean until your Achilles tendon snaps.
Aeration shoes — or, more accurately, strap-on soles — are available from sellers like Amazon for around $20 (the highly rated Leweio aeration shoes are $21.99). So justifying a DIY build relies on being able to make something comparable for almost nothing. The soles aren't the challenge: That's just a matter of driving nails through a board, then sandwiching the nail heads between that board and another to hold them in place. The difficult part is probably making an effective DIY strap. YouTuber @nighteffects6778 of "log aerator" fame made a very simple version just by using a simple band to slide your feet into like shower shoes. This probably works fine for overseeding in ideal conditions when you don't really need aeration. But if you're working in very dry or very wet soil of the wrong type, it's easy to imagine the shoes being pulled off your feet.
Garden fork
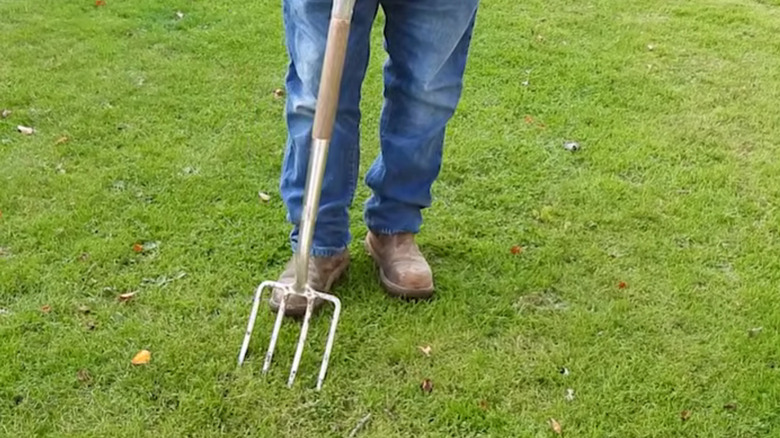
Using a garden fork (or pitchfork, if you're farm-minded) for lawn aeration is an interesting case study in pros and cons. The downsides include thicker tines that are likely to increase compaction around the holes you make. On the positive side, it's a cheaper aeration tool that you might already have in your shed; they tend to sink deeper than other DIY spike methods; and, used properly, they can introduce some compaction relief lateral to the tine direction when you rock the fork back and forth. That is, the fork breaks up the soil around the tines when you wiggle it around.
The procedure here is to sink the fork as far as you can into the ground — at least 3 or so inches to reach the root zone. Now, rock the tool back and forth, using the handle's leverage to disturb the soil down deep, and then pull it straight out. You'll know you've rocked the fork sufficiently if the grass lifts a little. Do this at somewhat regular intervals, ideally 6 inches or less.
This might not be the originally intended use of a garden fork, but it is the intended use of the broadfork aerator, which might be a bit easier to sink into the ground. There are also commercially available forks that do core aeration, but these are exceptionally difficult to DIY because of their plug-ejection mechanisms. You might be better off spending the $30 if that's your preferred approach.
Cordless drill
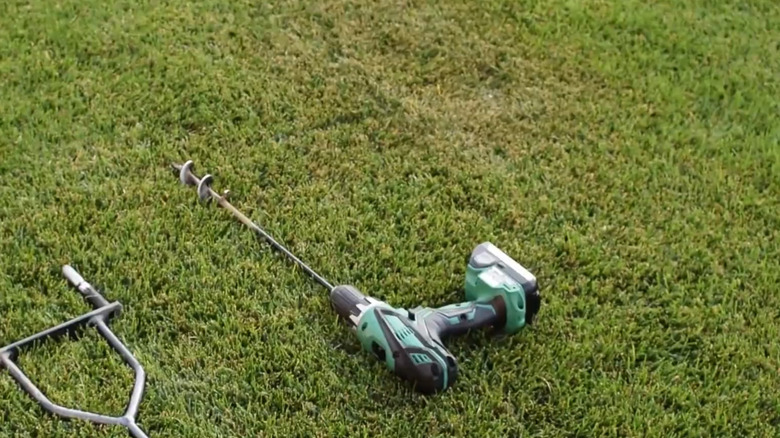
Hovering in the mental space between genius and madness is another lawn aeration trick that'll revive your patchy yard without pricey equipment: the cordless drill. Oh, it's possible to use a corded drill, and depending on the size of your lawn, that might be the only practical way to do it. But this really isn't a solution for aerating large lawns, so let's stick with cordless. Really, drilling holes in your lawn is mostly intended for treating small patches that are suffering from compaction for one reason or another.
You can drill a grid of holes with a large bit — say, ¾ inch or so — and it will be fairly effective, if time-consuming. But if you have the patience and batteries for it, using a small bulb auger bit (or a large standard auger bit) will remove larger curls of soil from the ground in a manner similar to core aerators. Unlike spike aeration methods, a cordless drill and auger bit shouldn't contribute to further compaction, so the only real downside to this DIY method is that it'll wear you out in a hurry.
DIY core aerator
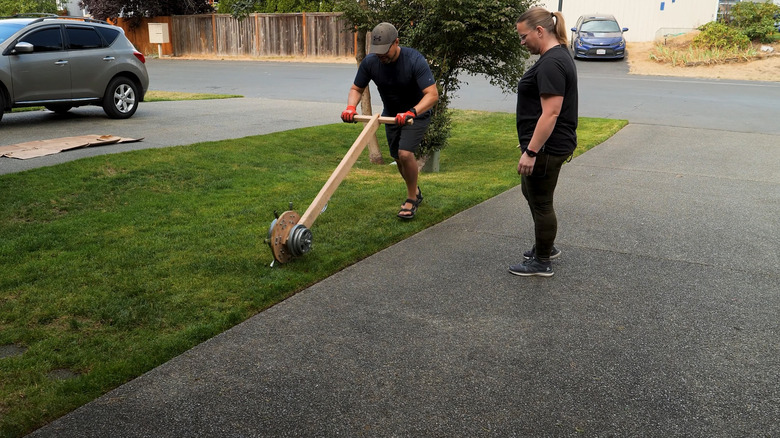
Okay, so we've determined that there are some decent ways to do spike and core aeration with DIY equipment. But has anyone built a credible DIY core aerator? The challenge, of course, is ejecting the cores ... and it's more complicated than it sounds. The simplest method is to eject them from the top of the coring cylinder, but this seems susceptible to failure from either a misshapen corer or insufficient pressure to move the soil through. And though there are certainly some DIY versions that are workable, they are extremely involved and require prodigious metal-working skill.
One build that seems promising is by YouTuber @vandit0o0o, whose channel is called "Albert Does It All." He ordered a replacement coring tine from Amazon and replicated it (seven times) using steel pipe. These were attached to a wooden disc with barbell plates on either side to add weight. (Other builds we've seen use brake drums and discarded truck flywheels for weight.) He made the handle of wood and did the final assembly in under two minutes and showed in a follow-up video that his DIY version continues to work, producing and ejecting cores more or less properly. His build cost $164.40 in materials, just over half the price of a credible commercially available product. We'll leave it up to you whether this is worth all the effort and whether you need it at all.