Turn A Dated Honey Oak Hutch From The Thrift Store Into A Gorgeous Kitchen Island
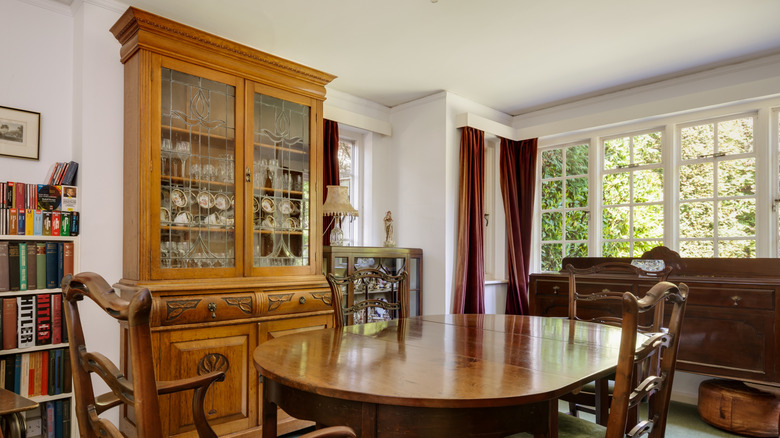
Honey oak: never has there been a hue so divisive. To many people, it's an outdated cabinet finish — one that never should have made it out of the '90s. Yet others insist that honey oak cabinets are coming back in style. What we do know is that you shouldn't pass up on a solid wood piece, like the classic wooden hutch that you see all over the thrift stores, just because the stain doesn't mesh with your interior. That's true even if you don't feel like you need a full hutch in your kitchen, because you can make it look like a completely different piece, simply by removing the top and turning the bottom into a rolling kitchen island.
Why not just buy an island cart? Well, because they're often flimsy, lack space, and don't really give you much storage. Plus, you can likely find an old hutch at a thrift store or on Facebook Marketplace for less money, and you get to customize it to fit your kitchen's style. That starts with getting rid of the honey oak color with a smooth coat of paint, whether you want to go light and airy with white or rich and dark with black or navy.
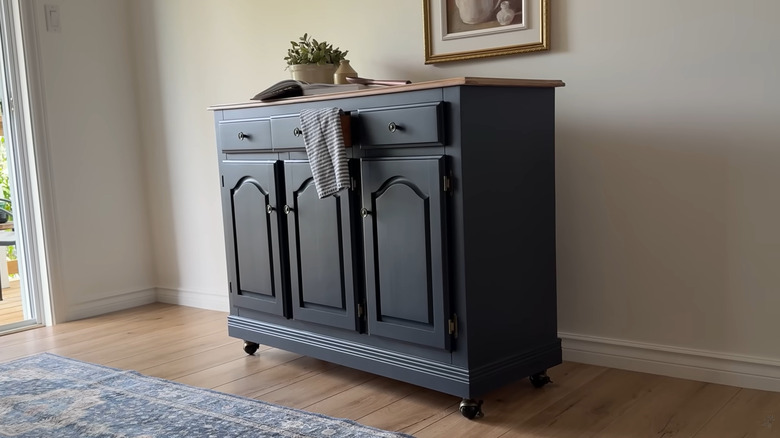
As for the top, you can use the oak that's already there if it's in good shape and you like it. Or, replace it with wood planks, a butcher block, or a lightweight countertop material — just make sure the hutch base can handle the extra weight. Then, add hardware to dress it up, and add little customizations, like a towel rack on the side. Or, snag a cute paper towel holder at the thrift store to attach to your DIY island.
Build your dream island from a hutch
Transforming a hutch is perfect if you're looking for unique kitchen island ideas. You get to build your dream island with the features you want, but the basic structure of the piece is already there — the bottom of the hutch. To start, remove the top section from the piece. (Don't worry ... you can use the top of your thrift store find to give your kitchen a storage boost.) You may need to remove screws or brackets to separate the parts.
The back side of the hutch might not be finished, so add wood planks or beadboard to create a decorative finished look. Sand the entire piece in preparation for refinishing. If the top has holes or marks from the top shelving, sand those areas down and fill in the holes with wood putty. Painting the base is often easier when you remove the doors and drawers to paint them separately, just like you would with kitchen cabinets. Apply your primer and paint until you get a finish you're happy with (and you've hidden all evidence of the honey oak). Put the doors and drawers back on the cabinet base.
For the bottom, add sturdy furniture casters if you want a rolling island. To create a stationary island, add decorative furniture feet to the four corners to elevate the piece. Install the drawer pulls and handles. If you're replacing the top, install your new material. Now, it's a matter of installing organizers and extra features on your island. No one will guess that the new centerpiece of your kitchen was once a thrifted honey oak hutch!