Forget Paint: 10 Easier Ways To Give Your Honey Oak Kitchen A Major Overhaul
We may receive a commission on purchases made from links.
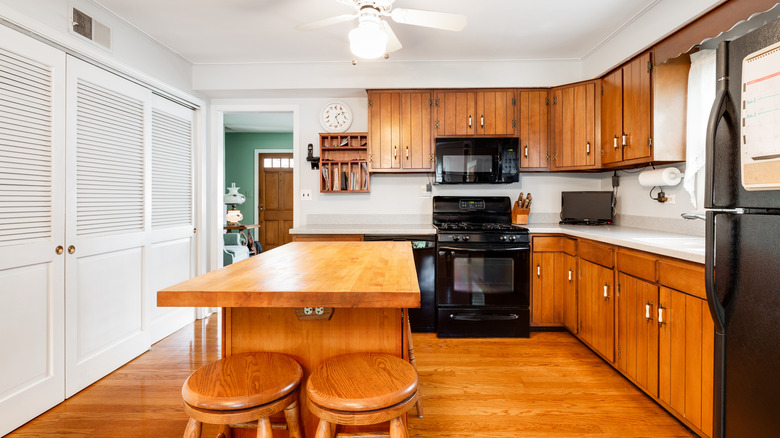
Love 'em or hate 'em, honey oak cabinets are having a moment. While some homeowners are embracing the aesthetic in all of its '90s glory, others are looking for ways to elevate the trend with a modern twist. The first instinct is to grab a brush or roller and find the best paint color for honey oak wood, but people don't take into account other avenues that are less costly and quicker, yet equally impactful. Take a breather before sifting through color swatches, and brainstorm paint-free alternatives for modernizing the look.
When it comes time to put a plan into action, you can refresh the cabinets themselves with different materials, DIYs, and unique hardware. Sometimes, you don't even need to touch the cabinets — all you need to do is focus on the space around them in order to enhance the look of the kitchen while still celebrating the wood's natural charm. Consider one (or a few) of these paint-free upgrades to achieve the honey oak cooking space of your dreams.
Add cane to your cabinets
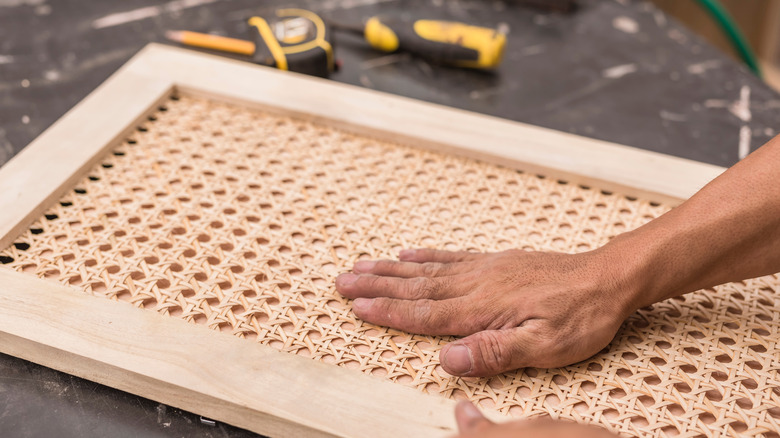
Rather than paint or stain honey oak cabinets, add rolls of cane webbing like the Sinnsidelin natural caning from Amazon for a rustic touch that complements the wood. To fastening it to the cabinet, you'll need to soak the cane in water for 30 minutes to stretch it out, and apply it when damp for a tight fit. Measure the cane and allow extra material while stapling around the perimeter of the cabinet. Remove the excess with a knife (once it is dry), and add strips along the back of the door. Modernizing kitchen cabinets with cane will be a DIY you're proud of.
Swap out the hardware
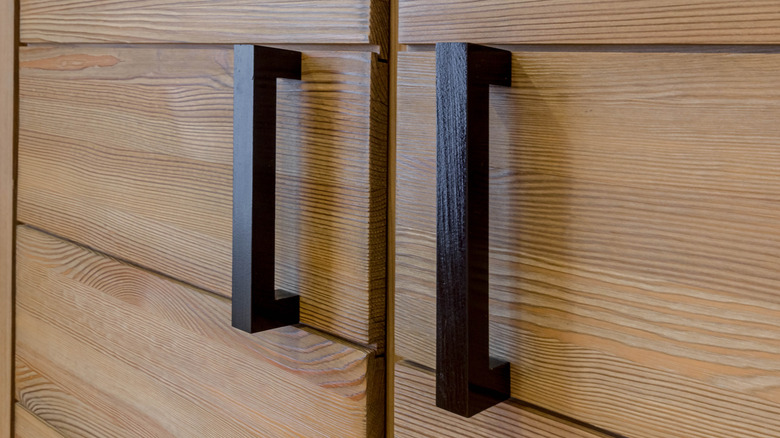
There's a good chance your cabinets are still rocking their original handles, cementing their place in the '90s. If you want a quick and efficient upgrade that brings you back into modern times, replace the OG handles with new hardware. If you're looking to step into sleek, modern territory, consider a matte black handle. If you want to elevate the cozy, inviting touch, bronze hardware enriches the wood's warm look. Don't forget to think about the shape of the hardware, too: Modern pieces are slim and clean-looking.
Opt for open shelving
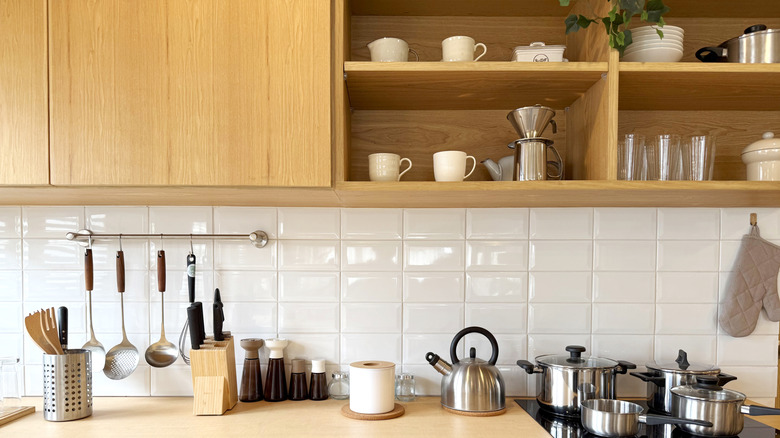
Honey oak cabinets might feel like a hug from Grandma, but the truth is, the orangey tone of the wood can be overwhelming. To soften the look, keep the bottom cabinet doors intact, and opt for an open shelving concept on the top portion of the cabinetry. You won't be foregoing any storage space, but you will be doing away with the visual heaviness of the cabinet doors. Make sure to line your shelves with complementary dishware that enhances the aesthetic rather than adds visual clutter.
Try peel-and-stick coverings
When in doubt, think like a renter. The beauty of a peel-and-stick adhesive for your cabinetry is that the makeover is permanent until you decide otherwise. It will provide that pop of color you might've been searching for with paint, but it can be easily removed when your lease is up or you decide to explore another trend. You might also want to consider updating your cabinets with vinyl wrapping. To start, you'll remove the cabinets and hardware one-by-one, measure the appropriate amount of contact paper and cut it with a blade, and apply the vinyl with a heat gun.
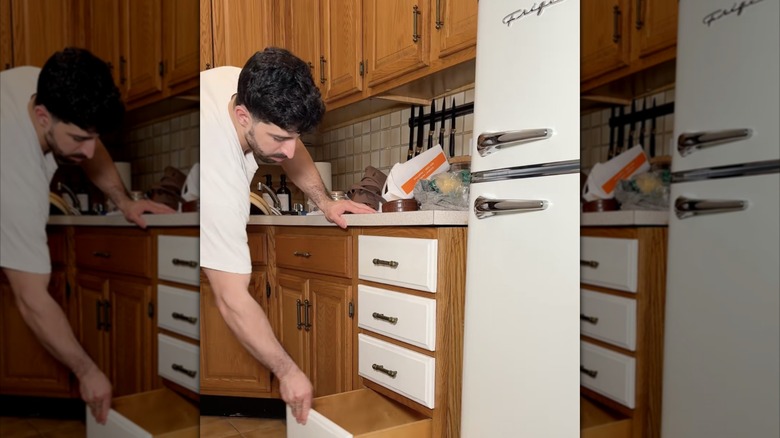
Remove cabinet doors and add a pull-out shelf
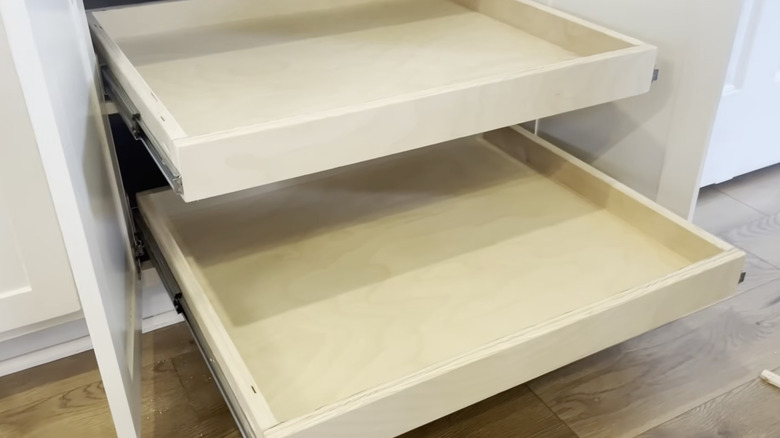
Similar to the open shelving route, utilizing your bottom kitchen cabinets for sliding shelves eliminates the visual heaviness of the wood when you remove the doors — plus it allows easy access to cookware. To install a pull-out shelf, start by removing the cabinet doors and measuring the space. Then, cut and secure plywood to each side of the drawer, where you'll mount slides like Amazon's LONTAN soft-close drawer slides. From there, you'll need to cut plywood and drill it into a box that can fit in the space and attach to the slides.
Accentuate the shape with a bobbin trim
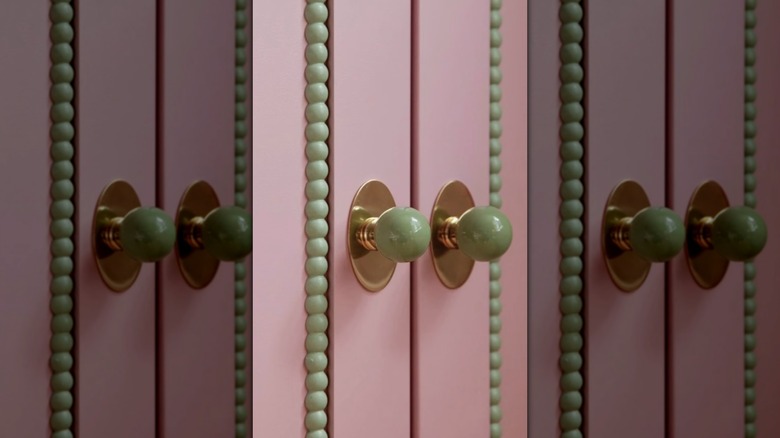
Often, honey oak cabinets get a bad rap for their orangey undertones when, in fact, the real reason they look dated could be the shape or the dated beveling. Give them a playful upgrade with a bobbin trim. Adhere Pongja's wooden half-sphere balls with wood glue along the edges of the cabinet doors for an unexpected yet sweet pop of creativity a la @themittiedit on Instagram.
Add a backsplash
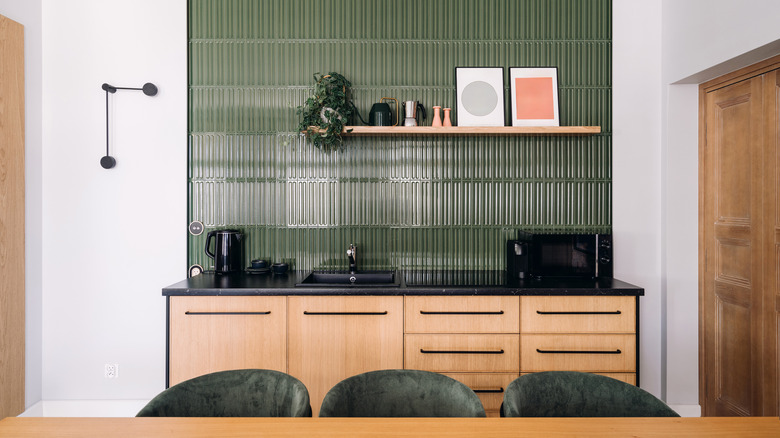
If you want to revamp your kitchen cabinets without laying a finger on them, shift gears to focus on your backsplash. To soften up the aesthetic of the cabinets, opt for a neutral white, but avoid the sterile look of a stark white. If you'd like to play into honey oak's warmth, choose natural, earthy tones, and consider rustic, handmade tiles like a clay stone or ones with light veining. Keep in mind that grays and blues are the culprits that clash with the wood and often make your kitchen look dated.
Accessorize accordingly
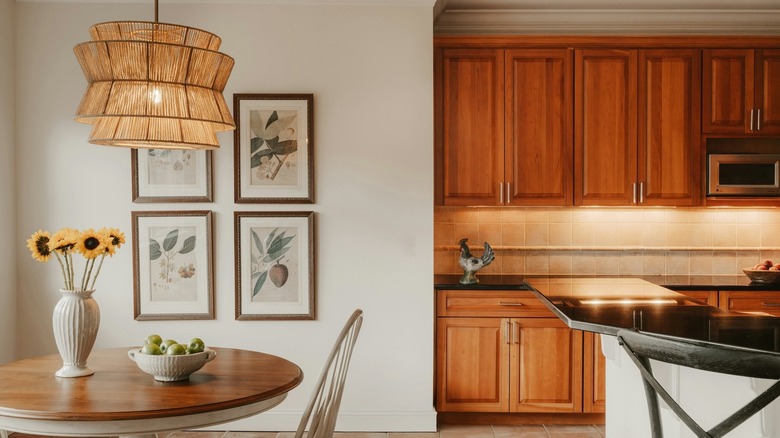
We've been conditioned to believe that honey oak cabinets are working against us, but the truth is, we're not doing the wood any justice in a cluttered kitchen. Rather than throw random accessories on the countertop that clash with the cabinets, work with the look of the material and select thoughtful objects that add to the aesthetic. Materials like rattan and brass are perfect additions to a honey oak kitchen, and warm, natural-looking colors like terracotta, deep green, and ivory can pull everything together — food for thought when selecting dishware, cookware, and beyond.
Don't forget about lighting
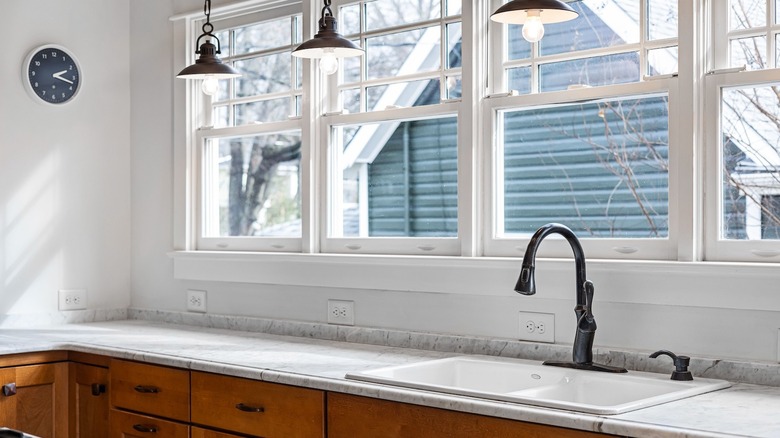
Make sure you're opting for warm, inviting lighting in the kitchen with sconces, pendants, and beyond. Natural lighting is equally important, so make sure to keep your windows clean and accessible. To further enhance natural lighting in your beloved honey oak kitchen, opt for a color scheme that's easy on the eyes, add glass where appropriate, and keep visual clutter to a minimum.
Stain your cabinets
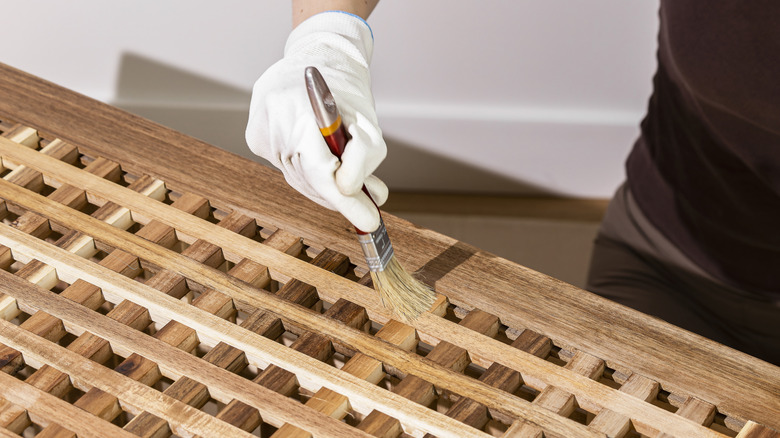
Meet painting's easier, less-involved younger cousin: staining. If the orange undertones of your honey oak cabinets are irking you, opting for a stain could enhance the color and grain of what you already have. Water-based stains are the easiest to work with and don't have an overly heavy odor, whereas oil-based woods are more likely to seep deeply into the wood, to name a few options. When it comes time for the application, clean your cabinets and sand them if necessary, wet the wood, apply the stain, and remove the excess with a cloth.