Skip The Stain And Paint: A Smarter Way To Update Honey Oak Cabinets
We may receive a commission on purchases made from links.
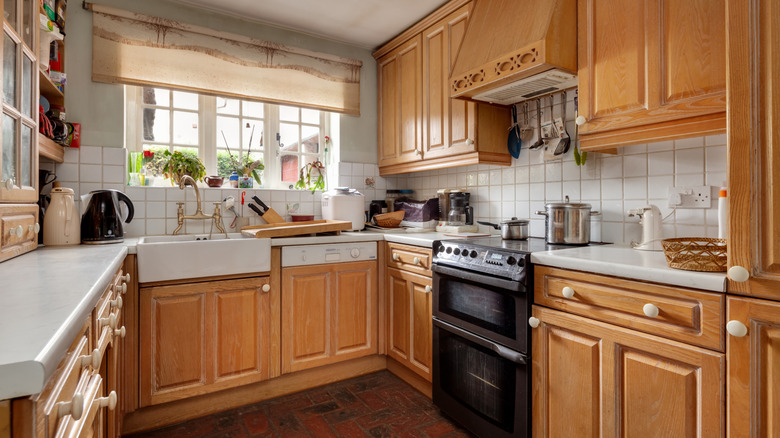
Nostalgic touches are always welcome around the house, but sometimes they need a reboot. The honey oak kitchen cabinet resurgence is a phenomenon that leans into controversial territory, since it's warm and welcoming to some, yet overwhelming and dated to others. Regardless, if you're determined to bring this '90s kitchen and bathroom statement into modern times, balance is key. You don't need to go to the trouble of staining your honey oak cabinets or adding a coat of paint, however: One elegant update involves simply adding cane webbing to the doors for a rustic flair.
Less time-consuming and roughly the same price or less expensive than painting kitchen cabinets, this DIY alternative is beginner-friendly and leans perfectly into today's popular kitchen trends. Right now, homeowners are searching for a cozy and inviting place to prep their meals, and incorporating natural materials is one way to achieve this vibe. Plus, this project makes the wood appear less dominating, allowing accents like backsplashes, tiles, and wall color, to draw the eye and unify the space.
How to modernize honey oak kitchen cabinets with cane
Once you've selected a decorative cane webbing, the process is fairly straightforward. Soak natural cane in a bath for 30 minutes, allowing it to absorb water and swell. After you attach it to the cabinets and let it dry, it will create a much tighter fit, avoiding sags.
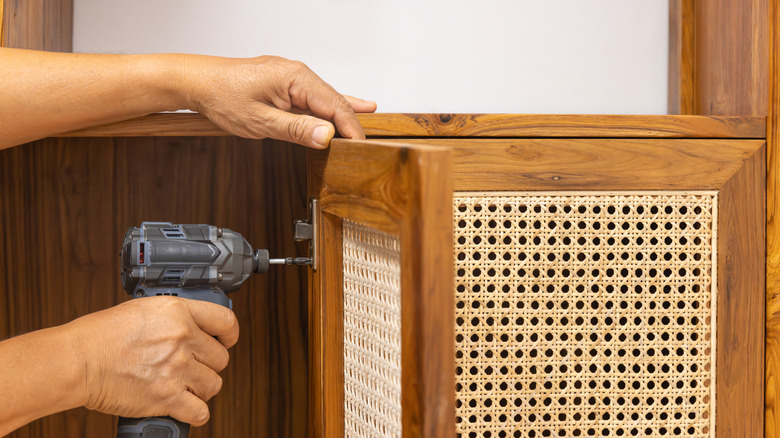
First, remove the interior panels of each cabinet door. You can do this, carefully, using a jigsaw, then sanding cut edges smooth. Cut the cane larger than the interior of the frame, so you have room to work. You want to attach it to the backside of each door. Using staples every few inches attach the roll of cane to the inside profile (that little rim inside the frame on the back). Make sure your cane is straight and flat, but you don't need to stretch it tight, as the webbing will do that all on its own as it dries. When everything's stapled down, trim the excess with a razor knife. Attaching ¼-inch wood strips along the back of the cabinet door will help keep everything in place.
If you don't want to remove the cabinet doors, you can attach cane directly to each door panel. After soaking your cane (this time you'll want it nearly dry to adhere), cut it to the size of the interior panel. Apply Gorilla Glue to the cabinet, then lay the cane webbing down. Cover with wax paper and a few heavy, flat objects and let it all dry for several hours. Synthetic webbing, such as Vehipa's plastic cane webbing roll, also works well here to keep everything flat and straight.