DIY Rainbow Furniture Knobs For Kids
We may receive a commission on purchases made from links.
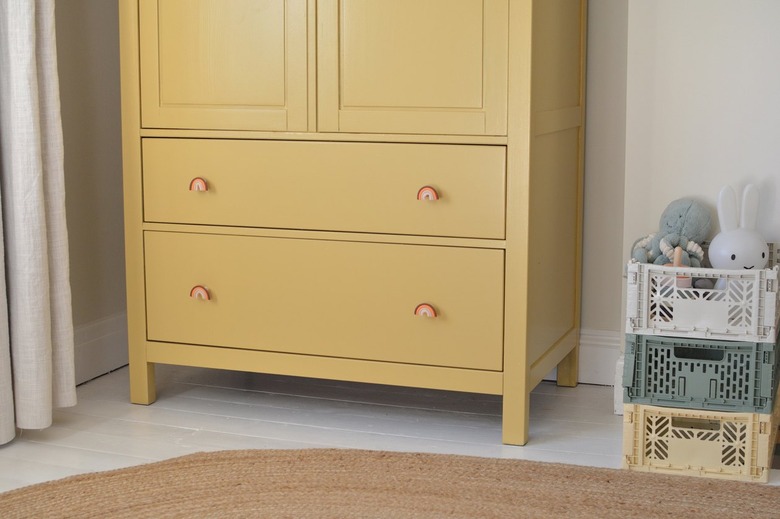
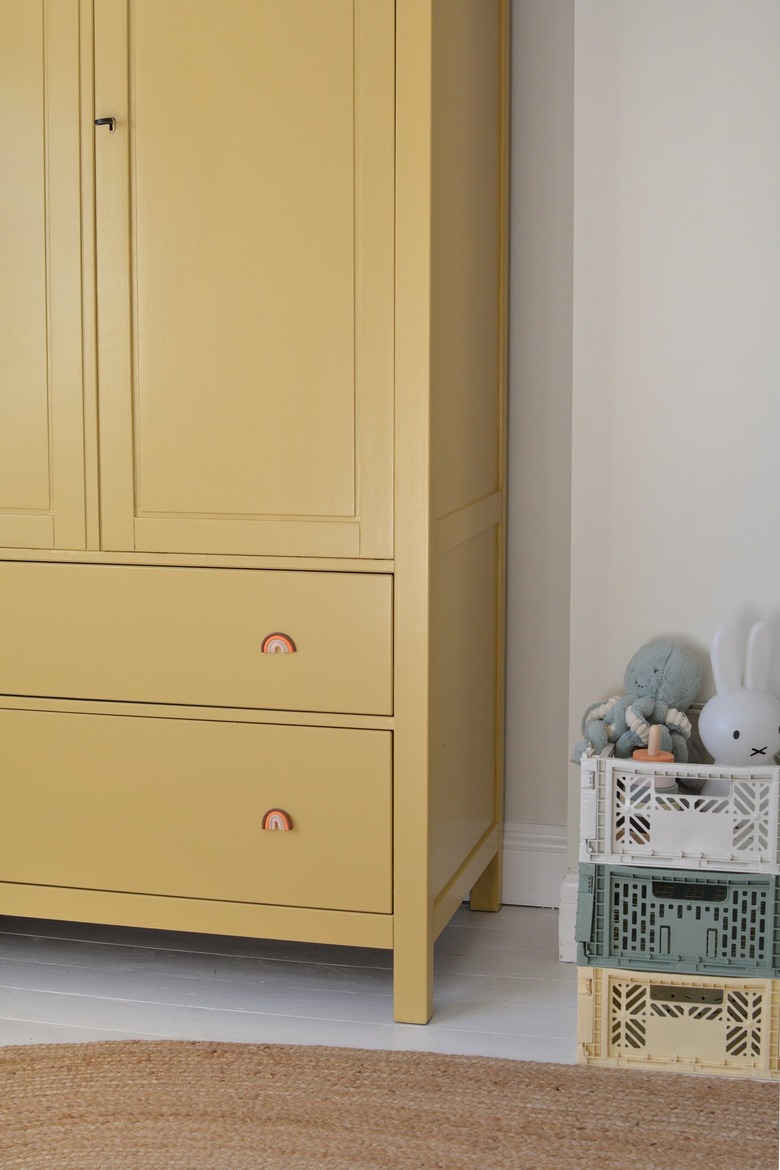
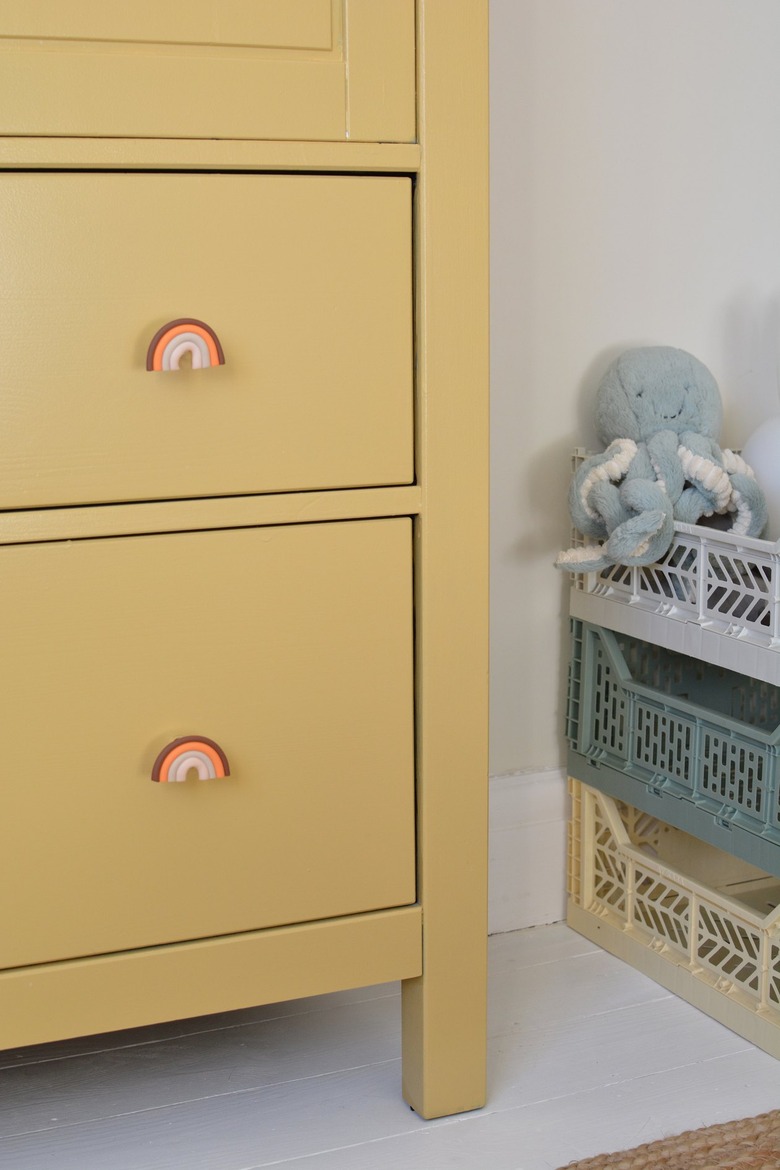
Childrens bedrooms and playrooms are some of the most fun to decorate, creating a space where they can express themselves and let their imaginations thrive. We're always looking for simple ways to add whimsy and interest — and these rainbow furniture knobs are a charming way to update furniture that your little ones will be sure to love.
As your children grow we don't always want or need to replace larger items of furniture (especially if they're in good condition) but changing the hardware is a quick and affordable way to refresh the look of an existing set of wardrobes or drawers. We've taken some basic knobs from IKEA and given them a super cute makeover using polymer clay that you can customize with your children's favorite colours.
 Caroline Burke
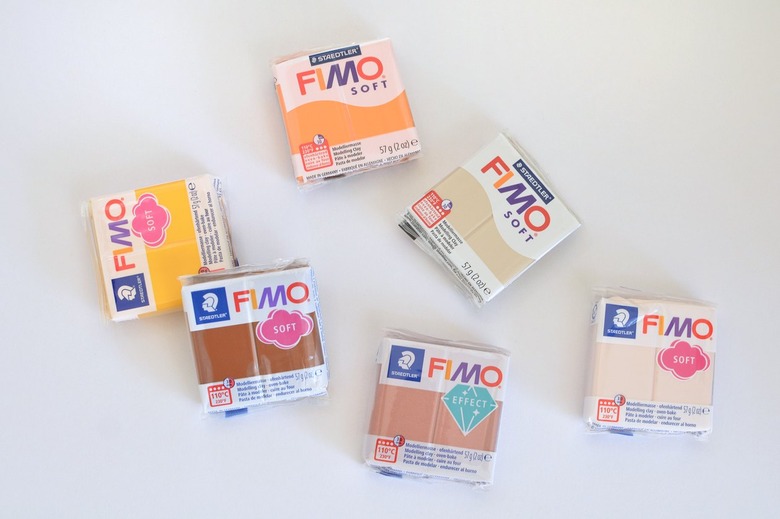
Things Needed
-
Plain furniture knobs (we've used the Bagganas knobs from IKEA)
Step 1
Pick the color scheme for your polymer clay — you can use any combination for your rainbows. We've opted for a selection of complementary colours that would sit well with the yellow shade of our wardrobe.
 Caroline Burke
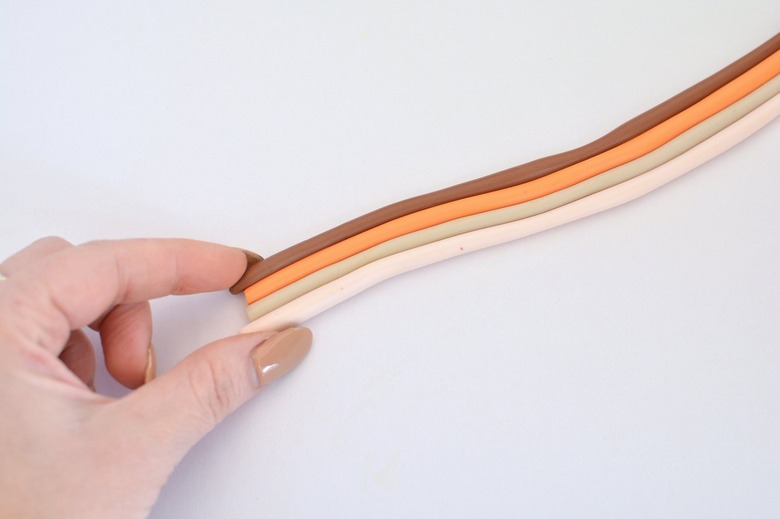
Step 2
Use your hands to roll the polymer clay into lengths that are 1/4 inch thick. We're using four colors for our rainbow but you can add more if you wish.
 Caroline Burke
Step 3
Gently squeeze the rolled out lengths together to make one section.
 Caroline Burke
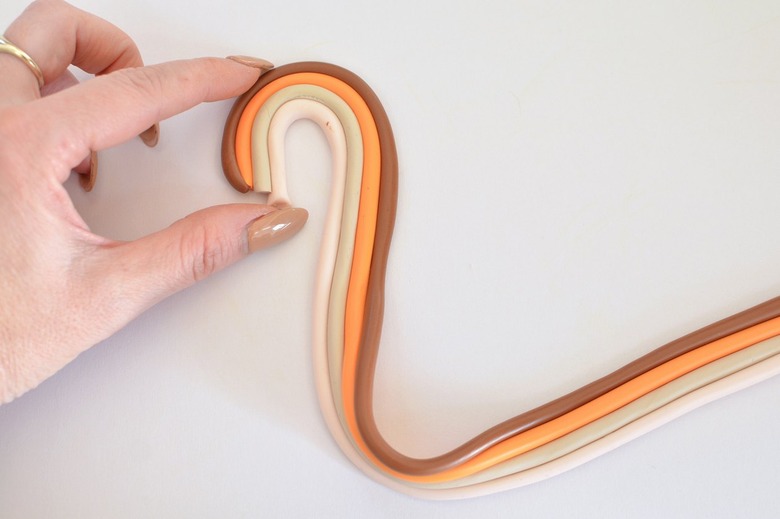
Step 4
Start to gently curve the clay to create a rainbow shape.
 Caroline Burke
Step 5
Trim the rainbow shape with a knife. You can make your rainbow any size — ours is approximately two inches wide and 1-1/2 inches high.
 Caroline Burke
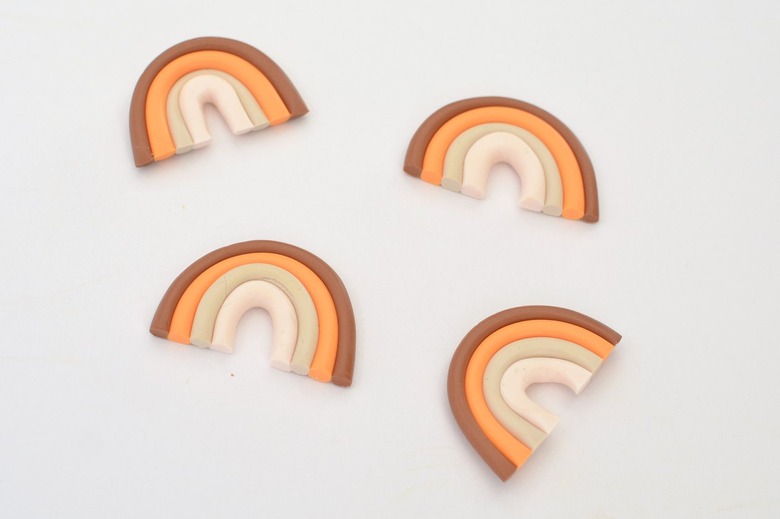
Step 6
Repeat Step 4 and Step 5 until you have the required amount.
 Caroline Burke
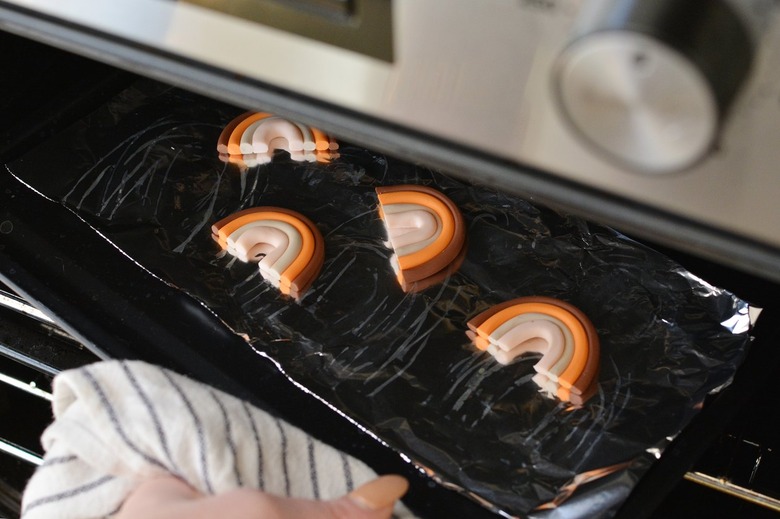
Step 7
Pop your clay into the oven to harden. Make sure to follow the manufacturer's instructions for times and temperature.
 Caroline Burke
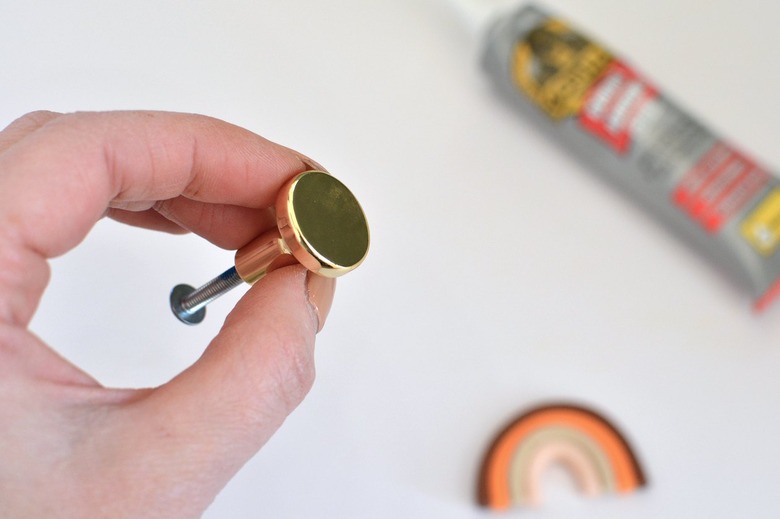
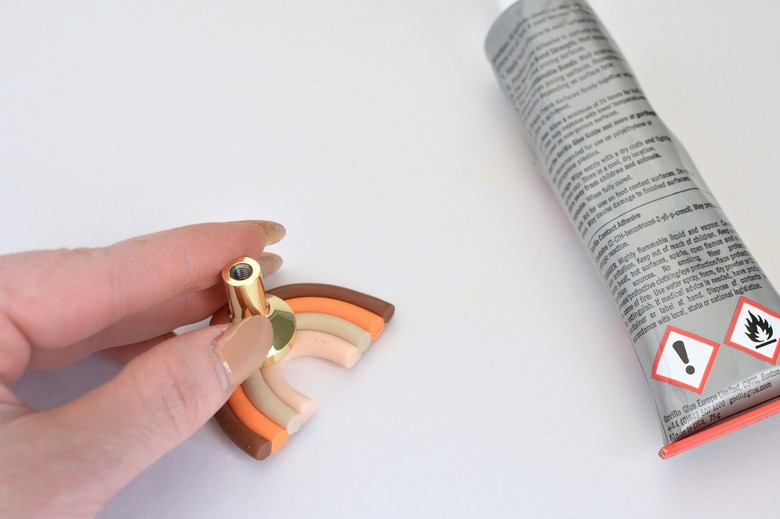
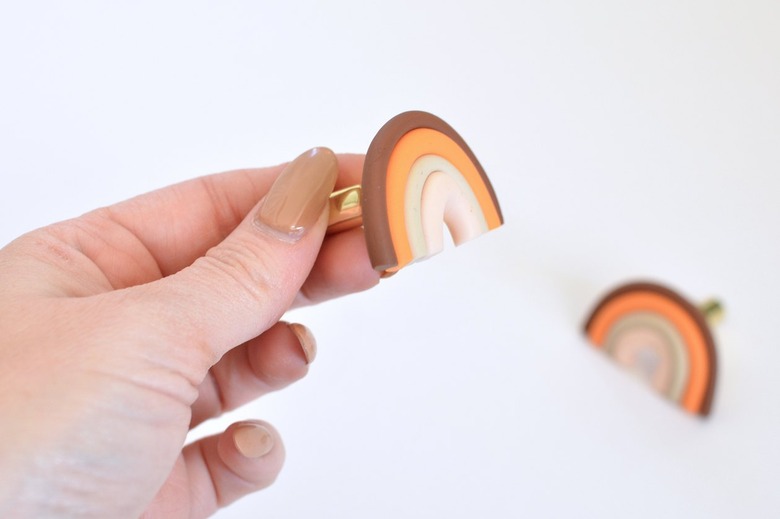
Step 8
Next you'll need to glue the rainbows to your hardware. Small flat knobs work best.
 Caroline Burke
Place the adhesive on both surfaces (the knob and the clay), and hold together to bond.
 Caroline Burke
Step 9
Once dry, the knobs are ready to use. Simply attach them to your drawers or doors using the screws provided.
 Caroline Burke
Such an easy way to update the look of your children's bedroom furniture!
 Caroline Burke