Add Decorative Trim To Your Curtains (No Sewing Required)
We may receive a commission on purchases made from links.
Curtains are to spaces what coats are to outfits — that last layer that really polishes the whole look. And while store-bought curtain panels are great for the budget, they can feel a little plain right out of the package. All it takes to jazz them up is a little bit of decorative trim. Whether it's tassels and fringe or pompoms and patterned ribbon, a simple embellishment can make your store-bought curtains look like custom drapery. And you don't even have to sew a stitch! Also, don't miss our simple hack for getting a high-end pinch pleat look with curtain rings.
 Trisha Sprouse
Things Needed
-
Decorative trim (rick rack, bullion fringe, gimp, pompom, tassels)
Step 1
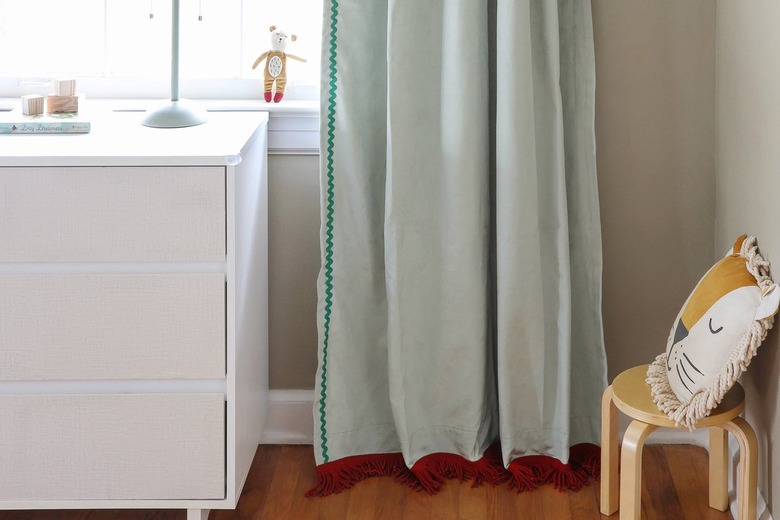
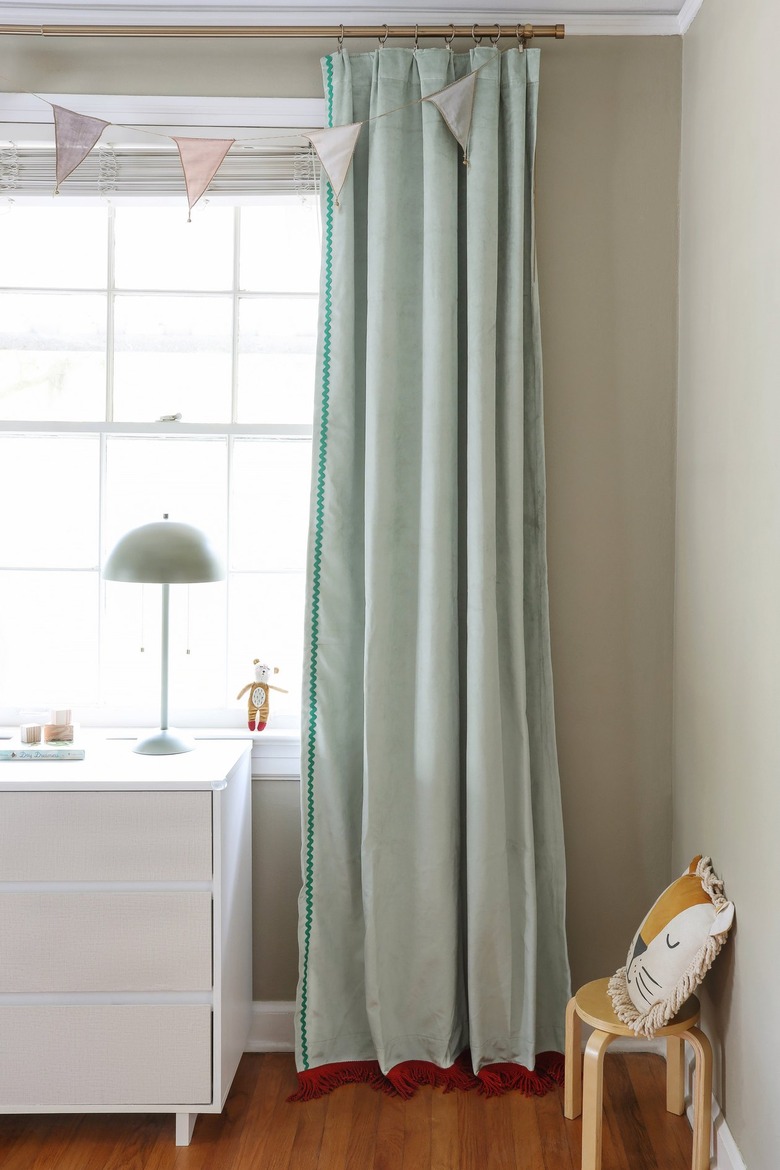
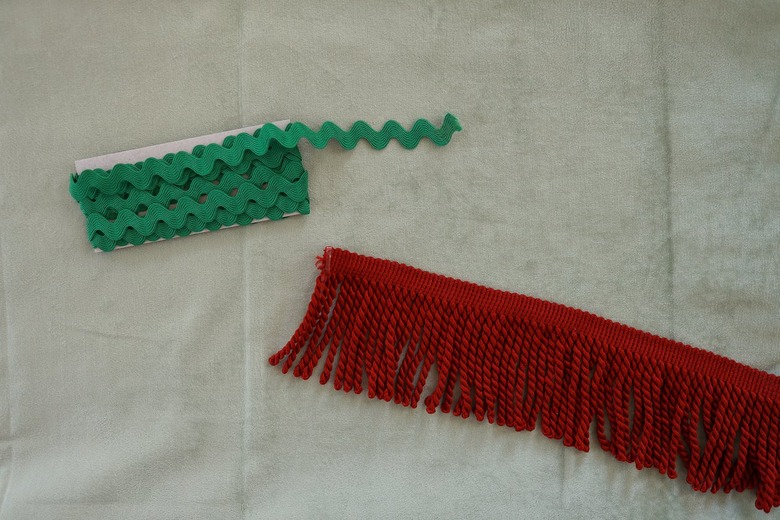
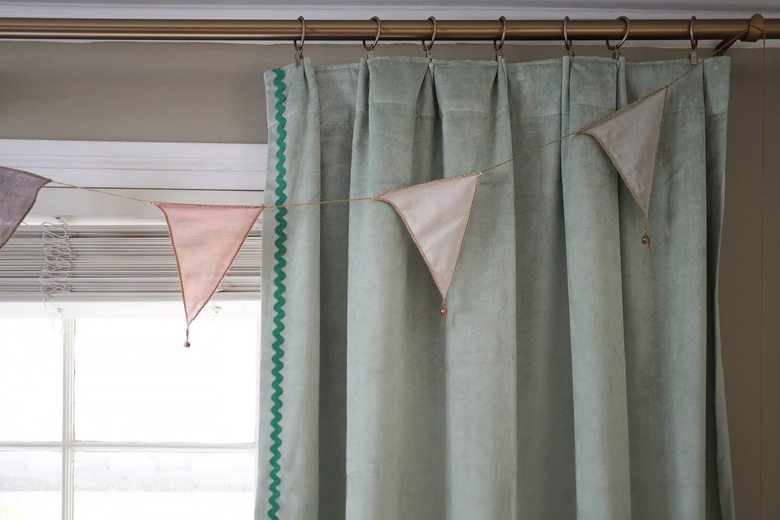
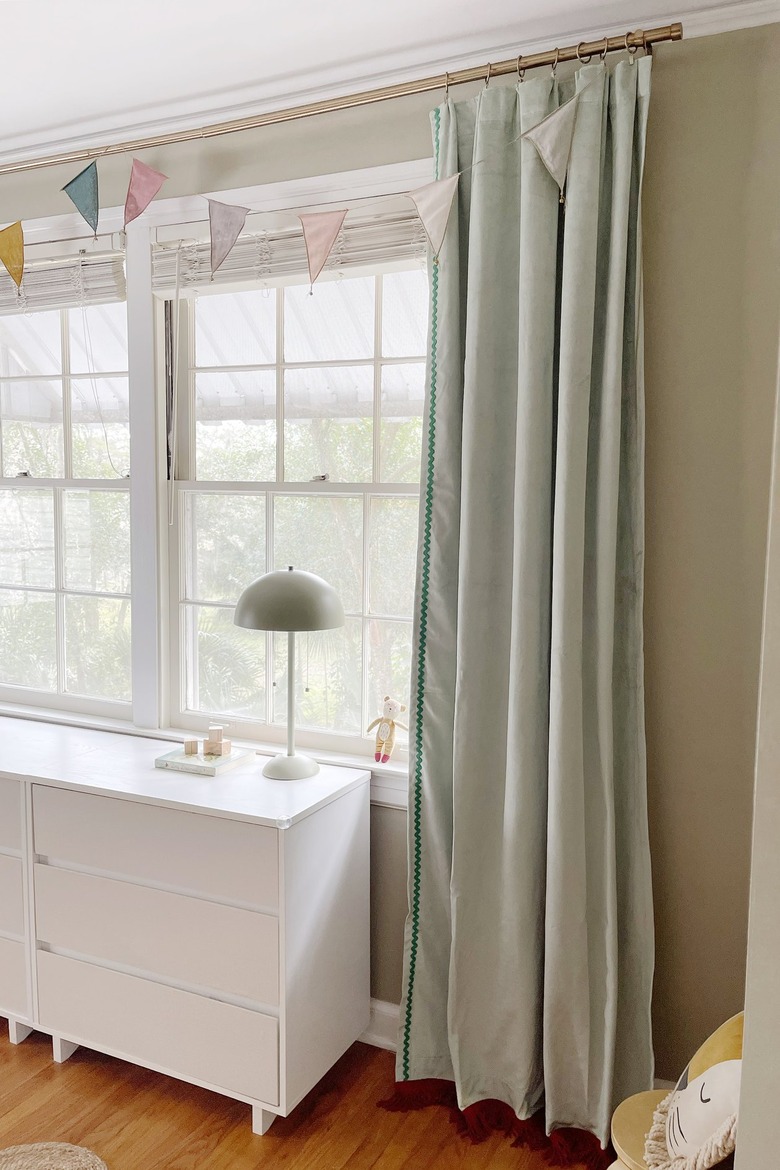
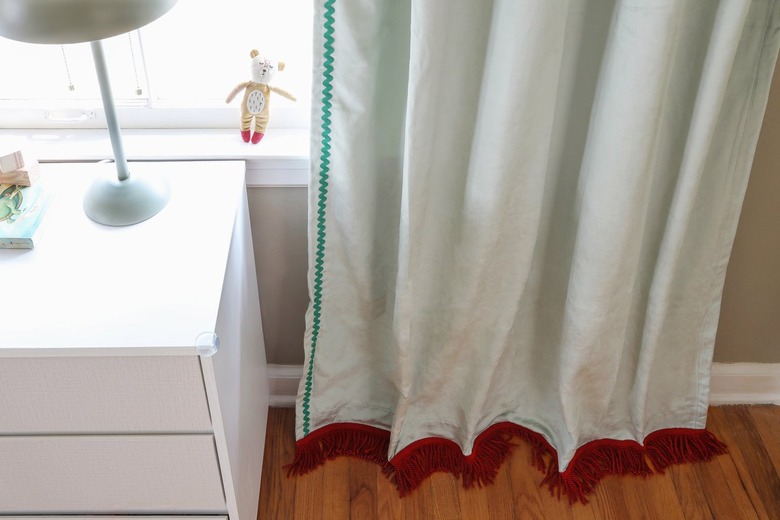
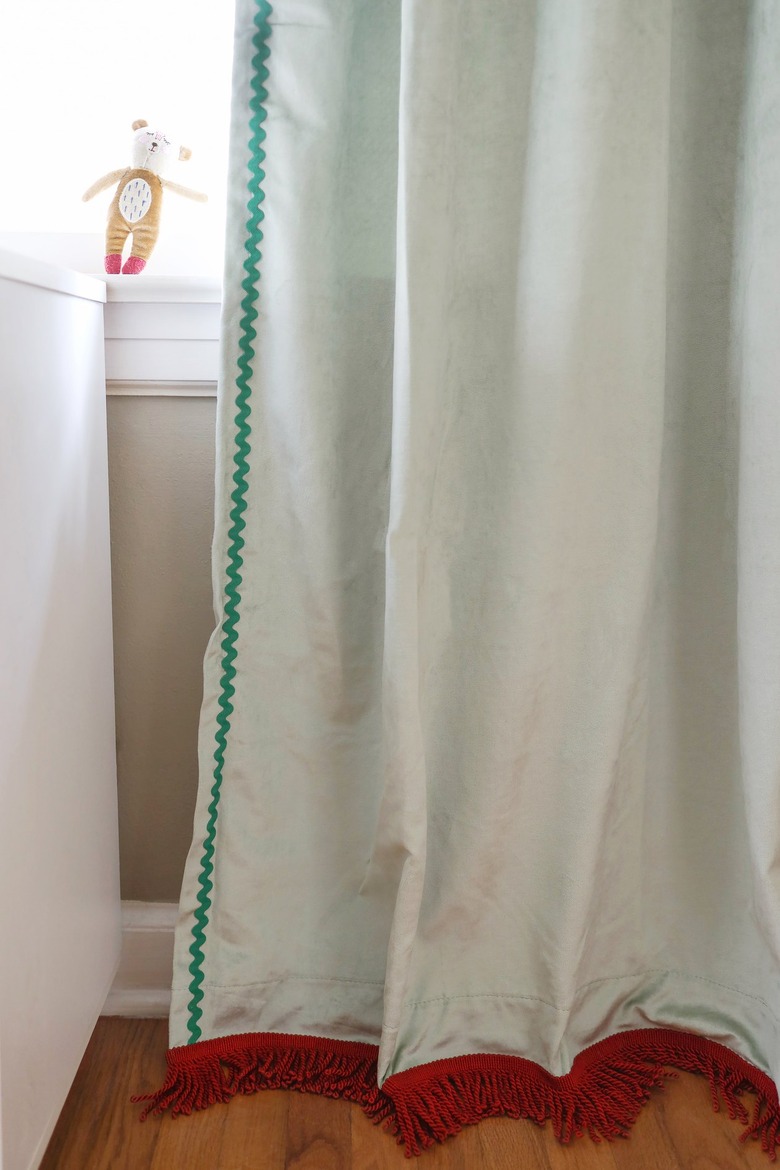
Plan what kind of trim you'd like to add to your curtains. You could keep it simple by just adding one type of trim along the sides or bottom, or you could combine various styles of trim to add color and pattern. Here, we've chosen an emerald green rick rack to add along the inner edge of the curtain panels and a brick red bullion fringe to add along the bottom.
Keep in mind how long you'd like your curtains to be when selecting trim that will go along the bottom edge. For example, we needed a little extra length because we wanted our curtains to slightly pool on the floor, so we selected a 3-inch fringe trim.
 Trisha Sprouse
Step 2
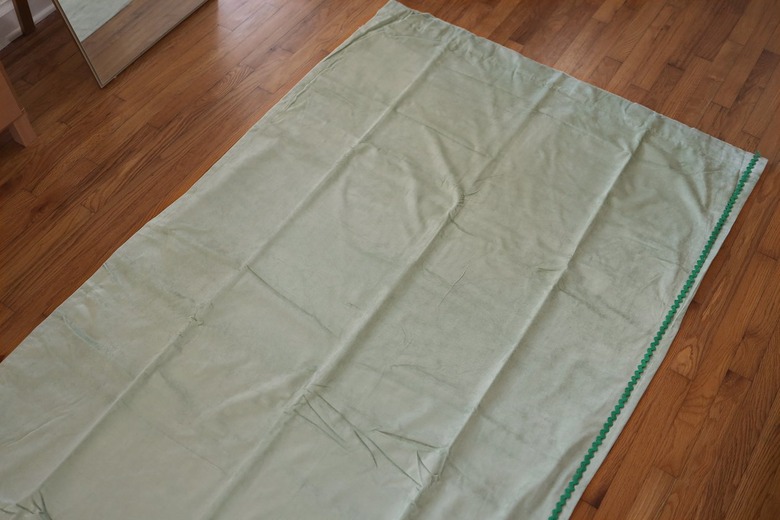
Lay your first curtain panel flat and smooth it out. If you plan to add trim along the sides of your curtains, like the green rick rack shown here, cut a piece of trim that's a few inches longer than the length of your curtain panel and lay it in place along the desired edge. We chose to attach it about an inch in from the edge, so that you could see the curtain color on each side of the trim.
 Trisha Sprouse
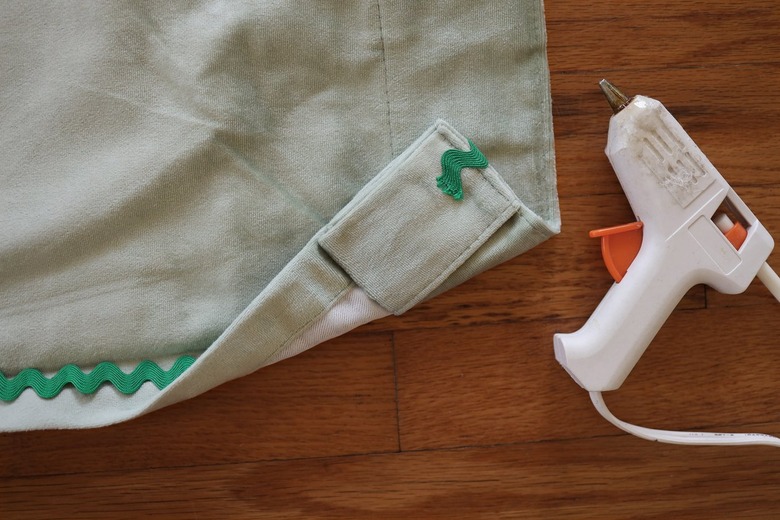
Step 3
Fold the raw edge of the trim over the top of the curtain panel, and glue it in place on the backside of the curtain.
 Trisha Sprouse
Tip
While you can use iron-on adhesive tape to attach most kinds of trim, fabric hot glue is the best no-sew option for rick rack due to its wavy edges.
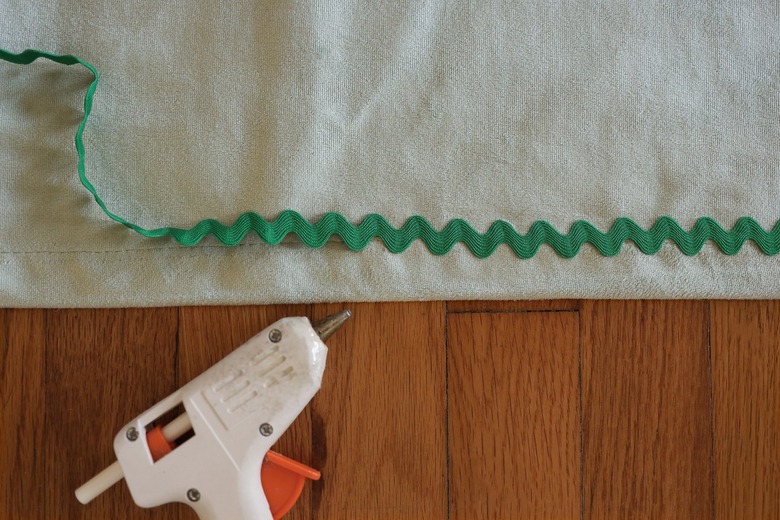
Step 4
Attach the rest of the ribbon on the front side, working in two-inch segments at a time. Go easy on the glue, so it doesn't ooze out from under the ribbon. When you get to the other end, fold the raw edge over and secure it to the backside of the curtain.
 Trisha Sprouse
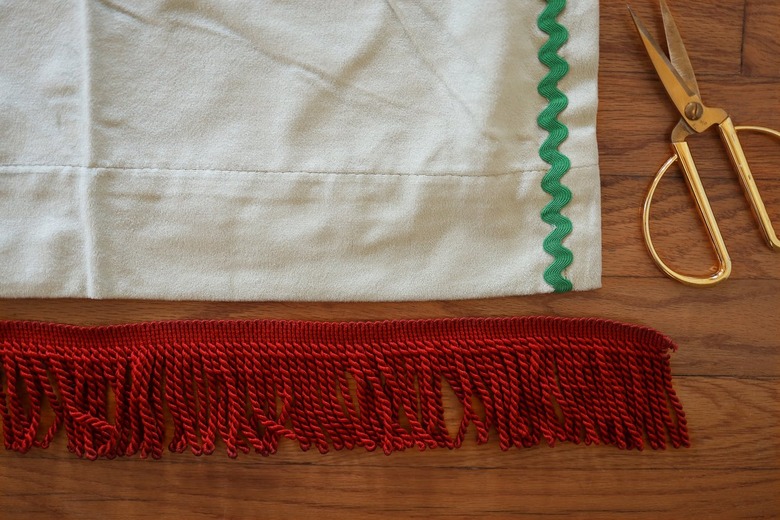
Step 5
When attaching trim to the bottom of your curtain, such as the bullion fringe shown here, cut a length that is a few inches longer than the width of your curtain panel.
 Trisha Sprouse
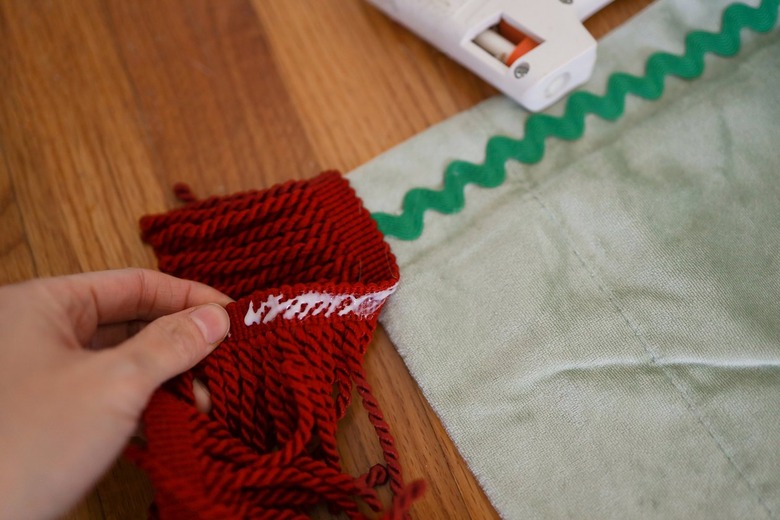
Step 6
Keeping in mind the length you'd like your curtains to be, position the fringe on top of the curtain panel. Fold the raw edge over to the backside of the curtain, and glue it in place.
 Trisha Sprouse
Step 7
Continue gluing the trim to the front side of the curtain panel, working in small segments at a time. When you get to the other end, fold the raw edge over to the backside and glue it in place.
 Trisha Sprouse
Step 8
One last hack to take your curtains up another notch! Instead of using the rod pocket or tabs that are sewn into your curtains, hang them with curtain rings instead. If you pinch the fabric together where you attach each curtain ring, it'll give your curtains that highly coveted pinch pleat look.
 Trisha Sprouse
Now you have completely custom curtains for your space, and you didn't have to spend a fortune for them!
 Trisha Sprouse
 Trisha Sprouse
 Trisha Sprouse