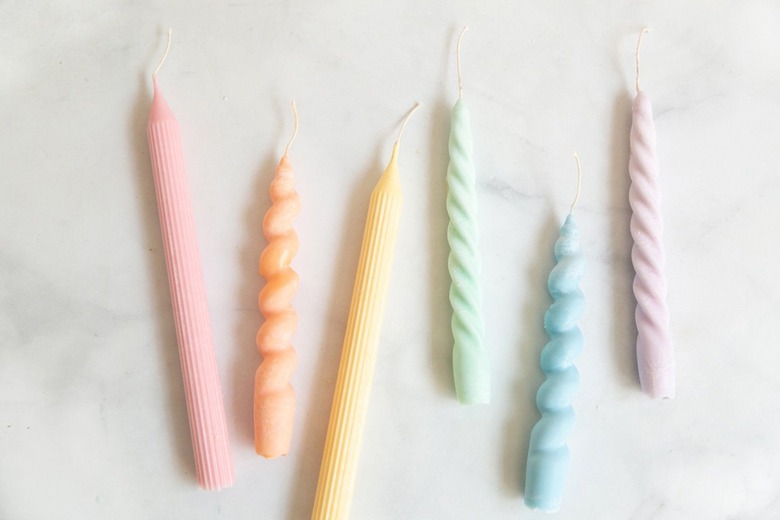
Cute, Creative Taper Candles To DIY
We may receive a commission on purchases made from links.
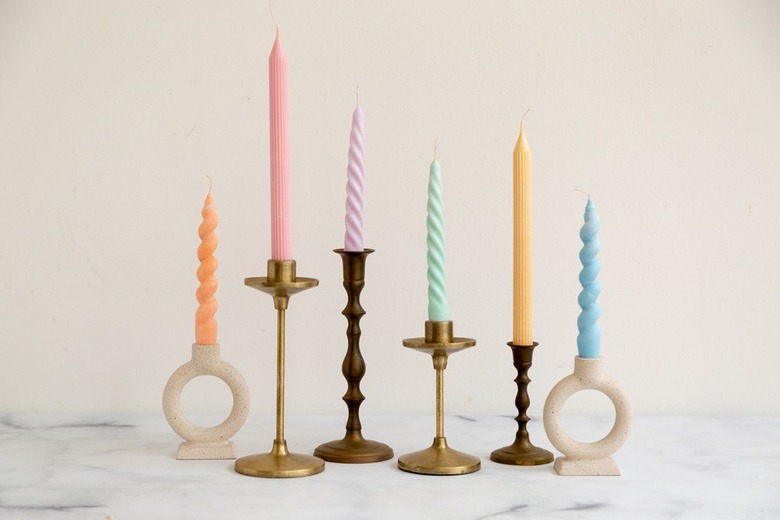
Have you been wanting to make your own candles? Once you try it for the first time you will quickly become addicted! The perfect style to start with are taper candles — ribbed, twisted, and plain are just some of the designs you can create. While you can find similar candles in stores, there is something so incredibly special about making your own handmade candles. We love placing these on a dining room table, a fireplace mantel, or a coffee table in cute candle holders.
This tutorial shows you how you can easily try your hand at candle making.
 Sara Albers
Things Needed
Tip
What kind of mold to use for taper candles? Candle molds come in hard plastic or silicone. We used both types for this project. We found the hard plastic molds to work best. The ribbed candles are made from the hard plastic molds.
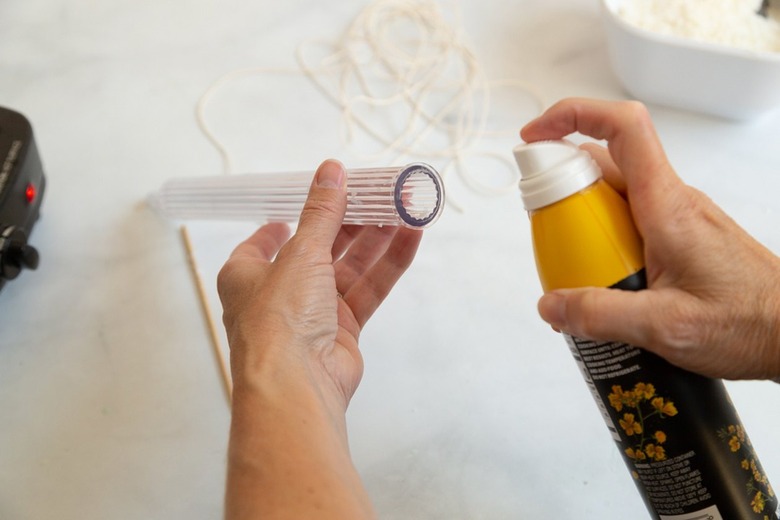
1. Prep Candle Mold
Spray a small amount of canola oil into the plastic mold.
 Sara Albers
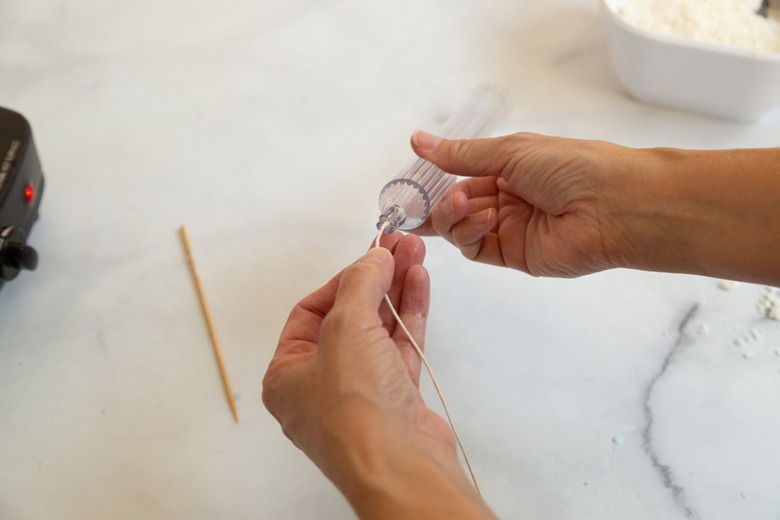
2. Add Wick
Thread the candle wick into the taper mold. Leave a few inches on each end.
 Sara Albers
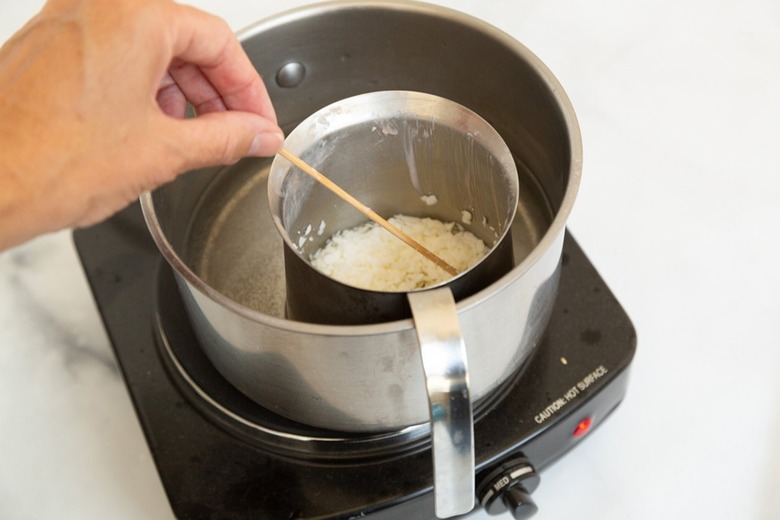
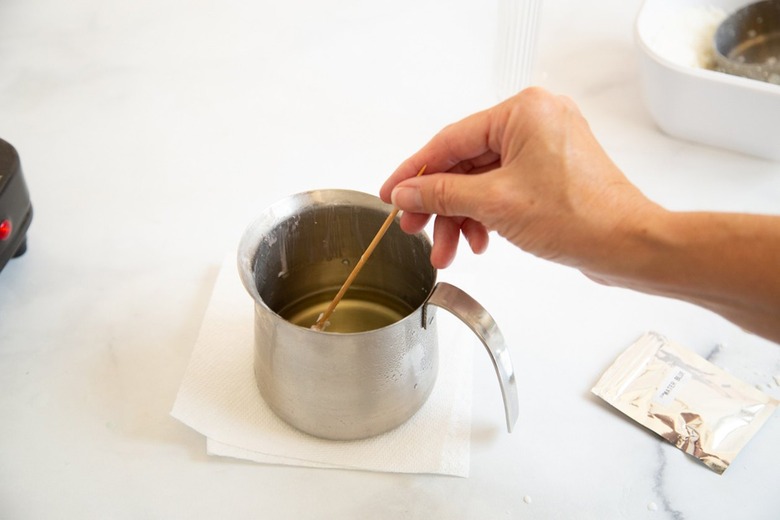
3. Melt Wax
Fill a pan with water and place the melting pour pot within the pan. (This works as a double boiler.) Add about 3/4 cup of the soy wax to the melting pour pot. Melt on a low boil and stir with skewer. Note: you do not want to overcook the soy wax. Use a candle thermometer to make sure the wax does not reach over 160 degrees.
 Sara Albers
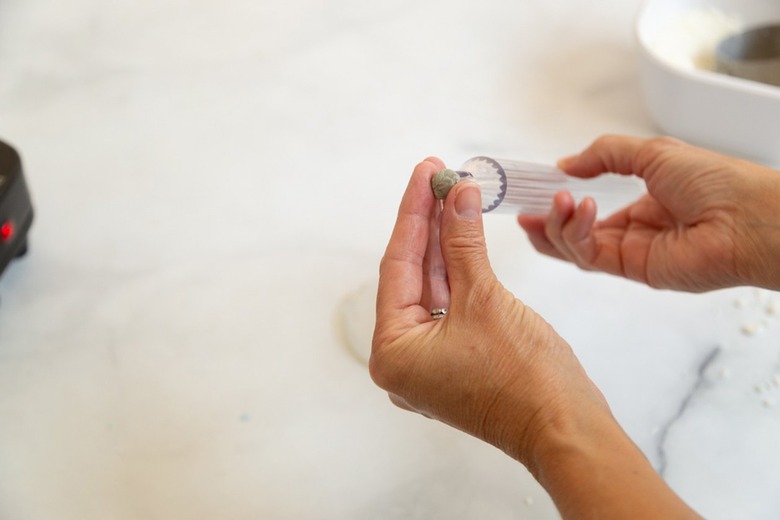
4. Add Color to Melted Wax
Add a small amount of color using the color wax chip. Stir into the melted wax.
 Sara Albers
5. Seal Top of Candle
Use sealant to seal the top end of the candle and place it into the stand. This will ensure that the hot wax will not pour through the opening.
 Sara Albers
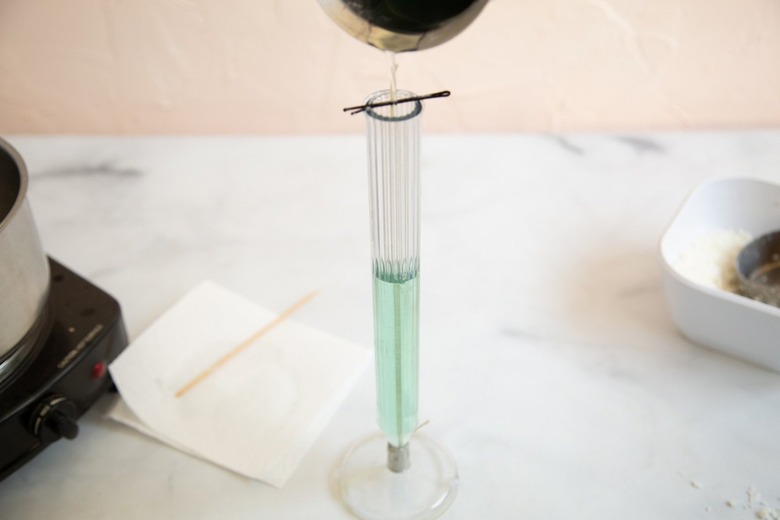
6. Pour wax
Slowly pour the wax into the candle mold. To secure the end of the wick, place skewers on either side of it, or hold the wick in place using a bobby pin. Allow to solidify overnight.
 Sara Albers
7. Remove From Mold
We found that putting the plastic mold in the freezer for a few minutes makes it easier to remove the candle from the mold. For the silicone twist molds, you can open the mold and remove the candle carefully.
 Sara Albers
These candles make for great gift ideas — as a birthday present, party gift for baby showers, or hostess gift. Simply wrap in a lovely bow or some twine.