This Candle-Making Tutorial Covers Everything You Want To Know

We may receive a commission on purchases made from links.
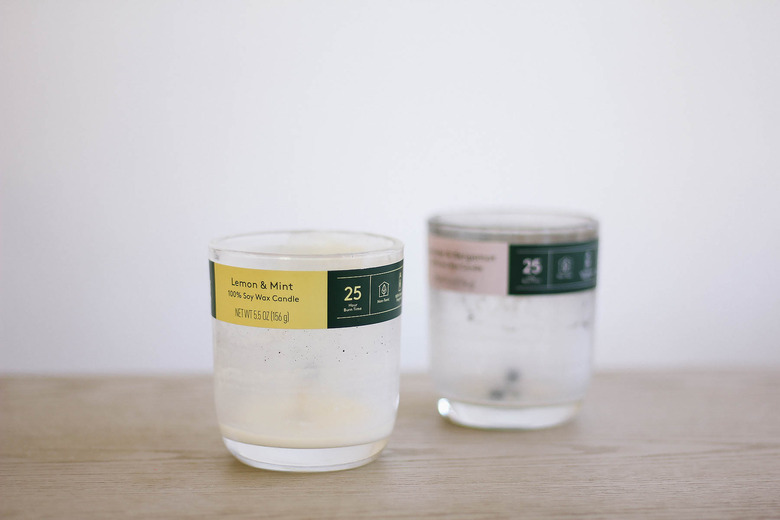
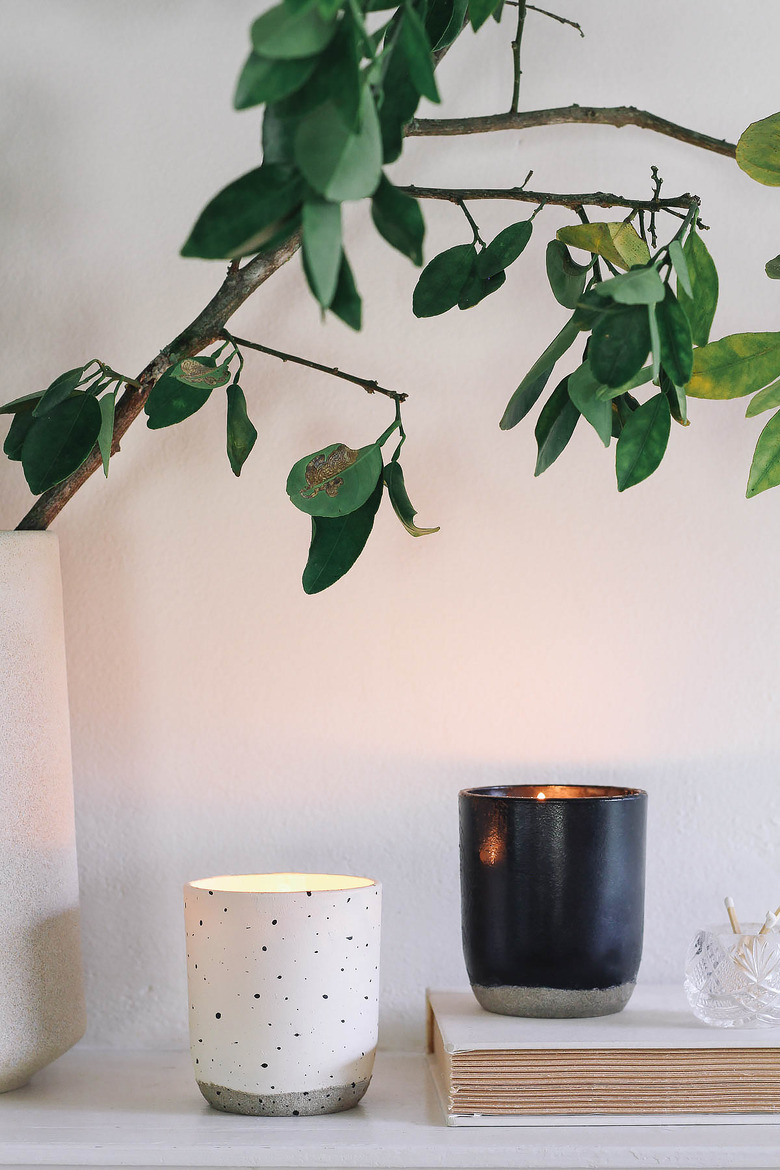
While we love a good candle around here, we're not fond of toxic chemicals that may be lurking in some of them. So, we decided to create a cleaner version from scratch, using better-for-you ingredients. And since we were already on the cleaner path, we thought why not also make them more sustainable? With a bit of paint, we were able to upcycle empty drugstore candles into trendy "ceramic" vessels. Paired with gorgeous scent combinations using essential oils, our cleaner candles not only look and smell like they come from a luxury brand, but are much better for you and the planet. (They also happen to make great gifts, too.)
Things Needed
-
Old candle jars (or empty condiment jars, mason jars, or similar heat-proof vessels)
-
White vinegar
-
Drop cloth or newspaper
-
Spray paint (we used a matte ivory color and a glossy black)
-
Black craft paint (optional)
-
Thumbtack or nail
-
Glass bowl or jar
-
Microwave or saucepan
-
Pre-waxed cotton wicks (our wax came with wicks)
-
Chopsticks or pencils
Choosing Your Wax and Scents
Choosing Your Wax and Scents
Did you know paraffin wax, which is the primary wax of choice in the modern candle industry, is a byproduct of petroleum? Which means it may emit some of the same carcinogens as diesel engine fumes. To create the cleanest burning candles, it's best to make candles with a plant-based wax, such as beeswax or soy wax, and 100% cotton wicks.
As for scenting your candles, the cleanest option is to use pure essential oils as opposed to synthetic fragrance oils, many of which contain harmful chemicals. However, it's worth noting there are some phthalate-free fragrance oils (like these or these) that are on the cleaner end of the spectrum, and offer a much wider and more complex scent selection than essential oils do.
 Trisha Sprouse
Clean the Candle Containers
Step 1
If you're reusing a candle container, pop the jar(s) in the freezer for an hour or so. This makes it easy to break up the wax and remove it from the jar without a lot of leftover residue.
 Trisha Sprouse
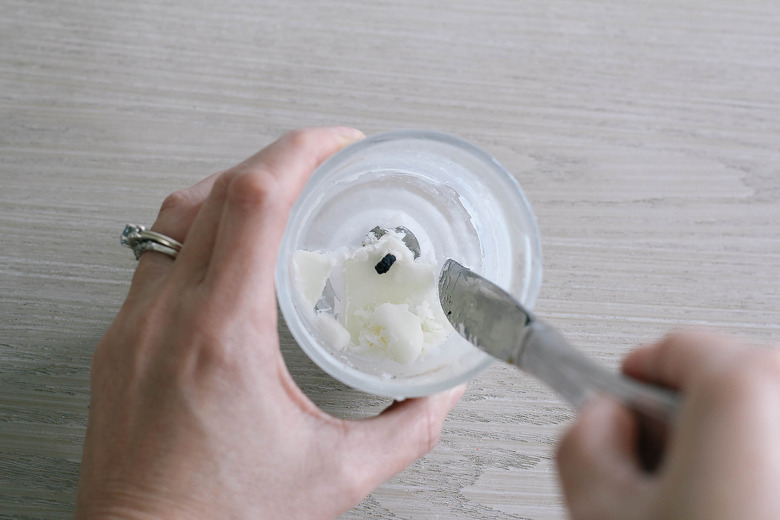
Step 2
Use a butter knife to gently break up the frozen wax, and then remove the wax pieces from the jar. If the wick doesn't come out with the wax, then apply gentle pressure with the tip of the butter knife to loosen it. If the wick is really stuck to the bottom, soak it in a little white vinegar for a few minutes, and it should pry off easily.
 Trisha Sprouse
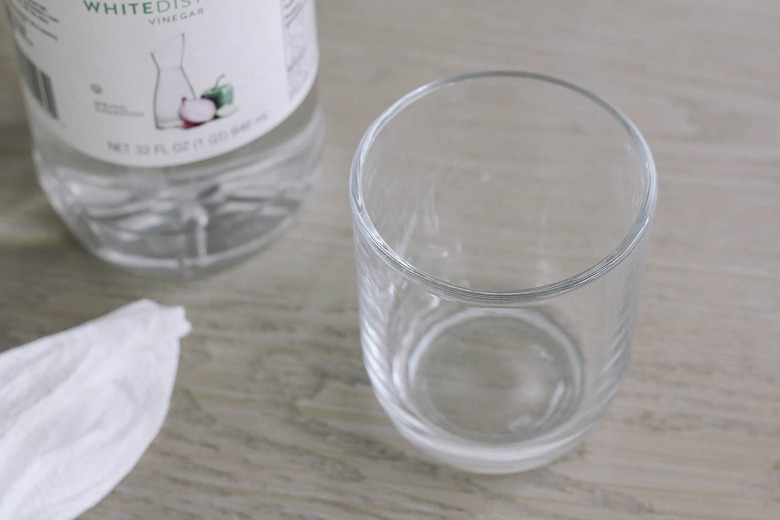
Step 3
If there are any labels on the jar, peel them off. If needed, use white vinegar to scrub away any stubborn residue. Then give the entire jar a good wash with dish soap and hot water. Dry thoroughly.
 Trisha Sprouse
Paint the Candle Containers (Optional)
Paint the Candle Containers (Optional)
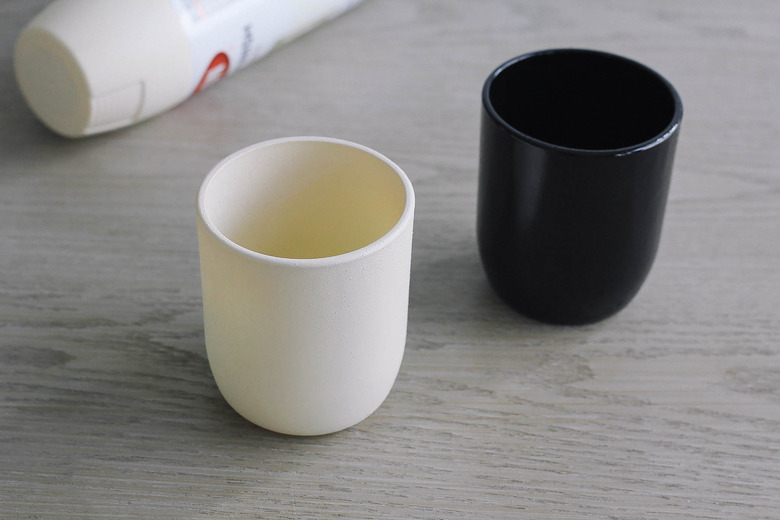
Place the jar(s) on a drop cloth or newspaper, and spray paint with your color of choice. We went with a matte ivory color and a glossy black color to mimic the look of glazed and unglazed ceramic. Spray several light coats, and then allow the paint to dry thoroughly.
 Trisha Sprouse
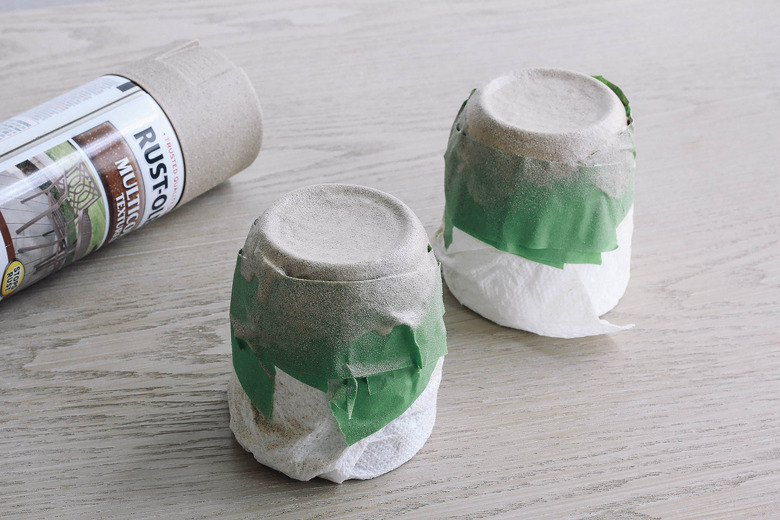
Step 1
Turn the candle upside down, and tape off a border around the bottom of the jar with painter's tape. It's fine if the taped line isn't straight — in fact, it'll look more artisanal if it isn't. Cover the top portion of the jar with a paper towel. Spray several light coats of the textured stone paint on the exposed area around the bottom, and let dry.
 Trisha Sprouse
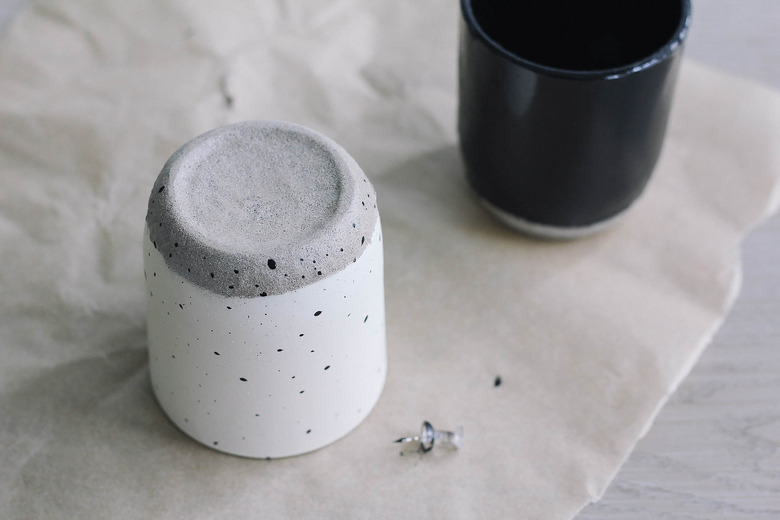
Step 2
Gently pull off the painter's tape and remove the paper towel. You could stop here, but if you'd like to create a speckled ceramic look, simply dip the tip of a thumbtack or nail into black craft paint and dot it randomly around the painted jar. Let dry.
 Trisha Sprouse
Make the New Candles
Step 1
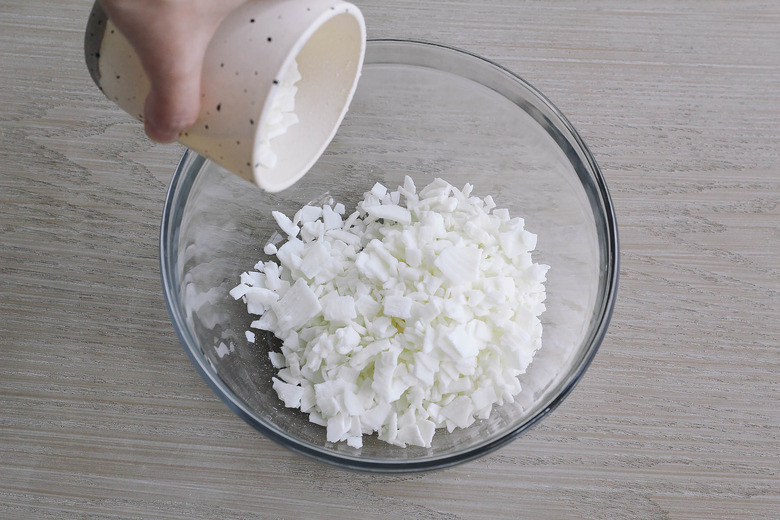
Use this hack to figure out how much wax you'll need: Fill your container to the top with wax, pour it into a glass bowl, and then repeat. (So, you'll be filling up the vessel twice with the wax.) Once it melts, it should be the correct amount to fill your container.
 Trisha Sprouse
Step 2
Place the bowl or jar of wax in the microwave, and heat on high until the wax melts completely (it only took two and a half minutes in our 1100-watt microwave). If you don't have a microwave, you can melt it over a double boiler by placing the bowl or jar of wax over a saucepan of boiling water.
 Trisha Sprouse
Step 3
To scent the wax, stir in the desired combination of essential oils (see our scent suggestions below). A good rule of thumb is to use 30 to 40 drops of essential oils per eight-ounce candle. It may seem like a lot, but keep in mind that essential oils will create a weaker scent than synthetic fragrance oils, and won't smell as strongly once the wax sets.
 Trisha Sprouse
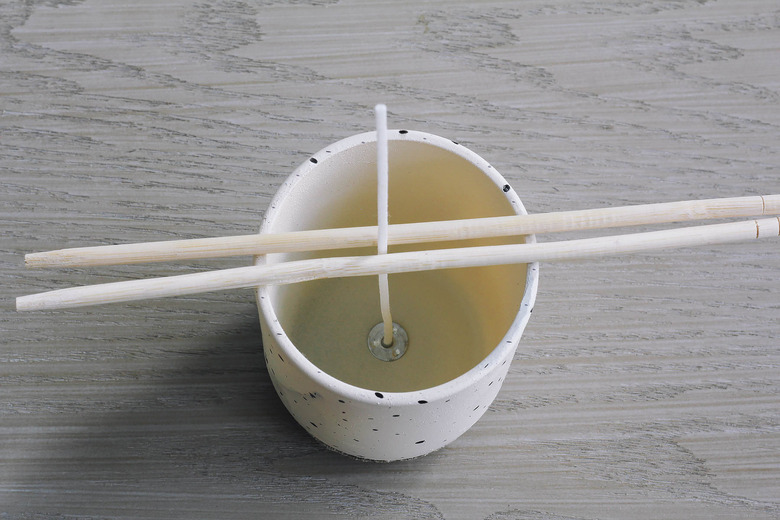
Step 4
Center the wick's tab in the bottom of the candle container, and use a glue dot or glue tape to secure it in place. Balance two chopsticks or pencils across the top of the jar and place the wick between them to keep it centered and upright.
 Trisha Sprouse
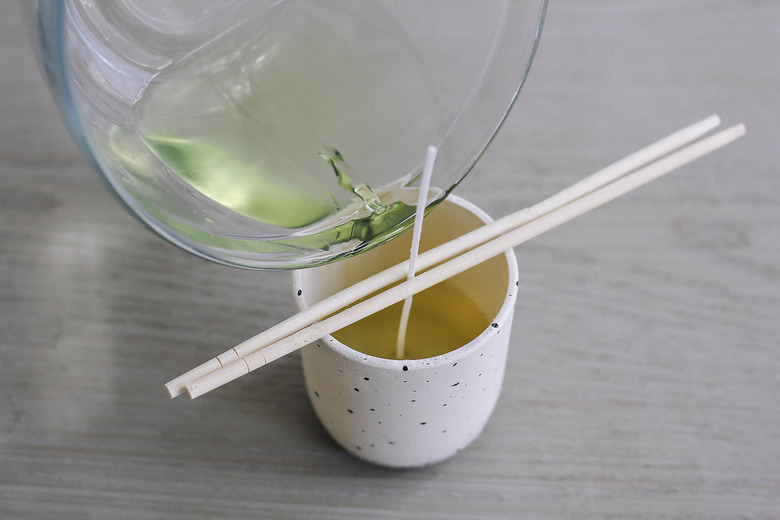
Step 5
Carefully pour the melted wax into your candle container, avoiding the chopsticks, and fill until there's about an inch of space at the top. It's best to pour slowly to avoid creating air bubbles, which can cause the surface to settle unevenly.
 Trisha Sprouse
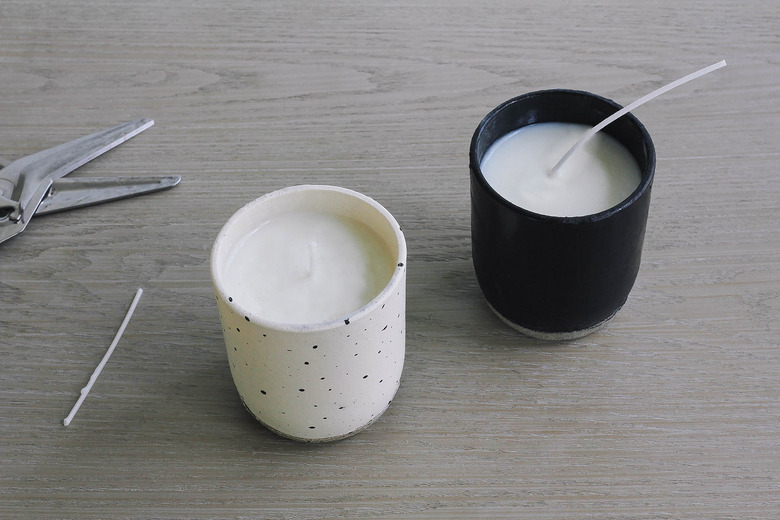
Step 6
Let the wax cool and harden completely, and then remove the chopsticks and trim the wick to a quarter of an inch long.
 Trisha Sprouse
Scent Suggestions
Scent Suggestions
To create candle fragrances that have a bit more complexity than single scents, be sure to blend essential oils to create top, middle, and base notes. Top notes evaporate quickly and are the scents that you smell before even lighting the candle, middle notes come through as the candle wax starts to melt, and base notes evaporate more slowly and tend to linger in the air. Examples of top notes include lavender, bergamot, orange, mint, and eucalyptus. Middle notes include chamomile, jasmine, ylang ylang, geranium, tea tree, and tobacco. Base notes include cedarwood, cypress, patchouli, sandalwood, frankincense, and vetiver.
Some of the various types of aromas you can create for your candle include: Fresh, Floral, Spicy, Sweet, Herbal, Citrusy, Earthy, and Woody. Here are a few ideas to get you started, but we highly recommend experimenting and coming up with your own custom blend!
- Fireside: Orange + Cypress + Frankincense
- Mountain Air: Orange + Clary Sage + Cedarwood
- Fresh Flowers: Lavender + Bergamot + Geranium + Ylang Ylang
- Spa Vibes: Peppermint + Eucalyptus + Rosemary
- Smoky Leather: Bergamot, Ylang Ylang + Patchouli + Cedarwood
- Fall Spice: Orange + Cinnamon Bark + Clove + Cedarwood
- Sleepytime: Lavender + Roman Chamomile + Juniper Berry
- Orange Bitters: Sweet Orange + Bitter Orange + Sandalwood
- Holiday Cheer: Orange + Pine + Fir Balsalm + Cedarwood
- Zesty Herb: Lime + Basil + Black Pepper
- Beachy: Lavender + Clary Sage + Rosemary + Cedarwood
- Library/Bookstore: Lemon + Patchouli + Birch + Ginger + Frankincense
 Trisha Sprouse
Candle Tips & Tricks
Candle Tips & Tricks
- The first time you light your candle, let it burn for at least two hours until the entire top is filled with melted wax. This helps the candle burn more evenly and prevents the middle of the candle from sinking below the rest of the wax.
- Trim the wick to 1/4-inch before each use to avoid black soot from forming on the sides of your jar.
- Keep the lid from your old candle, and use it to cover your new candle when not in use. It'll keep the scent from fading.
- Recycle your jar afterwards. You could turn it into another candle, use it as a storage vessel to hold items such as makeup brushes or pencils, or use it as a small vase for flowers.
 Trisha Sprouse