6 Easy Gutter Repairs You Can Do This Weekend
We may receive a commission on purchases made from links.
Although gutter repair isn't as enticing of a DIY project as painting a wall or swapping out drawer pulls, ignoring gutter issues like leaks or other visible damage almost always leads to other costly problems. A gutter system moves water from your roof away from the house — and a system that isn't working properly can lead to water-damaged siding or water that can pond at the base of the house's wall, possibly leading to damaged framing or leaks into the basement or crawl space.
You can hire a professional roofer or company that specializes in gutter installation to make the gutter repair, but many gutter problems are minor and make for relatively easy-to-complete DIY projects that can be tackled over the weekend.
Gutter Repair Basics
Gutter Repair Basics
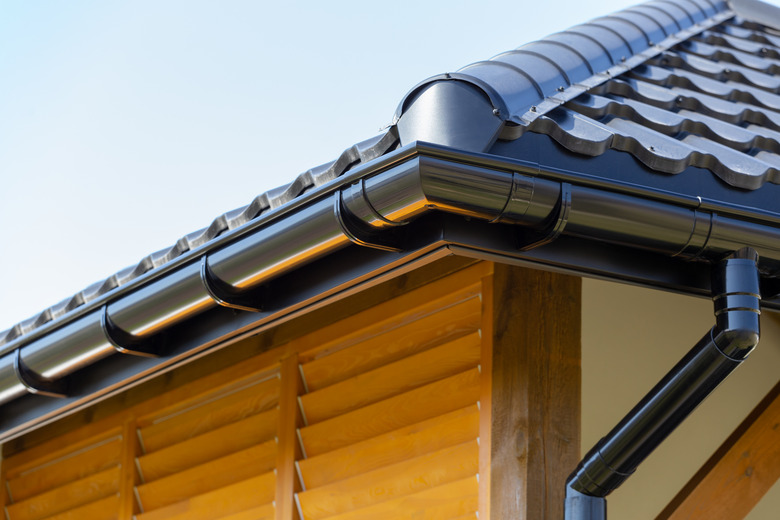
Before you begin a gutter repair — no matter how simple — it's crucial to know what it is you're working with. Gutters come in different materials, including plastic, aluminum, steel, and copper. They are available in different shapes, such as U-shaped and K-style, which have a flat bottom and look like the letter "K" when viewed from the side.
There are a variety of attachment devices for gutters, but aluminum K-style gutters that use a spike and ferrule system to hold them in place are very common. The rigid cylindrical ferrule goes inside the gutter, and the spike goes through the ferrule, which serves as a spacer. This allows the installer to drive the spike home without collapsing the gutter.
On a typical gutter system, the gutter sits against the fascia board — the wide, horizontal trim board running along the roof eave just below the edge of the roof. The fascia is attached to the ends of the rafters that support the roof system. On most well-designed gutter systems, either a gutter spike and ferrule or a screw-type gutter hanger is driven through the fascia into the rafter tails, or rafter ends. Rafters are usually spaced 16 or 24 inches apart.
Although there are many different gutter components in a typical system, there are no moving parts, and most gutter repairs can be made using common tools. For many people, the hardest part about making a gutter repair is the thought of working from a ladder or scaffolding. Even on a one-story house, most people need a ladder to work comfortably at the gutter line, so ladder safety is important.
1. Tighten Loose Gutters
1. Tighten Loose Gutters
There are a few reasons a gutter can come loose at its attachment points, including storm damage and the weight of ice dams. There's a difference between reattaching a gutter in a few spots and removing and reinstalling a gutter that is sagging badly, however, both in time and skill level.
To make spot repairs on a small section, remove the old spike. If the gutter is loose, you should not have much trouble pulling out the old spike and ferrule. Rather than using another spike to replace it, consider a gutter hanger. They slip under the lip of the gutter and come with an attached screw that you drive into the rafter tail. They are hidden from the ground, so it does not matter if they don't match the other hangers.
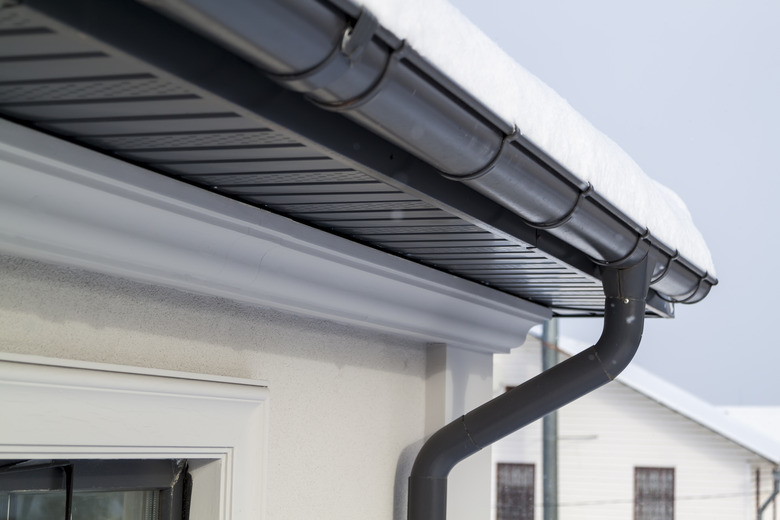
To install a hanger, fit the hanger into the gutter and then push the gutter into position. There is probably a mark on the fascia where the gutter was installed originally. If you are not sure about the location, place a level on the top edge of the gutter. The gutter should pitch slightly toward the downspout. Fasten the gutter hanger with a drill and nut driver (or screwdriver tip depending on the screw type), driving the screw through the back side of the gutter, through the fascia, and into the rafter behind the fascia. Gutters come in 4-, 5-, and 6-inch widths, so be sure to get the hanger designed for your gutter.
2. Seal Up Leaky Gutters
2. Seal Up Leaky Gutters
Many gutters are installed in sections, and where sections are joined together, there is the potential for a leak to develop. In most cases, section connections are sealed with a gutter mastic or caulk during installation, but over time, the mastic can wear away, causing a leak. Even seamless gutters that are fabricated on-site and installed in one piece have end caps where a leak can develop.
In many cases, you can refresh the seal by scraping away as much of the old mastic as possible. Then, clean and dry the area and apply new sealant that is formulated for your type of gutter.
If the leak isn't at a gutter joint but is midspan and due to damage or rust, you have a couple of options. For small holes, you can apply a gutter sealant or cover the hole with a waterproof tape made for gutter repair. Follow the directions on the product but typically, you will need to clean and dry the area and remove any rust using a stiff-bristle brush.
For larger holes in aluminum gutters, you can buy rolls of aluminum flashing to create patches. Working on the inside of the gutter, clean and dry the area around the hole. Cut a patch to size using tin snips and set the patch in gutter mastic.
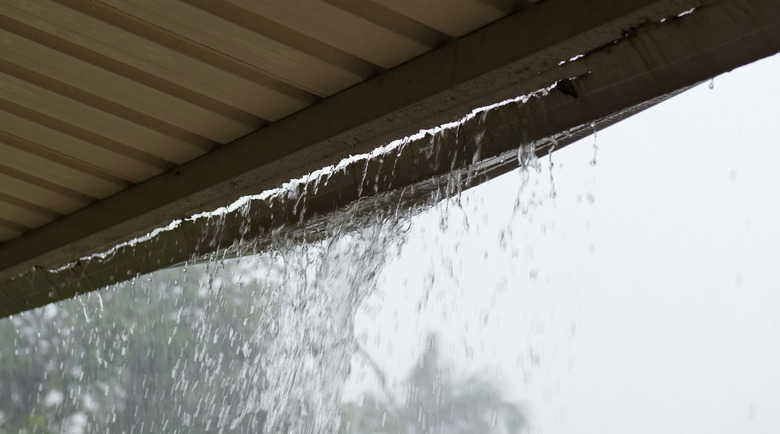
Sometimes, what appears to be a leaking gutter is rainwater or melting snow that works its way behind the gutter and trickles down the wall. This situation can also cause the fascia to rot. Ideally, a metal drip edge installed along the edge of the eave should help direct water into the gutter, but sometimes, the drip edge is missing or is installed incorrectly.
To fix the problem, install a roof apron, which is an L-shaped metal flashing, along the edge of the eave. The flashing is sold in 10-foot lengths that you can cut with tin snips to the correct size. Tuck one edge under the shingles and let the other fall into the gutter. You will have to notch the flashing around the gutter fasteners. Follow the manufacturer's directions for securing the flashing in place.
3. Deal With Clogs
3. Deal With Clogs
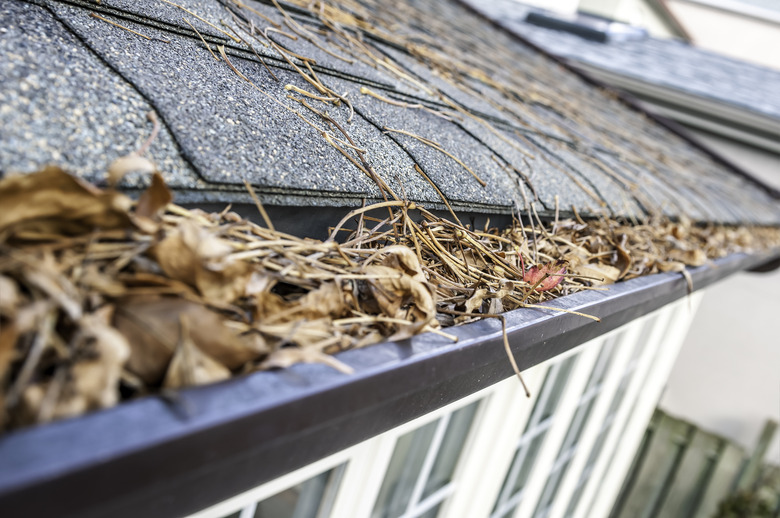
Routine gutter cleaning is essential to keeping the gutter system running smoothly, but sometimes, clogs develop that interrupt the flow of water. A blockage in the gutter is easy to spot and remove.
If you think that the gutter drains slowly, place a 4-foot level on the gutter's edge to make sure it is pitched properly. The recommended pitch is 1/4 to 1/2 inch for every 10 feet of gutter. If the pitch isn't right, you will need to remove and reinstall the gutter:
- After you remove the old gutter, establish a high point on the end of the gutter opposite the downspout and drive a nail partway into the fascia at the desired height for the back edge of the gutter.
- Hook a chalk line onto the nail and pull the line to where the far end of the gutter stops.
- Stretch the line taut and have your helper hold a 4-foot level up to the line; the line should be out of level by 1/8 to 3/16 inch.
- Snap the chalk line onto the fascia.
- Install the gutter hangers while the gutter section is on the ground, if desired. Just be sure that they are spaced so that you can attach them to the rafter ends. Otherwise, you can add them as you go once the gutter is in place.
- Lift the gutter into position setting its back edge on the chalk line and drive the hanger screws home.
If the pitch is correct and the gutter still clogs often, consider installing a gutter guard to keep debris out of the gutter. There are a number of different types available.
Clogs in downspouts are another matter because in most cases, you don't know where the clog is or even what is causing the blockage. Start by spraying a garden hose full force into the top of the downspout. You can also insert a drain snake into the bottom of the downspout and work it upward. This should remove the clog.
Each section of a downspout should fit into the one below it. If the lower section fits inside the one above it, there may be a leak. Remove the sheet metal screws and assemble the downspout properly. Use 1/2-inch sheet metal screws to reattach the sections. Longer screws can snag material in the downspout and cause a blockage.
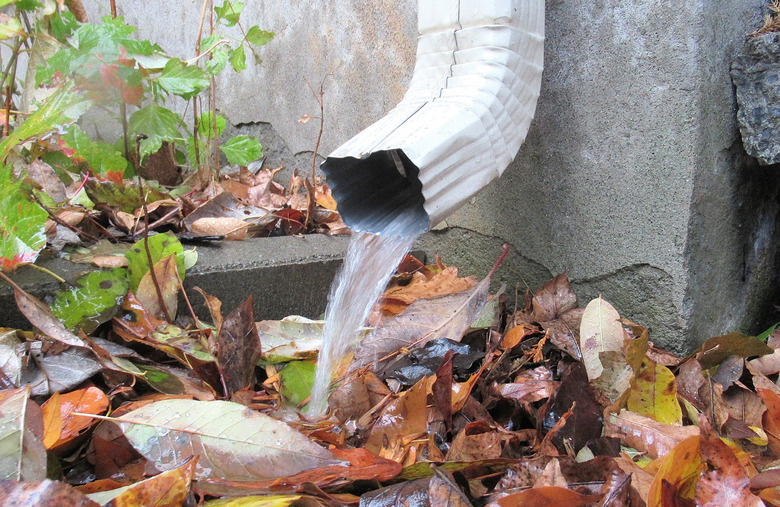
4. Correct Any Ponding
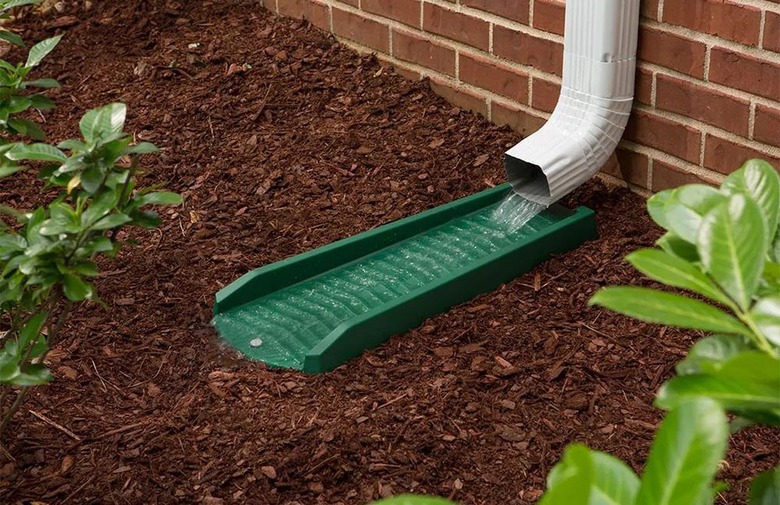
4. Correct Any Ponding
Some downspouts end in straight sections that simply dump the water at the base of the house, but that defeats the whole purpose of a gutter system. The goal is to move the water away from the house. At the very least, the last section of downspout should be a curved elbow.
There are inexpensive gutter splash blocks that you can pick up at a hardware store or home center. Many are made of hard plastic and extend out 24 inches. You can find them in green to match the lawn and brown to match mulch. Simply set them in place.
There are also flexible extensions that you attach to the end of the downspout. The flexibility lets you place the exit point for the water wherever you want it. Because they are enclosed, you can bury them in mulch for a neat appearance.
Most extensions are plastic and work with any type of gutter. You do have the option of using aluminum extension sections that contain hinges that you screw to the end of the downspout. The hinge allows you to move the extension out of the way when you mow the lawn.
5. Extend Overflowing Gutters
5. Extend Overflowing Gutters
If your gutters tend to overflow during moderate to heavy rains and there is nothing clogging the system, the gutters may be too small for the home. A gutter installer will determine the width of the gutters you need by considering the square footage of the roof area being drained and the slope of the roof. So, replacing a 5-inch gutter with a 6-inch one may solve the problem. Discuss the problem with a professional roofer or gutter installer.
Sometimes, water splashes over gutters where the gutter is at the foot of a roof valley, however. Valleys are where two roof planes meet, and a lot of water is funneled into the valley. Gutters at this location usually make hard right-angle turns, which also interferes with the water flow. Attaching a splash guard at this point can help channel the runoff into the gutters without overflowing. Install the guard on the top edge of the gutter using caulk and sheet metal screws.
6. Fix Rotted Fascia
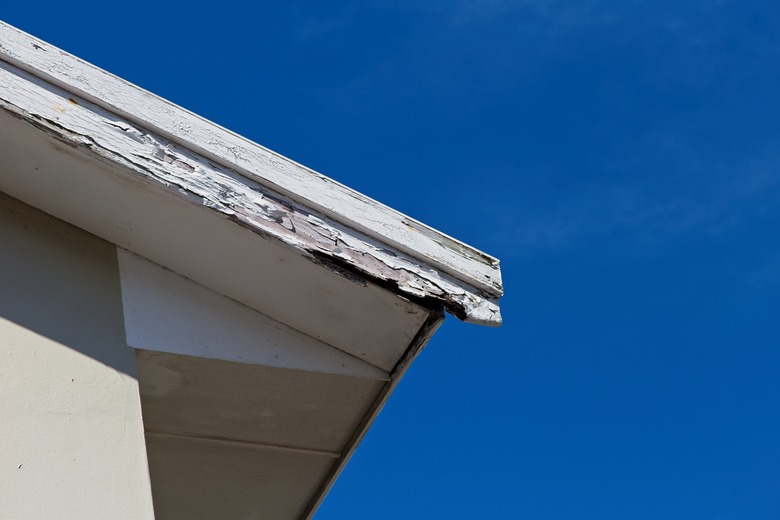
6. Fix Rotted Fascia
Rotted fascia is not only unsightly but it can provide entry to your attic for birds and other critters. Unfortunately, to make the repair, you will need to remove the gutter in order to tear out the fascia board. If only part of the board is damaged, you can cut out the damaged section without removing the entire board.
- Locate the rafter end that is just beyond the damaged fascia. There are usually nails in the fascia to help you locate the rafters.
- Cut the gutter just beyond the rafter. An oscillating multitool fitted with a metal cutting blade works well for this.
- Cut out the damaged fascia, making a straight cut that exposes half the rafter end. You will nail the new fascia section to the rafter as well as nail the existing portion of fascia to the same rafter.
- Cut the new fascia section to match the existing board, usually 2x6, 2x8, 1x6, or 1x8.
- Apply exterior wood glue to the edges and slip the new piece in place.
- Use 2-inch or 3-inch galvanized nails (depending on the thickness of the fascia) to secure the new section.
- Prime and paint the new board. When dry, reinstall the gutter.
- Use gutter couplers or joiners and mastic to attach the new section to the old.