How To Repair Sagging Gutters
We may receive a commission on purchases made from links.
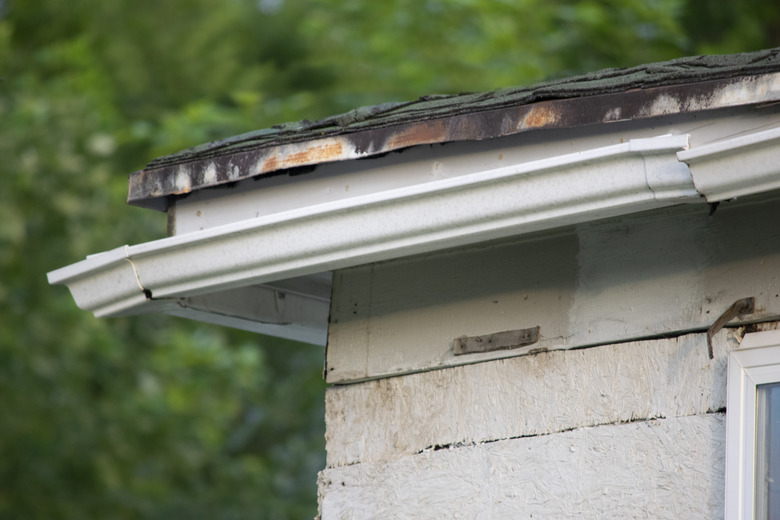
Sagging gutters not only ruin curb appeal but they also prevent rainwater from channeling properly off the roof through gutters and downspouts. This allows water to spill onto exterior walls and pool near the foundation, potentially flooding the basement or crawl space (and creating a major headache for you). Gutters sag when old fasteners come loose over time. Straightening them is usually a simple matter of replacing the old fasteners with better screw-type hangers.
It's essential to repair a sagging gutter problem immediately — not only because it's unattractive but because it compromises your home's drainage system. To address sagging rain gutters, you can hire a professional gutter company for around $75 to $200, but if you're confident working on a ladder, it's an easy DIY home improvement project when you use the right tools, materials, and hardware. Follow the proper steps and procedures to ensure a secure hold from your gutter to the structure of your home.
Causes of Sagging Gutters
Causes of Sagging Gutters
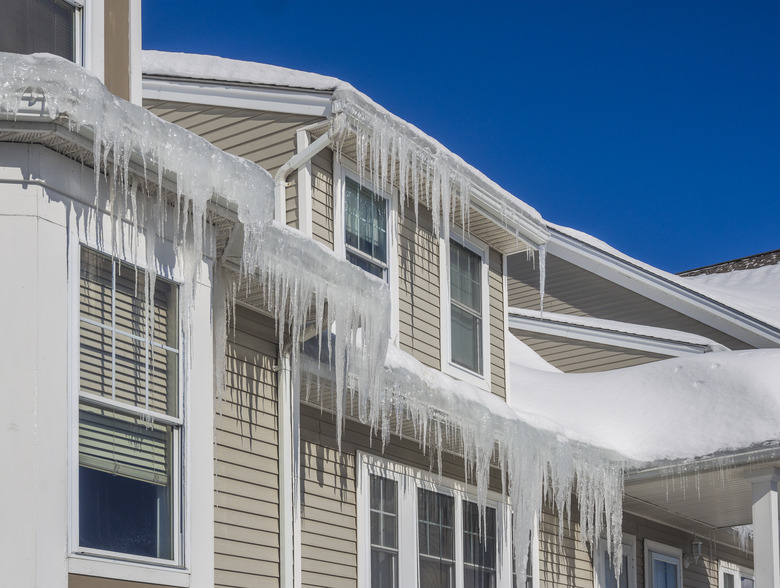
One of the biggest causes of sagging gutters is the weather, specifically snow, ice, and rain. In winter, snow and ice put extreme weight and pressure on gutters, pushing them down and causing them to sag in the middle. Two feet of level snow from one snowfall actually weighs 60 pounds, which weighs down on your gutters, and an inch of rain falling on a 40 x 70-foot roof weighs a whopping 1,743 pounds.
In autumn, this rainwater gets trapped by fallen leaves that prevent the water from flowing through downspouts, which clogs and weighs heavily on your gutter system. This puts pressure on your gutters — especially if you neglect to clean your gutters properly after leaves fall.
A good defense against the weather is using strong, durable hardware and fastening your gutters to the fascia board and rafters. Inferior hardware that comes loose allows gutters to sag, which leads to homeowners needing to refasten hardware periodically.
Why Gutter Hangers Work Better Than Spikes and Ferrules

Why Gutter Hangers Work Better Than Spikes and Ferrules
If you know about gutter hardware, you're familiar with the old spike and ferrule hardware system that may be on your home right now. However, when compared with hangers with hidden screws, the old system falls short in many areas.
Gutter Spike and Ferrule System
The conventional method of spike and ferrule systems consists of 7-inch spikes and 5-inch ferrules, which are little pieces that look like cylinders and act as spacers to prevent the spike from crushing the gutter. Spikes are driven through pre-drilled holes in the front of the gutter and then through the ferrule inside the gutter. Then, they pierce the back side of the gutter and are driven through the fascia board and into the rafter located behind the fascia.
There are several reasons they fall short:
- Gutter spikes aren't aesthetically pleasing. They're visible from the ground, which puts a damper on your curb appeal.
- Gutter spikes aren't DIY-friendly. When you hammer in spikes and miss with your hammer, you badly dent the gutter. It can be tricky to drive the large spikes and keep everything straight.
- Gutter spikes don't have threads. Since gutter spikes are nails, they don't contain threads that prevent the fastener from pulling out. Spikes can loosen under the weight of ice and snow, causing them to detach from the fascia board. This usually means you'll need to hammer them back into place or replace them as needed.
Hidden Hangers With Screws
The design of concealed hangers with hidden screws forms a stronger hold and looks better on your property. The reason why there's a stronger hold? This is because you're fastening screws through the 3/4-inch-thick fascia and into the rafter. This enables you to drive screws into the structural lumber for a better hold.
Hangers with screws come in 4-inch, 5-inch, and 6-inch sizes to fit most standard gutter sizes. When choosing new hangers, opt for heavyweight gutter hangers with hidden screws and install them at every other rafter location.
There are several reasons they are preferred:
- Gutter hangers with hidden screws aren't visible from the ground, giving your gutters a more seamless appearance.
- Screws have threads. The screws in the gutter hangers contain 2 inches of coarse thread that screws into the fascia and rafter, providing a stronger hold than spikes that don't contain threads.
- Screws allow for expansion and contraction. The screws in the hangers hold better than spikes by resisting the expansion and contraction of the wood.
Examine your fascia board to ensure there isn't any wood rot or other damage prior to installing new gutter hangers and replace the board if necessary.
Things Needed
How to Repair Sagging Gutters
1. Clean Leaves and Twigs Out of Your Gutters
Gutter repair requires a clean work area because you don't want to work with a pile of leaves in your way. Ensure your gutter is clean and free of any dirt, leaves, or clogs that can get in the way of your project.
- Slip on your work gloves.
- Climb the ladder and scoop up any leaves and dirt from your gutters.
- Place them in a bucket or empty them on the ground and collect them later.
2. Snap a Chalk Line to Keep Hardware Straight
When your gutters are sagging considerably, snapping a chalk line will help you create a straight line to keep your gutter straight. A chalk line is the best tool for marking a straight line over long distances.
- Hold the chalk line at each end of the gutter section with the aid of a helper. Align the string with the back edge of the gutter at each end.
- Pull the chalk line really tight and snap it near the middle to create the line. If you don't have a helper, drive a small nail (like a finish nail) at one end to hold the hook end of the chalk line and then pull the line taut from the other end.
Tip
Creating a straight line does not mean you will make your gutters level. Gutters need to be sloped 1/2 inch every 10 feet of gutter for proper drainage.
3. Remove Old Fasteners
If your gutter spikes have loosened from the fascia board, you'll need to remove the spikes and ferrules, but using a pry bar or hammer alone can crush and dent aluminum or metal gutters made from thin sheets of metal. A simple solution is to give your pry bar leverage and prevent crushing by using a custom-cut wood block:
- Measure the inside of the gutter and cut a wood block from a 2x4 using a circular saw. The block should fit snugly inside the gutter.
- Position the block inside the gutter next to the spike you're removing.
- Use a pry bar to extract the spike, pivoting the bend or heel of the bar over the block location.
- Remove the ferrule from inside the gutter.
4. Mount the New Gutter Hangers
Gutter hangers need to be driven through the fascia board and into rafters since rafters will be the strongest point. Rafters are positioned 16 inches apart and run on each side of the roof from the ridge board at the highest point of the roof down to the wall plate. If the rafters are not visible from the underside of the eave, look for nail heads in the fascia board, indicating the rafter locations. It's best to use a nut driver instead of a screwdriver to screw in hangers because screwdrivers tend to strip screw heads.
- Position a gutter hanger at each rafter location.
- Hook the front end of each hanger under the lip on the front of the gutter and slip the back end over the back edge of the gutter.
- Lift the gutter as needed so the back edge is aligned with your chalk line. Drive the hanger screw into the fascia board and rafter using a drill and nut driver attachment. Drive the screw all the way so the gutter is held firmly in place.
- Move on to the next hanger.
References
- Fixr: How Much Does It Cost To Repair a Gutter?
- Bob Vila: How Much Does Gutter Cleaning Cost?
- Reformation General Contracting: Gutters: Why Seamless Is Better Than Spiked
- YouTube: This Old House – How to Repair a Gutter
- U.S. Geological Survey: Rain and Precipitation
- YouTube: Berger Building Products – Installing Gutter Brackets