A Homeowner's Guide To PEX Pipe
Many people believe that PEX pipe is going to revolutionize the plumbing industry by becoming the piping material of choice, replacing copper for drinking water systems. Of course, the other side is just as adamant that copper is and always will be king. Most homeowners probably fall somewhere in the middle because in many people's minds, PEX is a new material about which they don't know much, but anyone planning a plumbing project or repair should consider PEX as an option.
What Is PEX Pipe?
"PEX" stands for cross-linked polyethylene, a type of plastic that is approved by all major plumbing codes for potable water systems. It isn't new. Developed and used in Europe since the 1960s, PEX pipe has been used in the United States since the 1990s in both plumbing and radiant flooring systems. So, there is a good chunk of real-world experience behind the use of PEX pipe.
PEX pipe is available in all the standard pipe sizes, so it can be added to existing plumbing systems. It comes in 100-foot to 500-foot lengths that are packaged as coils. That's important because most types of PEX tend to return to the coiled shape, making them slightly difficult to work with, but the material is also sold in 10-foot lengths, making it easier to handle.
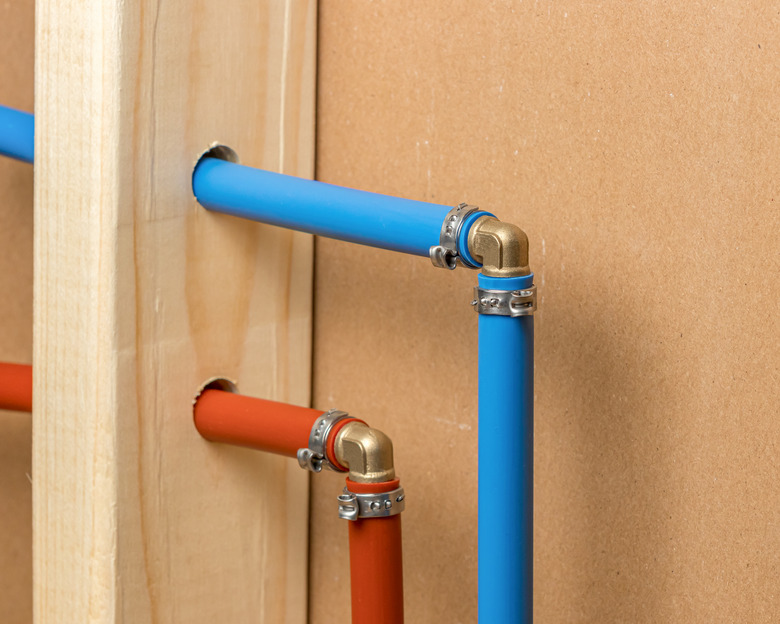
Most PEX comes in red or blue, so you can use red for hot water and blue for cold. Either color can be used for hot or cold water systems, but the colors make it easier to keep a project organized. There is also white PEX that many people use if the pipe is exposed.
Some advantages of PEX pipe include:
- PEX uses less fittings than other types of pipe because the material is flexible and can be bent around corners rather than requiring elbows and other fittings to make turns.
- Installation is faster and easier than with other materials. There is no soldering as there is with copper pipe or gluing as there is with PVC and CPVC. Most connections are made by crimping or clamping fittings to the pipe.
- Fittings can be installed in wet lines, unlike the dry piping necessary when soldering copper.
- PEX won't corrode as copper can.
- The material can expand, so it won't burst if water freezes inside it.
- PEX is about half the cost of copper in both material costs and the labor involved in professional installation. Copper pipe costs about $2 to $4 per linear foot, while PEX is about 45 cents to $2 per linear foot depending on the diameter of the pipe.
PEX has instant name recognition. Whoever branded it could have gone the route of PVC (polyvinyl chloride) and used the material's initials, but instead of calling the material CPE (cross-linked polyethylene), the marketing genius used the "PE" from polyethylene and the crossed letter "X" for cross-linked. It's easy to remember and fun to say, and it looks good on product packaging.
PEX pipe does have some drawbacks. The material can degrade under UV radiation, so it can't be installed outside. It cannot withstand very high temperatures, meaning that it cannot be connected directly to water heaters. For water heater connections, install an 18-inch length of copper pipe to the inlet and outlet ports on the heater and attach the PEX pipe to the copper. Rats, mice, and some insects can chew through PEX, causing extensive water damage.
Types of PEX Pipe
There are three different types of PEX pipe: A, B, and C. The letter designations have nothing to do with the quality of the material. They are all cross-linked polyethylene products that meet all the standards necessary for potable water systems. The letters indicate the type of manufacturing process, and with different processes comes different qualities.
PEX pipe A is the most flexible type of PEX pipe. It has very little coil memory, so if you straighten out a section of PEX A, it stays straight. Should a kink develop in the pipe, you can straighten it by using a heat gun on the pipe section. It is very DIY-friendly because of its flexibility, but it can cost twice what PEX B costs.
PEX pipe B is not as flexible as A, meaning it is more difficult to work with. If a kink develops, the pipe must be cut and then reconnected with a coupling. It is the least expensive of all types of PEX, making it a favorite of plumbers, especially in new construction projects. It is more resistant to chlorine degradation than the other types, making it a good choice for municipal water systems that add a lot of chlorine to the water. It can resist higher temperatures and pressure before bursting than the other types.
PEX pipe C is not used as much as the other two in plumbing systems. It falls between A and B in terms of flexibility, and its manufacturing process is the most environmentally friendly. It is prone to cracking more than the other types. Kinks in the line must be repaired by cutting and using couplings to reconnect the sections.
PEX Pipe Connections
The good news about PEX pipe connections is that they are easy to make and reliable. The not so good news is that any plumbing tools you have for working with copper and PVC won't do much good, as you will need a few specialty items.
PEX connections are made with specially designed barbed fittings made of either brass or plastic polymer. There are also push-fit fittings available for PEX. There are fittings for every type of connection, including PEX to other plumbing pipe materials. PEX types B and C rely on crimp rings or clamps to secure the fitting.
During installation, the ring or clamp is placed over the pipe, and the fitting is inserted into the tubing. Then, either a crimping tool for crimps or a clamping tool for clamps secures the connection.
With crimps and clamps, the fitting decreases the diameter of the tubing, which does restrict flow through the pipe somewhat. This isn't a problem most of the time, but the reduced flow can be noticeable in very large houses with low water pressure.
PEX type A uses an expansion fitting. During installation, an expansion tool is used to enlarge the end of the pipe opening. The fitting, which is the full diameter of the pipe, goes inside the opening, and the properties of the material cause it to shrink back to its original dimensions, forming a tight seal around the fitting.
There are dedicated tools for working with PEX. Tools to secure crimps and clamps are manually operated and cost under $100. There are also manually operated expansion tools for about the same price. Battery-operated expansion tools can cost $300 to $500, although these tools are available for rental in many places.
PEX and Plumbing Manifolds
In a typical house plumbing system, the main water line, called the trunk, is usually either 3/4 inch or 1 inch in diameter. Smaller-diameter pipes branch off the main line to service individual fixtures. It's a setup that requires many fittings to make the necessary connections, and fittings are labor intensive to install. Also, if there is a leak, it is most often due to a faulty connection.
The traditional trunk and branch system works with PEX pipe as well, but the material can also be used with a manifold system. A plumbing manifold is the command center for a house's plumbing. Rather than running throughout the house, the main cold water pipe and the pipe coming from the water heater connect to the manifold.
Each of the other ports on the manifold service one fixture. The manifold eliminates branch lines because PEX runs from the manifold to individual fixtures. Because PEX is flexible, the only connections that are often necessary are at the manifold and at the fixture. This direct manifold to fixture system is also known as the "homerun" system.
Working With PEX Pipe
Because PEX pipe is flexible, it allows you to do things with it that would be impossible with rigid pipe. Its ability to bend to form curves reduces the number of fittings needed for many installations. There are even brackets that aid in forming bends.
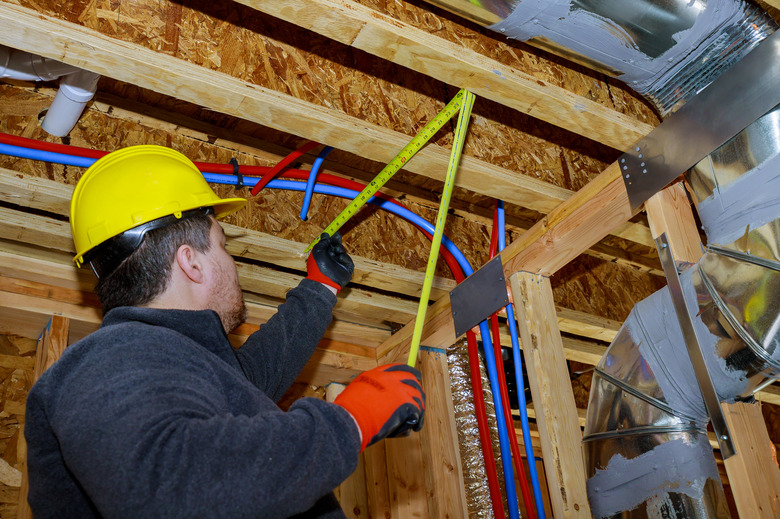
PEX lets you install long lengths of piping in tight spaces. If you want to run pipe through a series of floor joists, you can pull PEX from the first joist through the last in one piece. If using rigid pipe, the material is not flexible enough to do that. You would have to install a number of small sections of pipe and then connect them with coupling fittings in the spaces between the joists.
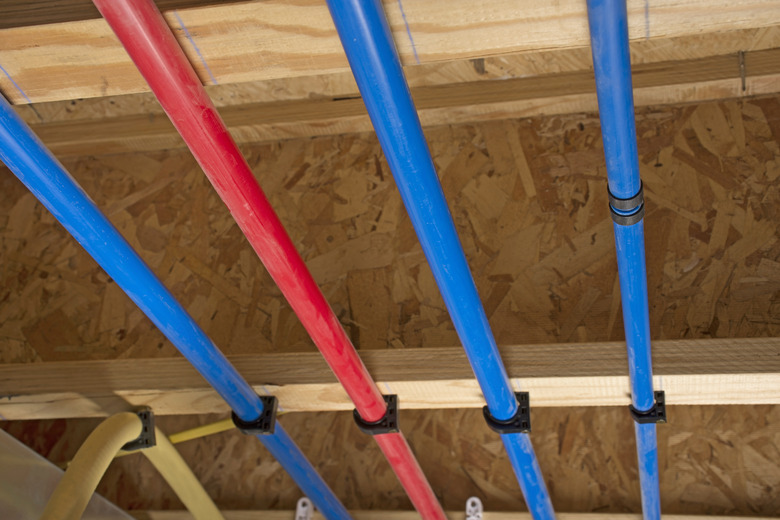
Always follow the manufacturer's directions, but in general, PEX that runs along a joist or beam should be supported every 32 inches. If it runs across beams, support it every 6 feet. Vertical runs should be supported at least once on every floor. There are a number of pipe supports available, but it is important to choose the right size for the pipe being installed because PEX expands and contracts with changes in temperature. A support that is too small could damage the pipe.
Because the material expands and contracts, adding slack or expansion loops is sometimes necessary. The rule of thumb is to provide about 1 1/2 inches of slack for every 10 feet of pipe run. An expansion loop should be about 10 times the diameter of the pipe. Check with the manufacturer because the natural flexibility of PEX may accommodate expansion and contraction on pipes 1 inch in diameter and less.


