A Homeowner's Guide To Plumbing Basics
We may receive a commission on purchases made from links.
With a few exceptions, plumbing basics are all about water: bringing it into the house, using it, and getting rid of it after you've used it. Each of these functions comprises its own category. Bringing in the water and distributing it throughout the house is known as the supply. Using water is done at the fixtures and appliances, and getting rid of the wastewater happens through the drain-waste-vent, or DWV, system.
The best way to understand plumbing basics is to follow the water into, around, and out of the house, so get ready for a wet and wild trip through your home's pipes. (Now, about those exceptions: Plumbing also encompasses gas piping, heating systems, and ventilation of gas-burning appliances, but those are subjects for another day).
Water Supply: The Source
Water Supply: The Source
Your home's plumbing supply starts at the city or water company's water main. A buried cold-water supply pipe branches from the main and heads toward your house. Its first stop is the water meter, which records your water usage and is the basis for the charge on your water bill. Most meters have a shutoff valve on one or both sides of the meter (you can use this in a pinch if you need to shut off the water to your house and can't do it elsewhere). The meter belongs to the water company, but everything on the downstream (house side) of the meter belongs to you and is your responsibility.
Alternatively, if your house is on well water, your water comes from a private well and is delivered to the house via an electric pump submerged inside the well casing. It travels to the house through a buried pipe and typically fills a pressure tank inside the house from which the water is drawn for use. As you probably know, all parts of a well system are the homeowner's responsibility.
Outdoor pipes are buried for two very good reasons. Deep in the ground, they're protected from damage (and untimely encounters with homeowners and shovels). More important in cold-winter climates, pipes are buried well below the frost line — the depth to which the ground freezes in winter. Below the frost line, the earth stays at a relatively constant temperature and does not freeze.
Water Supply: Distribution
Water Supply: Distribution
The main water supply pipe typically enters the house through a foundation wall and emerges into a crawl space or basement. Its first stop indoors is the main water shutoff valve, which single-handedly controls the water flow to the entire house. You can use this valve anytime you need to shut off the water (but there are many other smaller valves that shut off water closer to fixtures and appliances). Every homeowner should know where this main shutoff valve is located and how to use it. If you don't have this down pat, practice now. Don't wait until you have a water emergency and need to find it in a panic.
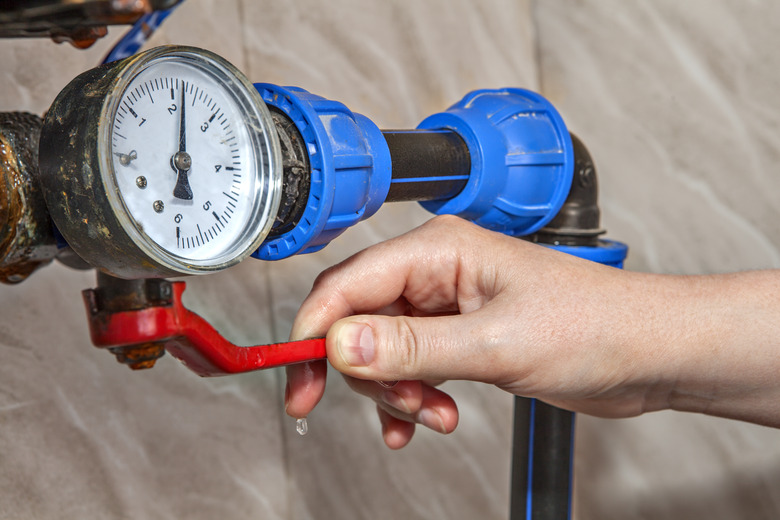
The main shutoff in older homes usually has a round handle that controls a globe- or gate-style valve. You turn the handle clockwise to shut off the water. Newer homes typically have a straight handle that controls a ball valve; rotate the handle until it is perpendicular to the pipe to shut off the water.
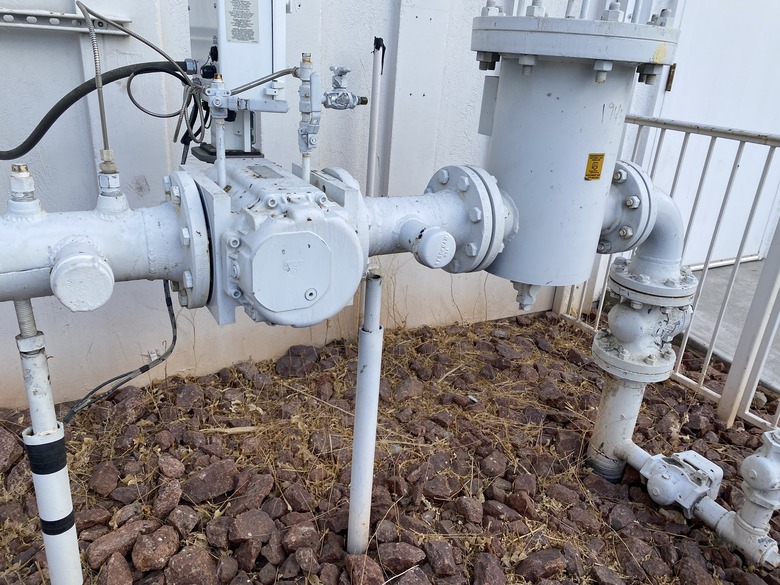
After the shutoff valve, some homes have a pressure-reducing valve — a brass, bell-shaped device that limits the water pressure to a preset level. Water pressure is applied by the water company (or a well pump and pressure tank) and is typically between 30 and 80 psi. Pressure below 30 psi results in unsatisfying showers and similar frustrations. Pressure above 80 psi is hard on pipes and pipe connections and can lead to premature leaks.
The water distribution system inside a house is simply a network of pipes that branch off — first from the main supply pipe and then from increasingly smaller branch supply pipes — to reach the water-using fixtures and appliances. The main supply pipe is typically 3/4 or 1 inch in diameter. The first branch is usually a 3/4-inch pipe supplying the water heater. A single hot-water pipe exits the water heater and ultimately supplies all of the things that use hot water. Meanwhile, the cold-water supply continues on its way and runs alongside the hot water pipes to the same appliances and fixtures. High-demand items, like showers and washing machines, are supplied by 1/2-inch pipes. Bathroom faucets and toilets use 3/8-inch pipes and supply hoses, and ice makers are supplied by flexible 1/4-inch tubing.
The Drain-Waste-Vent System
The Drain-Waste-Vent System
Nearly everything in the house that uses water has a drain attached to it. The smaller drains feed into larger drains, and ultimately, all of the household waste ends up in the biggest drain — the main drain — which is a 4-inch pipe that leads out of the house and runs under the yard to the city's sewer main under the street. If you're not on city sanitation, the main drain feeds into a septic tank, and from there, the waste is distributed into a leach field and is absorbed into the ground.
Unlike the water supply system, which is constantly pressurized, the drain system works entirely by the force of gravity and relies on the natural behavior of water and air to work properly. Plumbers have two expressions that explain most of what you need to know about drains: "water carries waste" and "s**t runs downhill." To use gravity, horizontal runs of drain pipe must slope downward slightly in the direction of the water flow. The standard slope is 1/4 inch of drop per linear foot. If the slope is too steep, the liquid waste (mostly water) flows away from the solids, leaving them stranded in the pipe. If there's not enough slope, the waste moves sluggishly or not at all. This is important to know for any plumbing project involving a drain; all horizontal runs, no matter the length, must have the proper slope.
Venting is equally important and is required for all drains. To understand the vent system, think about the "magic" trick of holding your thumb over the end of a drinking straw and then lifting the straw — along with the liquid inside — up into the air. Your thumb creates a suction effect that prevents the liquid from flowing out of the straw. A house drain without a vent can act like a straw with a thumb on it, resulting in gurgling, poor flow, and clogs. In other words, vents supply air to drains to prevent suction and keep things flowing well.
Vent pipes extend upward from drains, usually converging like drains do and ultimately tying into the upper portion of the home's main drain, known as the vent stack. The vent stack extends through the roof and remains open to the atmosphere to allow air into the drain system. The vent stack also ventilates sewer gases (methane among other smelly vapors) rising up through the main drain. Sometimes, vent pipes will exit the roof independently of the vent stack. This is why many homes have more than one plumbing pipe sticking up from the roof. There are also "cheater" vents, called air-admittance valves (AAV), that draw air from the room and do not need to extend outdoors.
Essentially, the drain system is just a series of pipes that remain open all the way to the sewer, and there's nothing to stop sewer gases from flowing back up through the drains. That brings us to another critical part of the DWV system: the P-trap. The P-trap is the curved pipe that makes a U-turn under your bathroom and kitchen sinks and most other fixture drains in the house. Drain water sits in the bottom of the bend, sealing off both ends of the curve to prevent sewer gases from rising into the room. The water sitting in the trap gets pushed out and replaced by new water every time the drain is used.
Pretty much every drain in the house has a P-trap: sinks, showers, tubs, and floor and laundry drains. The toilet has a built-in trap, called a trapway, that does the same thing as a P-trap. If you don't use a drain for a long time, the water in a P-trap evaporates to a point where it no longer seals out the sewer gas, imparting a stockyard ambience to the room. Pouring some water into the drain refills the trap to save the day.
Different Pipe Materials

Different Pipe Materials
Plumbing materials make for a vast and (for some of us) thrilling topic about which plumbers could write volumes, perhaps if they weren't making such good money working with those same materials. For the typical homeowner, it can help to know a little bit about pipe materials so you can identify what's what under your sink, behind your walls, and in your crawl space or basement.
Materials commonly used for water supply piping include copper, PEX, PVC, CPVC, and galvanized steel. Copper remains the gold standard and the preferred material for many plumbers, primarily because it can last for a hundred years or more and is assembled with very reliable soldered joints. PEX (cross-linked polyethylene) is a somewhat flexible plastic tubing that is joined without soldering. This along with its relatively low cost (compared to copper) and other benefits make it popular with DIYers and an increasing number of plumbers. PVC is the familiar white plastic pipe and is suitable only for cold-water supply. Its off-white cousin, CPVC, is used for both cold-water and hot-water supply.
Finally, there's galvanized steel. Gray, rough-textured, and often rusty, it would look right at home in the bowels of a World War II battleship. If your home was built before the 1960s (roughly) and hasn't been re-plumbed, there's a good chance you have steel water pipes. There's also a good chance you have lousy water flow (due to corrosion buildup inside the pipes) and any number of pipe fittings that will eventually leak. Before you spend those savings or lottery winnings on a hot tub or a kitchen remodel, you should consider replacing those steel pipes.
Drain and vent pipe materials are almost certainly white PVC plastic or black ABS plastic in any home built in the last 50 years or so. Homes older than that may have cast iron, galvanized steel, or even copper drains, which today would be eye-wateringly expensive. Some old drain fittings and short lengths of pipe may be lead. Steel and cast iron eventually corrode, but this is not as big of a concern as it is with steel water pipes, and you can always replace problem sections with ever-affordable and DIY-friendly PVC or ABS. Lead is actually a really nice material that remains workable and corrosion-free seemingly forever. If you have lead pipes or fittings only in your DWV system, you don't have to worry about it contaminating your drinking water and can let it live on into the next millennium.
Shutoff Valves and Cleanouts
Shutoff Valves and Cleanouts
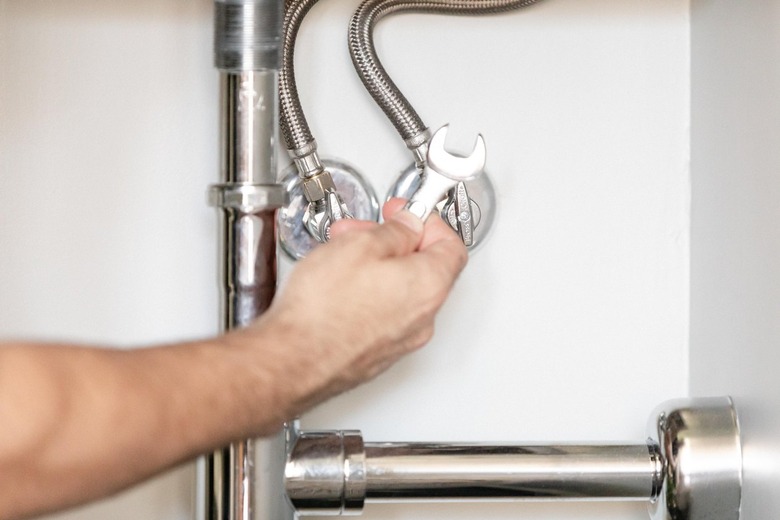
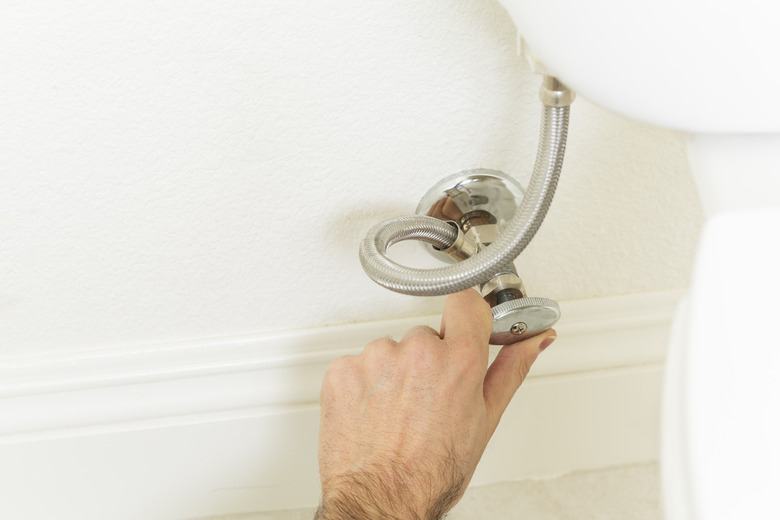
The final and in some ways most important stop on your plumbing basics tour is the valves and fittings that help you with repairs, upgrades, and emergencies. In addition to the main shutoff valve located on the incoming main supply pipe, each water-using fixture and appliance should have fixture shutoff valves for its water supplies. In most cases, these are small valves that serve as a transition between the water supply pipe and a flexible hose leading to the fixture or appliance. You can see them if you look under any sink, just below a toilet, or somewhere behind a washing machine.
Fixture shutoff valves allow you to turn off the water at a specific faucet or appliance without having to use the main shutoff valve. If you can't find shutoffs for a fixture — sometimes showers don't have them, and sometimes the plumber simply neglected to install them — use the nearest convenient shutoff valve or the main shutoff, and if possible, plan to add some fixture shutoffs while the water is off (your future self will thank you). If you need to shut off the hot water to anything in the house, in a pinch, you can close the cold-water valve at the water heater. This stops the water flow and pressure going into the water heater and therefore all of the hot water coming out.
On the drain side of things, one helpful feature most beginners aren't aware of is the cleanout. This is a short section of pipe (or a port on a fitting) that leads into the drain pipe and is sealed with a threaded cap that has a square nut on it. You open the cleanout by unscrewing and removing the cap. As its name suggests, you use a cleanout to clean a drain, typically with a drain snake or a sewer auger depending on the drain type and/or size. Cleanouts provide easy access to the pipe and often help you avoid bends or other elements that may inhibit passage of a snake.
You usually find cleanouts on the larger branch drains and on the main drain leading to the sewer or septic system. Plumbers may also install them anywhere they might be handy, such as at the beginning of a long, horizontal run or after a series of bends in a pipe. Outdoor cleanouts, which may have access at the ground level or may be buried a foot or so deep, are particularly handy for sewer pipes that are prone to clogging from tree roots or heavy household use.
Most homes have a cleanout on the main drain in the basement or crawl space near the point where the drain exits the house through the foundation wall. This can be used to snake the main drain all the way to the city sewer main. Use this with caution. If the main drain is backed up to a point above the cleanout, whatever is in that pipe above the cleanout will come out of the cleanout hole — with frightening force — if you remove the cap.