How To Solder Copper Plumbing Pipes
We may receive a commission on purchases made from links.
The technique for connecting copper pipes and fittings with lead-free solder is called "sweating," and it's an essential skill for plumbers and homeowners who want to do their own plumbing. It's a deceptively simple procedure that can take a few minutes if you do it right but can cost you the better part of an afternoon if you don't. Cutting pipes and preparing them for soldering is an important part of "doing it right." Any debris or residue on the pipe or fitting can cause a leak, and if a soldered connection leaks, it can be difficult to repair. One more thing to remember: the pipes you're sweating must be completely dry, or they won't get hot enough to melt solder.
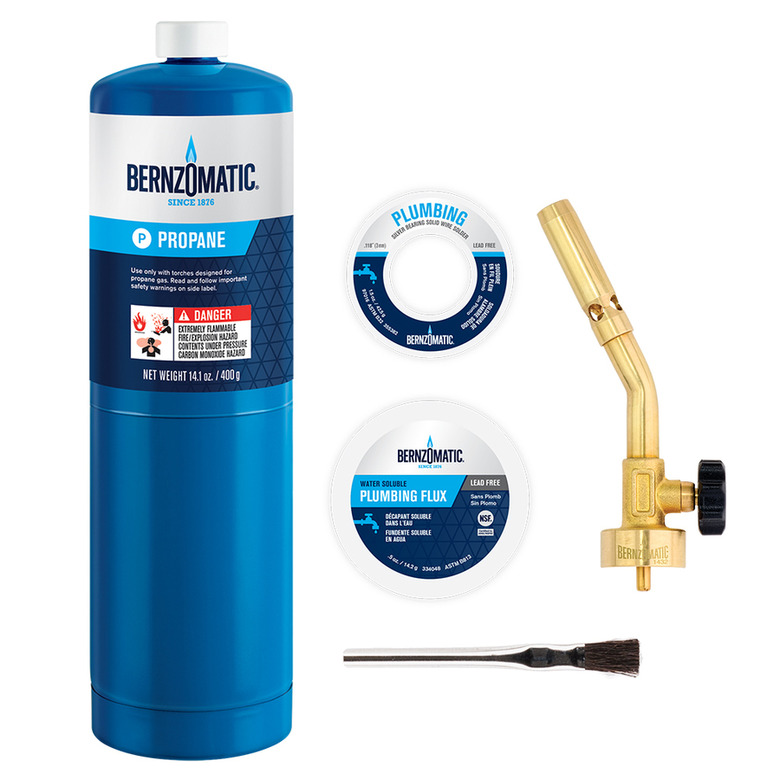
Things Needed
-
Lead-free solder
-
Flux
-
Propane or MAPP gas torch
-
Heat shield (soldering flame protector)
-
Pipe cutter or hacksaw
-
File or deburring tool
-
Wire brush
-
Rags
1. Cut and Prep the Pipe
The best way to cut copper pipes prior to soldering them is to use a pipe cutter. By tightening the jaws of the cutter around the pipe, a sharp blade contacts the metal and makes a score as you rotate the cutter around the pipe and progressively tighten the clamp. In some situations, you have no choice other than to cut the pipe with a hacksaw. When doing so, make sure to cut perpendicular to the length of the pipe. File off the burrs and shards of metal with a deburring tool or a file, or the pipe won't slide into a fitting.
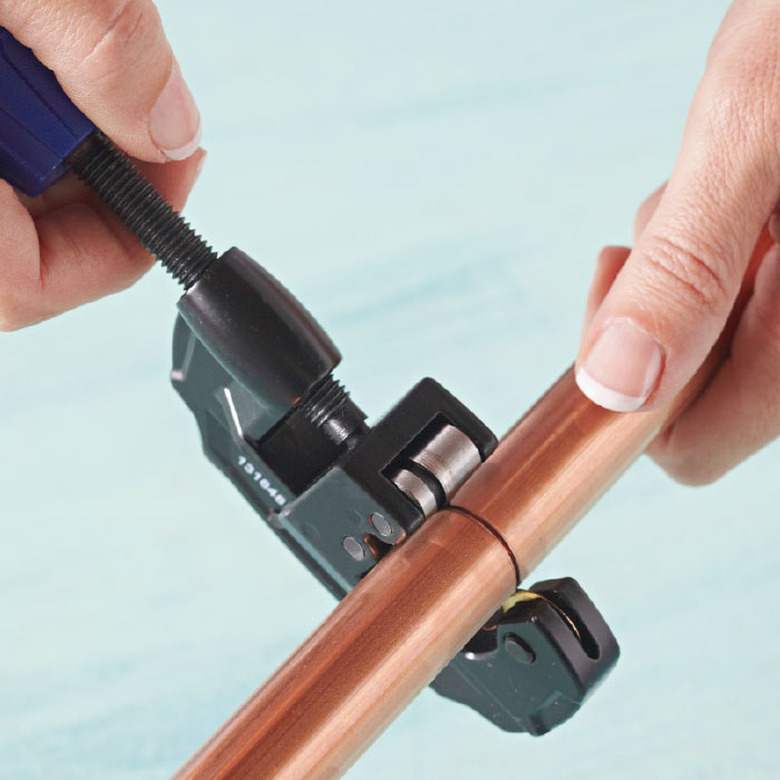 Lowes
Lowes
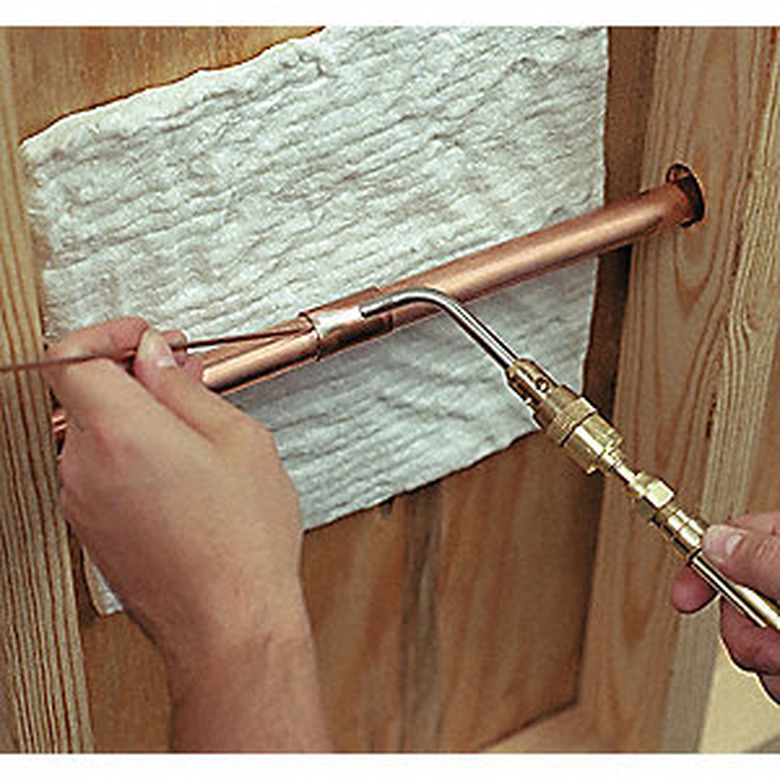
2. Set Up a Heat Shield
If you're soldering a fitting onto existing plumbing. it's important to protect the wall or framing members behind the joint from the intense heat of the torch. The best way to do this is to use a piece of flame- and heat-proof fabric, usually sold as a "heat shield" or "soldering flame protector." If you don't have an actual heat shield, a piece of fiber cement board works in a pinch. If you don't want to hold it while you're working, attach the shield to the wall or prop it up in some way.
 Grainger
3. Spread Flux
Rub down the outside of the pipe with a rag. Clean the inside of the fitting with a wire brush. Spread soldering flux on the outside of the pipe and the inside of the fitting. Flux is a paste that you'll find next to the solder at the hardware store. Its purpose is to remove oxides from the metal and ensure good copper/solder adhesion. The brush for applying it usually comes in the container.
4. Join the Pipe to the Fitting and Heat the Connection
Slide the pipe into the fitting, light your propane torch and adjust the flame to extend out about 2 inches. Hold the flame on the connection, moving it around the pipe to heat the metal uniformly, until the flux begins to smoke, crackle and boil away.
 RZ/iStock/GettyImages
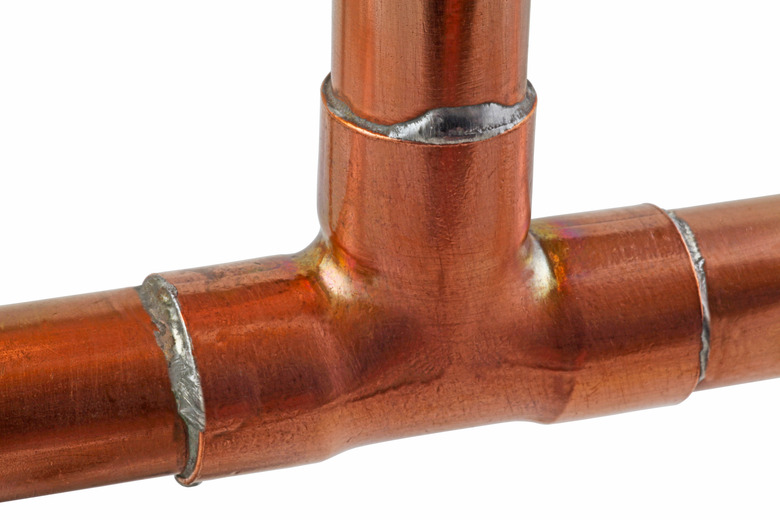
5. Apply Solder
Unwind a coil of solder to get a straight length of about a foot. Remove the heat and immediately touch the tip of the solder to the connection. If the metal has reached the proper temperature, the solder will melt and be drawn up into the joint by capillary action. The solder usually fills the entire gap without having to move the coil, but it doesn't hurt to move the coil around the pipe to make sure. If the solder doesn't melt, apply more heat to the joint, but don't overdo it. Burning the flux makes it more difficult for solder to wick into the joint.
 Lowes
Lowes
Water Problems
Water Problems
When making a repair to an existing water line, it's sometimes difficult to get all the water out of the pipe prior to soldering. It's important to do so, though, because the water will vaporize when you apply the torch, which will keep the temperature at 212 degrees Fahrenheit—not hot enough to melt solder. It sometimes helps to open a faucet in the water line to allow air to assist the movement of the water. Keep this faucet open while soldering to allow residual steam to escape.
If the pipe has a persistent drip, try propping up the end of the pipe. This may control the drip long enough for you to sweat-solder the joint. If you can't move the pipe, it may help to insert a paper towel or rag into the end to absorb water. Keep it there until you're ready to solder, and work quickly to complete the joint when you remove it. If you can't stop a drip, it may be a better idea to make the repair with a compression fitting than to try to sweat-solder a fitting.