How To Replace Your Thermostat
We may receive a commission on purchases made from links.
So, you're planning on purchasing a new thermostat to replace the old, weather-beaten one that has been faithfully running your heating or central air system for as long as you can remember. That's a good idea because modern thermostats, particularly smart thermostats, can keep you more comfortable and can run your system more efficiently, which will result in energy savings that are good for your bank account as well as for the planet as a whole. You can do the job yourself, but you need to know a few things before you make your purchase and begin the project.
The first bit of crucial information is whether your new thermostat is compatible with your HVAC system or, to put it another way, whether your system has the right wires and runs at the proper voltage. Voltage probably won't be an issue if you have only one thermostat connected to a furnace or central air system because it's probably a low-voltage thermostat that operates at 24 volts (and that's the voltage at which most new thermostats operate). However, if your home has several thermostats, each operating an individual baseboard heater, they probably run at line voltage (120 or 240 volts), which is incompatible with most programmable and smart thermostats.
The second thing you should consider is whether or not you need to change the thermostat location. If your house is perpetually cold and you've been blaming it on the old thermostat, take a look at where it's mounted. You may find that it's in full sun or stationed over a heating vent, and these are conditions that can trick it into thinking that the house is warmer than it actually is. Putting a new thermostat in the same location isn't going to improve matters, so you should move it somewhere else, and that means running new wires. That usually isn't a DIY job.
Reasons for Replacing Your Thermostat
Reasons for Replacing Your Thermostat
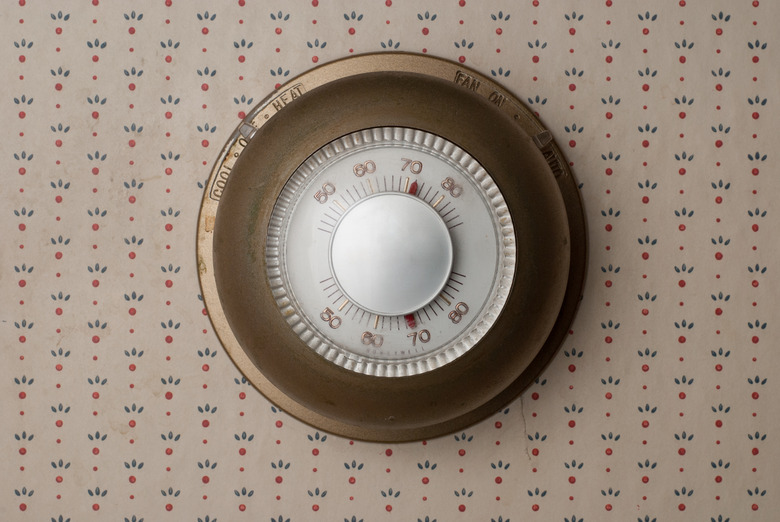
Technological developments keep producing increased functionality and sensitivity for new thermostats and rendering older ones out of date, but even if that weren't true, a thermostat doesn't last forever, and you may be replacing your old thermostat simply because it's time. It may also be damaged to the point where the temperature reading in its dial or screen bears no relationship to the actual ambient temperature. As long as you're sure the thermostat is in a good location that is representative of your home's conditions, replacing it is a DIY job, but if you have to move it, consider hiring an HVAC pro or an electrician to make sure the job is done correctly.
You may also want to replace your thermostat because of compatibility problems. It may not have enough functionality to take advantage of all your air system's features. For example, if your furnace has two-stage heating and your thermostat doesn't have a W2 terminal for the wire to control second-stage heat, you'll never be able to take advantage of this energy-saving feature.
By the same token, if you upgrade your furnace to one with enhanced efficiency features, you'll probably have to change the thermostat at the same time. However, if you have to install new wires, it's safer for you and for your system to have the thermostat wired professionally. Check the warranty on your new thermostat before installing it yourself; some manufacturers won't honor it unless the installation is done by a licensed HVAC pro.
 SchulteProductions/iStock/GettyImages
Assessing the Wiring for a New Thermostat
Assessing the Wiring for a New Thermostat
Before purchasing a thermostat replacement, you'll want to check the wires on the existing thermostat and, assuming it's matched correctly to your system, take a picture of the wire terminals. Your new thermostat must have all the same terminals at a minimum; it's OK if the new thermostat has more terminals than the old one, but it can't be missing any.
For example, if your thermostat controls an air conditioning system, it will have a Y terminal to control the condenser, and your new thermostat also needs a Y terminal. There's nothing stopping you, however, from replacing it with a model that has both Y and Y2 terminals (for second-stage cooling). You just don't use the Y2 terminal. In the same vein, you can use a thermostat with O and B terminals for a reversible heat pump to control a furnace that doesn't need these terminals — as long as the thermostat has all the other terminals the system needs.
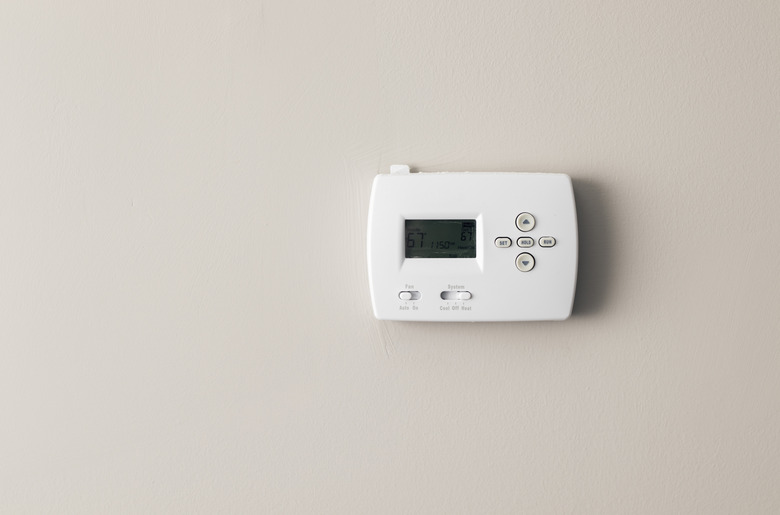
You generally don't have to run new wires to replace a thermostat, but there is one situation that may require it, and that's when you replace a mechanical or battery-operated digital thermostat with a smart home model. A Wi-Fi thermostat needs power, which is carried from the transformer by a common wire (C-wire), and if your existing thermostat didn't need power, there may be no C-wire. Fortunately, there are alternatives to installing a C-wire. One of the easiest is to purchase a thermostat with an adapter that allows you to plug the C terminal into a wall receptacle.
 Mint Images/Mint Images RF/GettyImages
Things Needed
-
Mobile device
How to Replace Your Thermostat
1. Turn Off the Power
If your HVAC system has an on/off switch, as most do, turn it off. If there's no switch or if you can't find it, turn off the circuit breaker in the breaker box that controls the system. This step is a safety precaution that's as important for the system as it is for you. You can get a shock (although it will be a minor one at 24 volts), and a short could damage the equipment.
2. Expose the Existing Wiring
Remove the thermostat cover, which you can usually do by unsnapping it. If you don't see any wiring behind it, it's because the wires are covered by the temperature sensor, which is attached to a plate that you can remove by unscrewing a few screws with a Phillips screwdriver. The wires will be connected either to the back of the plate or to the thermostat base that is still attached to the wall. Take a picture of the wire terminals with your mobile device.
3. Label the Wires
Compare the color of each wire to the letter displayed on the terminal to which it is attached. If the thermostat was correctly installed by a pro, the letter corresponds to the color: R for red, G for green and so on. If that color scheme has been followed, you probably don't need to label the wires; just remember to follow the same color scheme when wiring the new thermostat. If the color scheme hasn't been followed, label each wire with a piece of tape that displays the letter of the terminal to which it is attached and make sure to connect it to the same terminal on the new thermostat.
4. Disconnect the Wires and Remove the Base
Disconnect the wire from each terminal by loosening the screw terminal or by pressing the spring-loaded tab and pulling out the wire. If the terminals don't have screws or tabs and the wires are permanently attached, snip each one as close to the terminal as possible with wire snippers. When all the wires are free, twist them together and then pull the cable out of the wall as far as possible and bend it downward to prevent it from falling back into the wall (you can also secure it to the wall with a piece of tape). Remove the screws holding the base to the wall and remove the base.
5. Install the New Thermostat Base
Remove the new thermostat from the box and separate the display from the base. Feed the wires through the specified hole in the base and set the base against the wall, covering as much of the existing hole in the wall as possible. Level the base using a torpedo level if the base doesn't have its own level and then mark the positions of the screw holes and remove the base. Drill a hole on each mark large enough for a conical screw anchor and tap an anchor into each hole. Set the base back in place and drive a screw into each anchor to secure it. The screws and anchors are usually supplied with the new thermostat.
6. Connect the Thermostat Wiring
Separate the thermostat wires and expose 1/2 inch of bare metal on the end of each one using wire strippers. Feed the end of each wire into the slot of the appropriate terminal while holding back the tab with your finger. Release the tab to secure the wire. If you installed a new C-wire for your thermostat, it should be either blue or black, and it goes on the C terminal. All other wires go on the same terminals to which they were connected on the old thermostat.
7. Install the Sensor Plate and Display
Follow the assembly instructions supplied with your thermostat. You may or may not have to screw a sensor plate to the thermostat base, and if you're installing a battery-powered model, you'll have to put batteries in the battery compartment. The display should snap onto the base or the sensor mounting plate. If the display comes with a gasket, be sure to install this before snapping on the display.
8. Test the Thermostat
Turn on the power, set the thermostat to its highest setting and make sure the furnace switches on. This test verifies that the thermostat is correctly wired to power. If you're installing a Wi-Fi enabled model, such as a Honeywell Home, Ecobee or Nest, you'll need to follow the instructions to configure it to your laptop or mobile device before you can do this. If your device is supplied with a plug-in adapter to take the place of the C-wire, be sure to plug it in.
9. Program the Device
If your new thermostat is programmable or Wi-Fi enabled, follow the instructions in your owner's manual to program it. The programming sequence is a little different for each model, so follow the instructions carefully.
What About That Hole in the Wall?
What About That Hole in the Wall?
Your new thermostat may not be as big as the old one, or you may have to offset the new one slightly to provide a solid backing for the screws, and the result may be that part of the existing hole for the wires is left uncovered. This is usually easy to fix, and it's best to do part of the job before mounting the new thermostat on the wall.
After removing the base for the old thermostat, fill as much of the hole as possible with patching compound, which is a type of plaster that sets hard. Leave a small depression and wait for the compound to set before mounting the new thermostat. After the thermostat is secure to the wall, apply one or two coats of drywall joint compound over the exposed patching compound and scrape it smooth with a putty knife or drywall knife. Finish by sanding the joint compound with 120-grit sandpaper and touching it up with the wall color.
References
- Smart Thermostat Guide: 6 Things You Should Do Before You Replace Your Current Thermostat with a Smart Thermostat
- High Performance HVAC: Thermostat Terminal Designations Explanations
- The Home Depot: How to Install a Thermostat
- Smit's Solar Heating & Air Conditioning: The Dangers of Installing Your Own Thermostat & Why You Should Have a Professional Install It
- Early Experts: Thermostat Wiring for Dummies