How To Repair Drywall
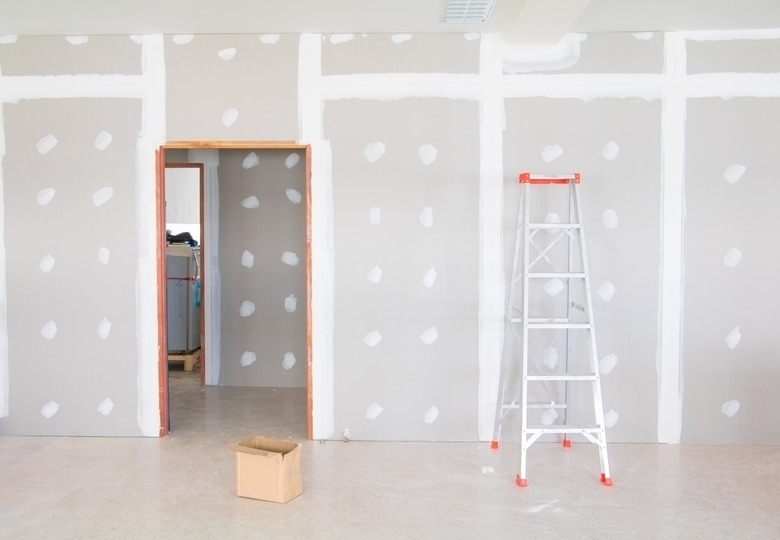
If you live in North America and your house doesn't have walls made of drywall, you're in the minority. Drywall is ubiquitous for reasons that include its resistance to fire and its low cost. Not to mention that it's made from gypsum, a resource the United States Geological Survey considers a perpetual resource. One of the most important reasons for the popularity of drywall, as far as do-it-yourselfers are concerned, is the ease with which you can repair damage. It's possible to mend cracked seams, holes large and smal,l and water damage, using just a few basic tools, some inexpensive supplies and a small investment of time.
The materials you use for drywall repair aren't always suitable for repairing plaster, which is a different type of wall covering. Plaster repairs call for a patching material that sets as it hardens, which usually isn't necessary for drywall repairs.
Repairing Minor Damage
Repairing Minor Damage
Small defects in drywall include cracked, lifting or bubbling seams, and dents or holes smaller than 1 inch in diameter, such as might be caused by an impact when moving furniture.
Things Needed
-
Paint scraper
-
1 1/2-inch drywall screws
-
Drill with driver bits
-
All-purpose joint compound (mud)
-
Drywall knife
-
120-grit sandpaper
-
Paint primer and touch-up paint
-
Utility knife
-
Patching compound (plaster of Paris)
-
Spackling compound
 Lowes
Lowes
1. Resetting Lifting Seams
Scrape dried mud off lifting seams and drive drywall screws into the seams to reset them. Drive at least one screw into each of the drywall edges forming the seam, being sure to sink the screw head at least 1/8 inch past the surface of the paper.
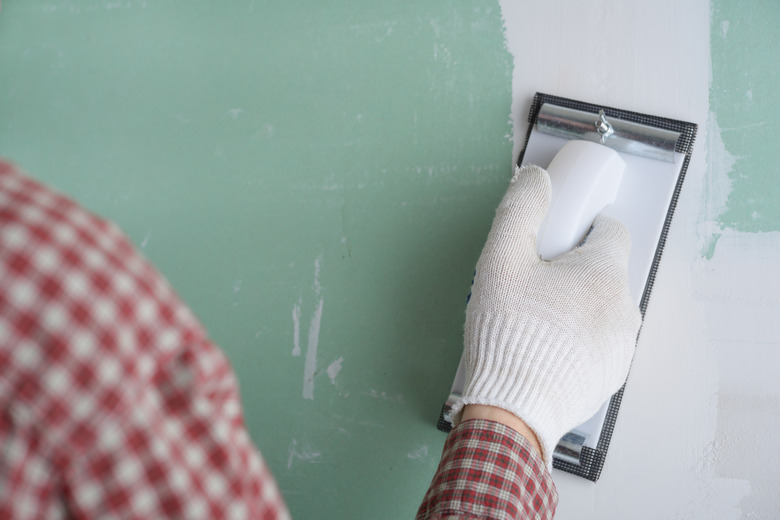
2. Taping the Seams
Coat the entire seam with mud, extending the mud about 2 inches past the seam. Lay drywall tape on the fresh mud, scrape the tape flat with a drywall knife and let the mud dry. Recoat with two more layers of mud, then sand the final coat with 120-grit sandpaper before priming and touching up the paint.
 -lvinst-/iStock/GettyImages
3. Repairing Damaged Tape
Cut out bubbles with a utility knife and reset seams as needed. If any tape is loose, lift it and apply joint compound underneath, using a small wallboard knife, then press the tape flat. Sometimes there's no alternative to removing the damaged tape entirely and applying new tape. Apply two of three coats of mud over the repair with a drywall knife, then prime and paint.
Tip
If any surface paper has ripped off, spray the paper underneath with drywall primer before patching with joint compound. This aids adhesion and prevents further peeling.
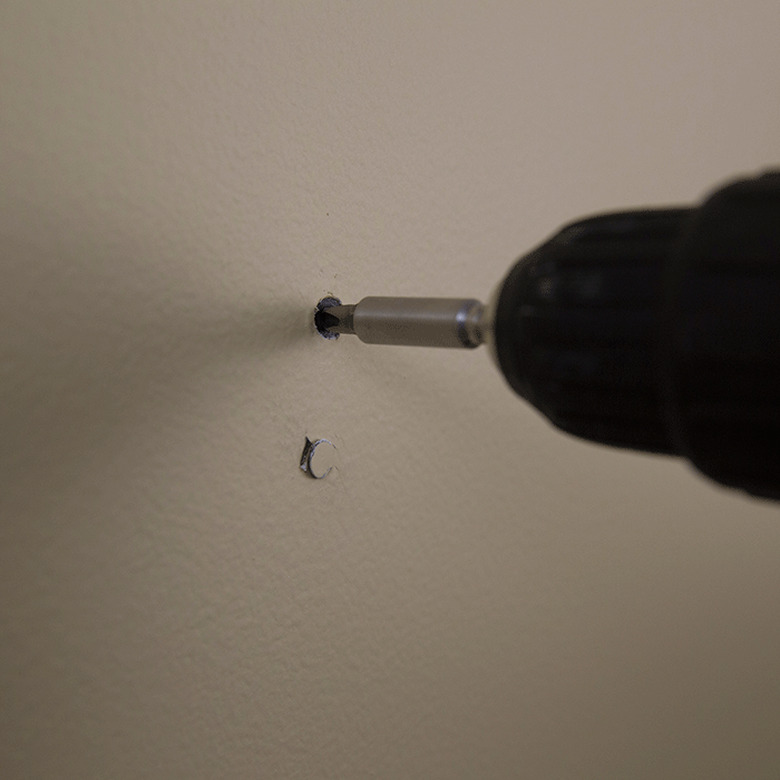
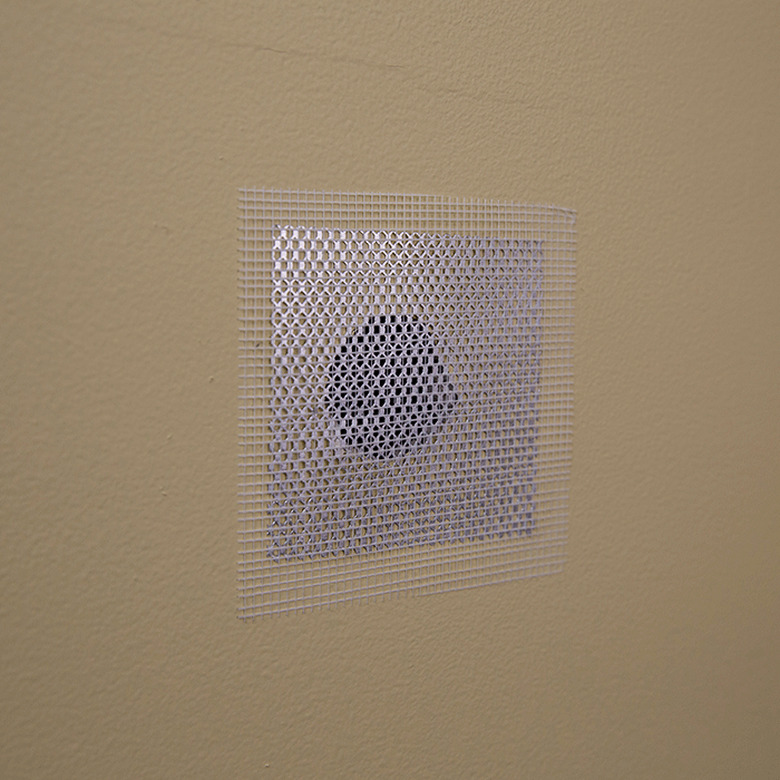
4. Fixing Small Holes
Fill 1- to 3-inch diameter holes with insulation or newspaper to provide a backing. Apply a coat of patching compound, which is a type of filler that sets hard in about 30 minutes. Scrape the patching compound flat, let it set fully, cover it with two or three coats of mud. Holes smaller than 1 inch in diameter usually don't need backing material. Just apply patching compound, then finish with mud.
For extremely small holes, such as those left by pins and picture hangers, use spackling compound to fill them. Spackling compound is a lightweight repair compound that dries quickly. Spread it with a paint scraper or putty knife and sand it lightly before painting.
 Viktor Ketal/iStock/GettyImages
Tip
Some pros like to fill holes with spray foam insulation. Squirt enough foam in the hole to form a small bulge and cut it flat with a saw when it dries. The hardened foam creates a great backing that you can finish with two or three coats of mud.
 Lowes
Lowes
Repairing Major Damage
Repairing Major Damage
Large holes, such as those created by major impact or water damage, usually require that you replace sections of drywall. In many cases you can fasten the drywall to the existing studs, but when that isn't possible, you have to affix some type of backing material—usually plywood—to the studs to provide a surface for attaching the drywall.
Things Needed
-
Ruler
-
Pencil
-
Drywall saw or zip tool
-
1/2-inch plywood
-
Wood screws
-
Drill with driver bits
-
1 1/2-inch drywall screws
-
Utility knife
-
Drywall tape
-
Drywall knife
-
Joint compound
-
120-grid sandpaper
-
PVA primer
-
Paintbrush
-
Paint
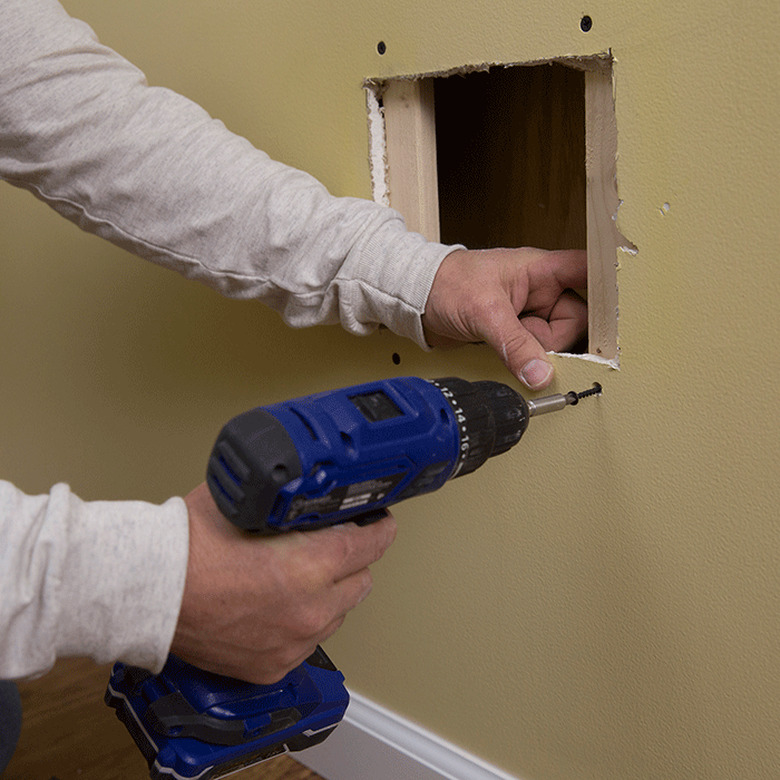
1. Draw a Rectangle Around the Damaged Drywall
Use a ruler and pencil to draw a rectangle around the damaged area. It's best if the rectangle is large enough to overlap the studs to the right and left of the hole. If you have to make the hole larger to do this, it's worth it. A large hole isn't any harder to fix than a slightly smaller one. and it will save you from having to install backing material.
2. Cut Out the Hole
Use a drywall saw to cut the hole. You may have to use a knife to cut the drywall that overlaps studs. Some pros like to use a rotary tool called zip tool to quickly cut drywall. If you use one of these, hold it carefully and work slowly, because it tends to wander. You can also cut drywall with a small handheld circular saw.
 Lowes
Lowes
3. Install Backing Material
Cut a piece of 1/2-inch plywood that fits inside the hole and exactly between a pair of studs. Tap it flush with the stud faces and fasten it to the studs with wood screws driven diagonally. Make sure to drive the screws fully so the screw heads are recessed. If the hole doesn't extend all the way to the studs, you can also fasten the plywood backer to the back of the existing drywall by driving drywall screws through the drywall and into the plywood.
 Lowes
Lowes
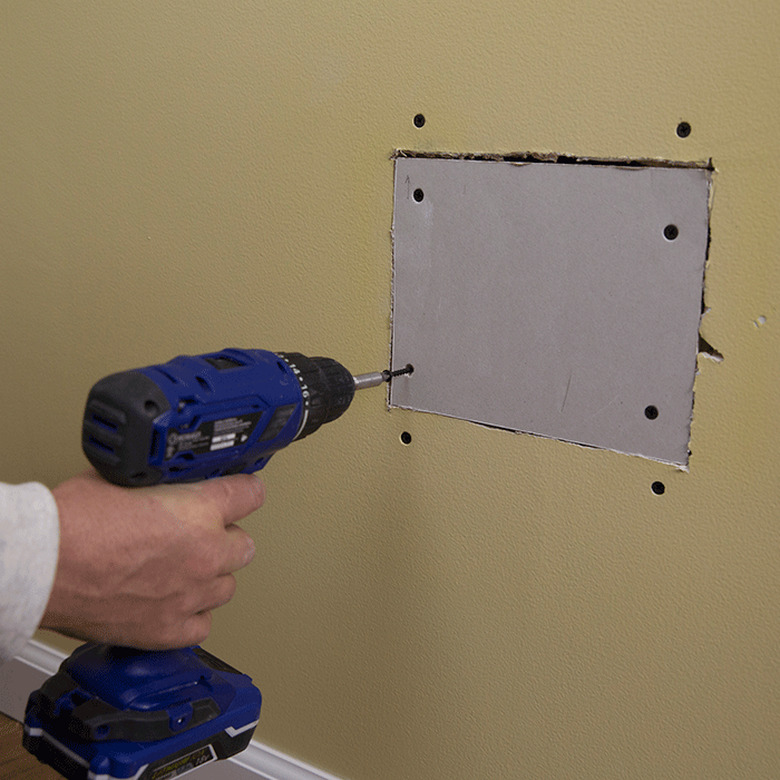
4. Install the Drywall Patch
Measure the dimensions of the hole you have to fill and cut out a piece of drywall that fits more or less exactly inside it. It's okay if there are small gaps at the edges. Fasten the drywall to the studs or the backing material, using drywall screws.
 Lowes
Lowes
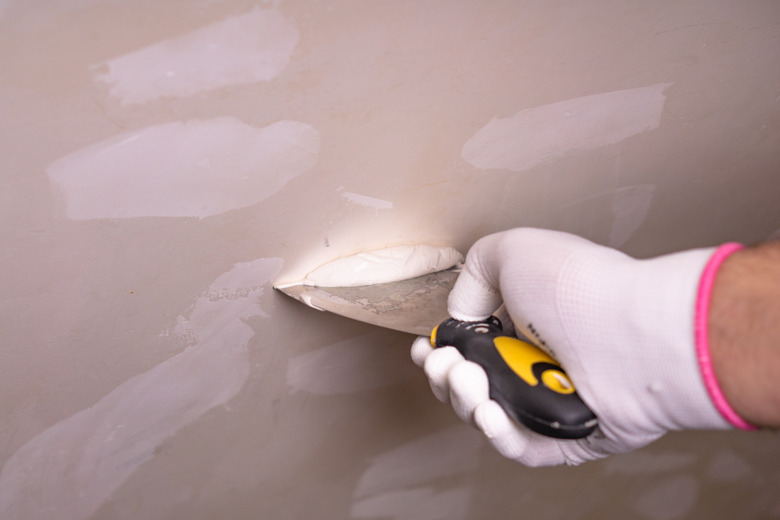
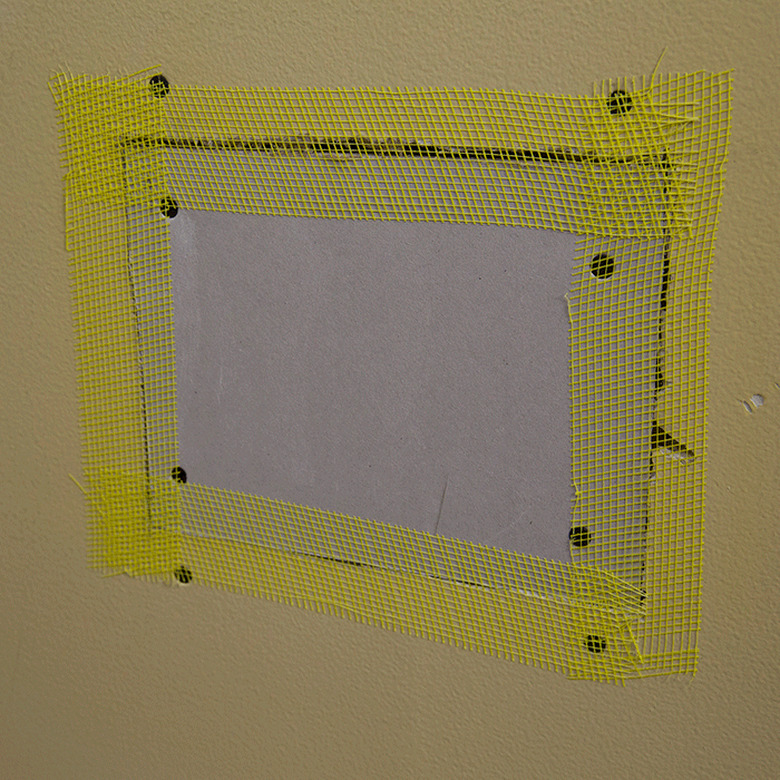
5. Tape and Finish the New Drywall
Spread joint compound on the seams of the new drywall and lay tape on the mud. Scrape the tape flat with a wallboard knife. Let the tape dry, then finish with two or three coats of joint compound. Sand the final coat, prime with PVA drywall primer, then paint.