How To Install And Use A Nest Thermostat
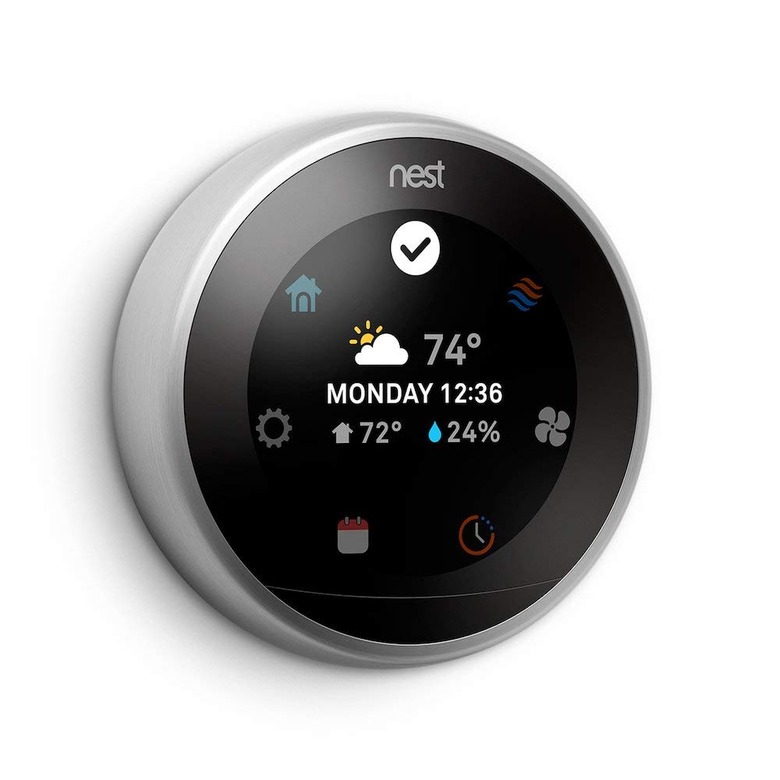
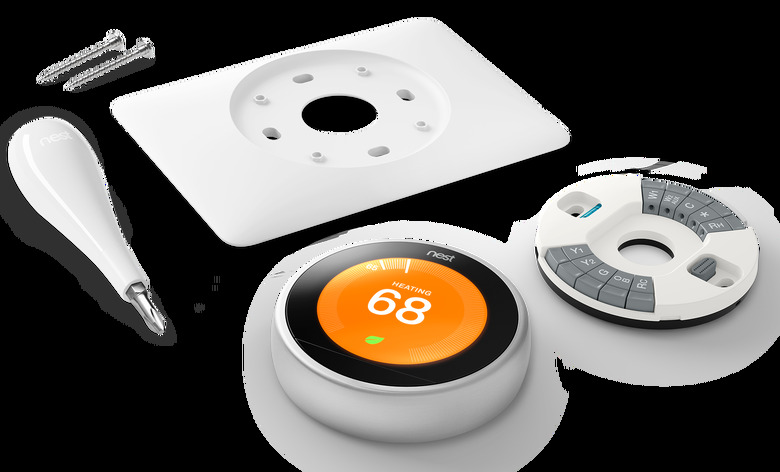
Replacing an existing thermostat with a new Nest thermostat is a simple job that usually takes less than half an hour. The process involves turning off the power, removing the old thermostat, mounting the Nest base and hooking up the wires, then clicking the Nest display onto the base. After a quick setup sequence (requires your smartphone), including a brief test of your heating/cooling system, the Nest is ready to use. The installation steps are the same for the Nest Thermostat E and the first, second, and third-generation Nest Learning Thermostats.
Things Needed
-
Screwdriver
-
Masking tape (as needed)
-
Level (as needed)
-
Drill-driver and 3/32-inch drill bit (as needed)
-
Wire strippers (as needed)
How to Install a Nest Thermostat
1. Turn Off the Power
Shut off the power to your heating/cooling system by switching off the appropriate breaker in your home's service panel (breaker box). Confirm that the power is off by adjusting the thermostat well above or below the room temperature. Wait several minutes to make sure the heating/cooling equipment does not turn on.
2. Label the Thermostat Wires
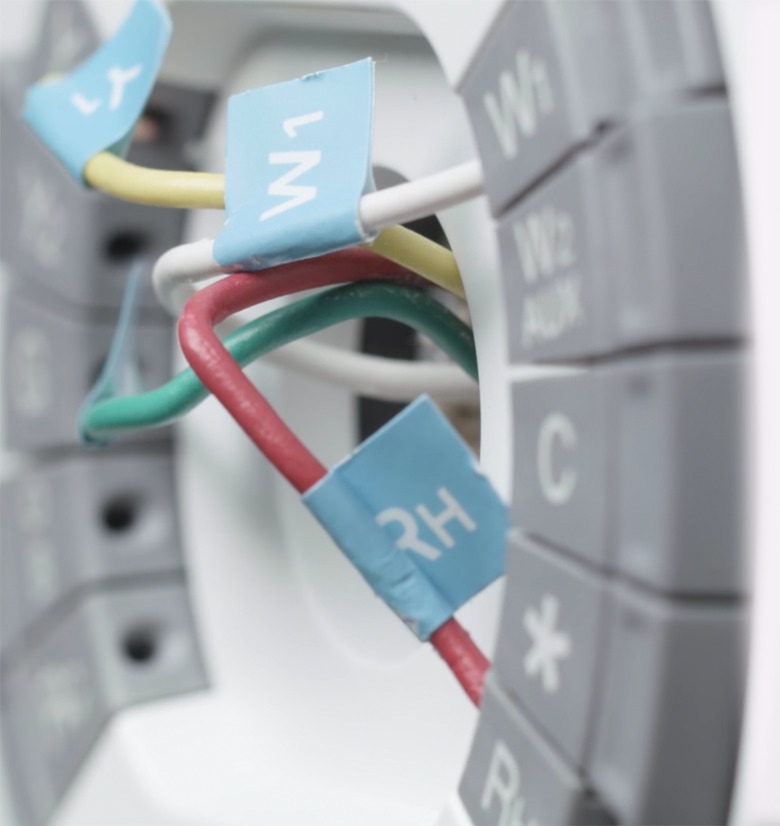
A new Nest thermostat comes with adhesive labels for labeling each wire in relation to where it connects to the old thermostat. For an additional reference, take a photo of the thermostat wires and their terminal connections on the old thermostat. If the old thermostat has a short "jumper" wire connecting two terminals, you can remove this wire without labeling it; it will not be needed for your Nest thermostat.
- Pull off the front cover or face of the old thermostat—most simply snap in place, but some have screws. This should expose the thermostat wiring.
- Take a photo of the wiring connections to record which wires go to which terminals.
- Use the Next wire labels to label each wire according to the symbols on the old thermostat terminals. Note that the wire color may or may not match the symbol on the respective wire terminal—for example, the red wire usually connects to the "R" terminal, but this is not always the case. What's important are the terminal symbols.
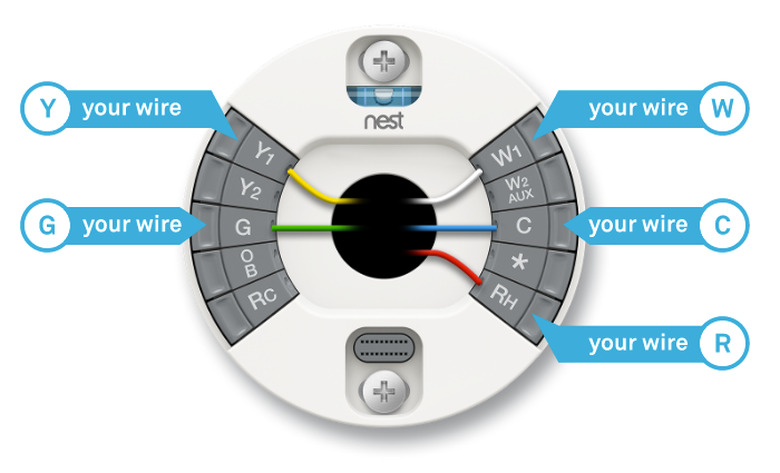
- Use the online Compatibility Checker at nest.com to confirm that your thermostat is compatible with your wiring. The Checker tool also will give you a diagram for wiring the Nest thermostat.
Warning
Nest thermostats are designed for low-voltage thermostat wires, which are very thin, like individual telephone wires or doorbell wires. If your old thermostat is connected to two or more thick circuit wires (typically with plastic wire connectors, or wire nuts) you have a line voltage system that operates on 110/120 or 220/240 volts. Do not connect a Nest thermostat to these wires.
3. Remove the Old Thermostat
Loosen each wire terminal with a screwdriver, and pull the wire from the terminal. Remove the screws holding the thermostat base to the wall, then remove the base. Be careful not to let the thermostat wires slip into the wall cavity. If necessary, temporarily tape the wires to the wall with masking tape.
Tip
The Nest thermostat comes with an optional trim plate to hide the wall area behind the old thermostat. If you prefer a cleaner look, you can fill the old screw holes and touch-up the wall with paint so that you can install the Nest thermostat without the trim plate.
4. Install the Trim Plate (Optional)
Position the trim plate—if you are using it—against the wall so that it is centered over the hole for the wires. Level the base with a small level, then screw the plate to the wall with the two provided screws. You don't need pilot holes if you are attaching to drywall. Use a screwdriver (not a drill) to prevent over-tightening the screws. If the wall is wood, plaster or masonry, drill pilot holes for the screws with a 3/32-inch bit.
5. Mount the Nest Base
If you're installing the Nest without the optional trim plate, you can mount the base directly to the wall. If you're using the trim plate, the Nest base goes over the plate.
- Hold the Nest base against the wall, centered over the hole for the wires.
- Use the level to position the base so it is level.
- Drive one of the provided mounting screws through the top screw hole in the base, tightening it so it is just snug. You don't need pilot holes for drywall. Use a screwdriver (not a drill) to prevent over-tightening the screws. If the wall is wood, plaster or masonry, drill pilot holes for the screws, using a 3/32-inch bit.
- Confirm that the base is level, then secure the base with the other mounting screw.
6. Connect the Thermostat
The ends of the thermostat wires should be straight and have about 3/8 inch of insulation removed. If necessary, straighten the ends and/or strip the insulation, using wire strippers.
- Connect each thermostat wire by pressing the tab on the Nest base and inserting the wire under the tab, following the wiring diagram provided by the Nest Compatibility Checker and the wire labels.
- Confirm that the tab stays down on each wire, indicating the wire is properly clamped.
- Tuck the wires into the center of the base so they do not protrude beyond the base.
7. Install the Nest Display
Position the Nest display so the logo is right-side-up and level.
- Push the display onto the base until it clicks in place.
- Restore power to the heating/cooling system by turning on the breaker(s) and/or disconnect switches you turned off earlier. The Nest display should come on. If you see a red blinking light, wait for the Nest battery to charge before proceeding.
8. Set Up the Nest
Once power is restored (and the Nest battery has charged, if necessary), the Nest will start itself up and prepare for the setup sequence. It will then guide you through the setup, asking a series of questions regarding your preferred language, your Internet connection, your location, and your heating/cooling equipment, and it will run a system test to confirm that the thermostat and heating/cooling equipment is operating properly.
The last step is to set up your Nest through the Nest app, using your smartphone. If you have a Nest Thermostat E, you must also choose the type of schedule the Nest will use to establish temperature settings: Choose the Basic Schedule if you want the Nest to follow pre-programmed settings based on nationally averaged data; choose the Auto-Schedule if you want the Nest to learn your manual settings over a few days and program itself accordingly.
Your Nest is now ready to use. For more setup information, documentation, user tips and troubleshooting help, visit the nest.com website.


