A Homeowner's Guide To Outdoor Showers
We may receive a commission on purchases made from links.
Some of the hottest new remodeling ideas featured all over Pinterest and home improvement magazines involve amazing outdoor showers. While many homeowners believe such an addition is out of their budget, there are many ways to construct a gorgeous DIY outdoor shower, ranging from shower kits to doing more intricate DIY projects. Whether you're looking to have a basic setup that uses only cold water or a gorgeous outdoor shower with hot and cold hookups and a tiled wall, there are many factors to keep in mind before you start planning.
Benefits of an Outdoor Shower
Benefits of an Outdoor Shower
The most common reason people install an outdoor shower is because they have a swimming pool and want to be able to rinse off before and after taking a dip. It's a good idea to shower before getting in the pool, as this reduces the bacteria, lotions and oils that make their way off people's skin and into the pool. An outdoor shower makes this process quicker, more comfortable and less messy than showering indoors before going outside.
Plenty of people without pools will find outdoor showers beneficial, though. Bathing outdoors can be a unique open-air experience that is simultaneously relaxing and invigorating. Whether you work out outdoors, work on cars in your garage, get dirty knees while gardening or otherwise get hot or messy outside, an outdoor shower can help cool you off and clean off sweat, mud, oil and more. If your pets get dirty outside or your kids tend to be big fans of stomping in puddles on rainy days, a handheld showerhead is also a fantastic way to clean them before they track mud inside your home.
One great thing about outdoor showers is that there are designs to fit every budget. If you don't have a ton of money for your outdoor shower project, consider a DIY outdoor shower kit, many of which require little more than a garden hose to hook up. If you're not big into DIY projects and want to invest more in your outdoor shower enclosure, a kit allows you to construct a complete enclosure for maximum privacy, enjoy both hot and cold water and set up a drain that links to your home's wastewater system rather than allowing the runoff to drain into your landscaping.
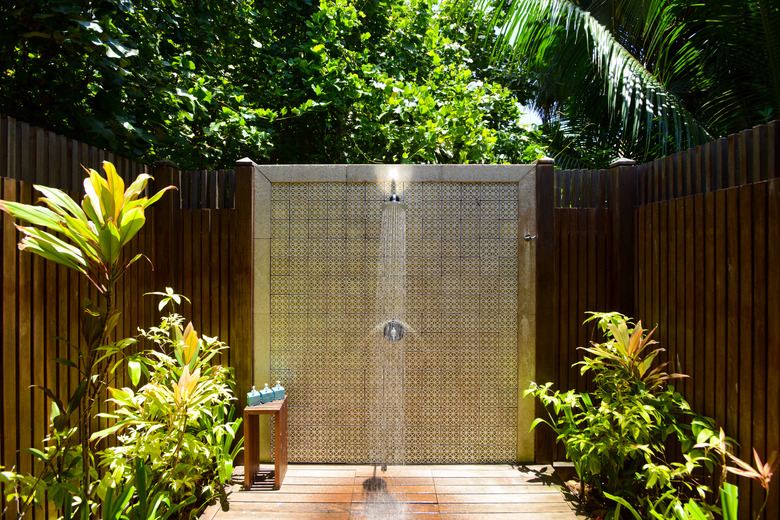
 Nakarin_thailand/iStock/GettyImages
Choosing the Right Location and Size
Choosing the Right Location and Size
One of the first things to decide when you want to add an outdoor shower is where to place it. While the most common location is near the back door, many want the shower to be near their pool, garage or boathouse since this is where they will need it the most. While it's good to think about placing the shower where it will be most convenient for your purposes, it's also important to think about your budget.
This means it's generally good to install the shower near existing water lines, as having a plumber install new water lines far away from your existing pipes will significantly add to the cost. If you're installing a DIY outdoor shower that will hook up to your hose connection, then you'll want it close to the faucet in order to avoid stringing a hose across your yard.
Try to put the shower somewhere sunny whenever possible. This won't just keep you warmer while you bathe outdoors but it will also help reduce the risk of mold, algae and mildew buildup, keeping the shower area more hygienic.
Also consider the right size for your space. You want something that is big enough to be used comfortably, which means it should be at least 3 feet square. While many people want the biggest shower that will fit in the installation space, this isn't always a good choice. Make sure the shower won't encroach on any other fixtures outside and won't get in the way of the rest of your outdoor living space. As for the showerhead height, 80 inches is the standard, but you might also want a foot shower to clean your feet or shoes before you come inside, though a handheld showerhead can let you control the spray at any height you choose.
Do You Care About Privacy?
Do You Care About Privacy?
If you intend for the shower to be used over swimsuits, fishing waders or other clothing, then you don't need to worry about privacy. Similarly, if your house is far away from any prying eyes and you aren't particularly concerned about modesty, you could shower out in the open without any worries. That being said, most people prefer showering with some sense of privacy.
Some homes have areas off to the side that allow for sufficient privacy, but most people will need to add one or more walls to create a permanent shower enclosure, install a shower curtain or simply place a movable privacy screen beside the shower. Permanent enclosures can have four sides or one open side where the view of the bather is obscured. One or more of these walls may be the home's walls, or the shower can be built with three or four stand-alone walls. Even without an enclosure, adding a U-shaped shower rod fitted with a shower curtain or having a waterproof privacy screen is often enough protection.
If you need a little privacy from your neighbor's upper windows or upstairs decks, consider installing a vine-covered trellis that will block their views but still allow light and air to enter the shower area.
Make Plans for Drainage
Make Plans for Drainage
The most common outdoor shower drainage option is to allow the water to flow into the soil below or beside the shower itself. For these drainage systems, it's important to only use biodegradable, earth-friendly soaps and shampoos that won't hurt the nearby vegetation or pollute the groundwater. The shower can be placed right above the intended drainage site, or the water may be directed with piping or a slope in the ground. When the water is redirected, you can use it to water plants but remember to never grow edible crops in areas using your used shower water because it's not safe to eat anything grown in untreated wastewater, also called gray water.
You should only drain into the soil if the drainage area is not right beside the home's foundation, if the shower isn't used so often that it floods the drainage area and if your soil drains well. You can test your soil's drainage by dumping a large bucket in the proposed drainage area and seeing how long it takes to soak into the soil. If there's still water there after five minutes, you may need to install a dry well, which is a hole filled with crushed gravel that allows the water to slowly permeate the surrounding soil.
If your shower will be right beside your home's foundation, you'll need to redirect the water somewhere else. A traditional shower pan can collect the water from the shower and direct it to a location of your choice using a drainage tube. Keep in mind that water won't travel up an incline without a pump.
Some municipalities require gray water to be drained into your wastewater system so it doesn't contaminate the groundwater. This is also a good option if you don't want to be limited to environmentally friendly soaps and shampoos. To connect to your wastewater system, you'll need a plumber to connect your outdoor shower drain to the indoor plumbing. This also means the shower should be installed near an existing drainage pipe to save money.
Hookups and Heating Options
Hookups and Heating Options
When it comes to installing an outdoor shower, the cheapest hookup option is to simply use your home's existing outdoor water faucet. If you really want to make installation easy and cheap, you could simply place a showerhead between the branches of a tree. That being said, using an outdoor faucet doesn't always mean you are stuck with an exposed shower hose dispensing cold water. You add to the design appeal by buying an attractive outdoor shower kit or going the full DIY route by covering the hose with a homemade wood enclosure (or even a hollowed-out surfboard).
You can also connect a tankless gas water heater to add warmth. These portable heaters can easily be stored behind a bush or in a small box. They use propane to heat water as it passes through the pipe.
One of the best DIY outdoor shower ideas for those who want hot water with minimal investment is to use a Y-splitter to divide the water from your faucet so it can enter two hoses. Use one hose as the cold-water hookup on your shower and use a long, black hose for your hot-water hookup. Make a large spiral in a sunny area with the black hose, ideally on the roof of your home or shower enclosure. The water in the black hose will heat under the sun, and as long as you shower on a sunny day and don't run the water for too long, you should stay warm. If you don't like the aesthetics of a coiled hose, though, there are also solar-powered outdoor shower bases.
Those willing to hire a plumber have two options. The more budget-friendly option is to simply install a frost-proof hot-water outdoor faucet beside the cold faucet and then hook up a heavy-duty hose to each faucet. Once you have the hookups ready, you can install just about any type of shower setup you desire (just make sure you purchase an outdoor shower that has two hose inputs). This option is actually preferable if you need to winterize the shower because you can just take off the hoses during the winter.
Alternatively, if you prefer a shower that looks and feels more like the one you have in your home, you could ask the plumber to install fixed plumbing pipes rather than just adding an outdoor hot-water faucet. These can either be wall mounted so they come out of the wall like a traditional indoor shower, or they can be freestanding, meaning the pipes are installed underground, and the fixture is spaced away from the wall.
Freestanding designs are generally better for enclosures away from the home, and many people prefer their appearance, but wall-mounted designs are sturdier and are generally better sheltered from the elements. While fixed plumbing lines generally look more attractive, keep in mind that they can crack in freezing weather and must be drained in the winter.
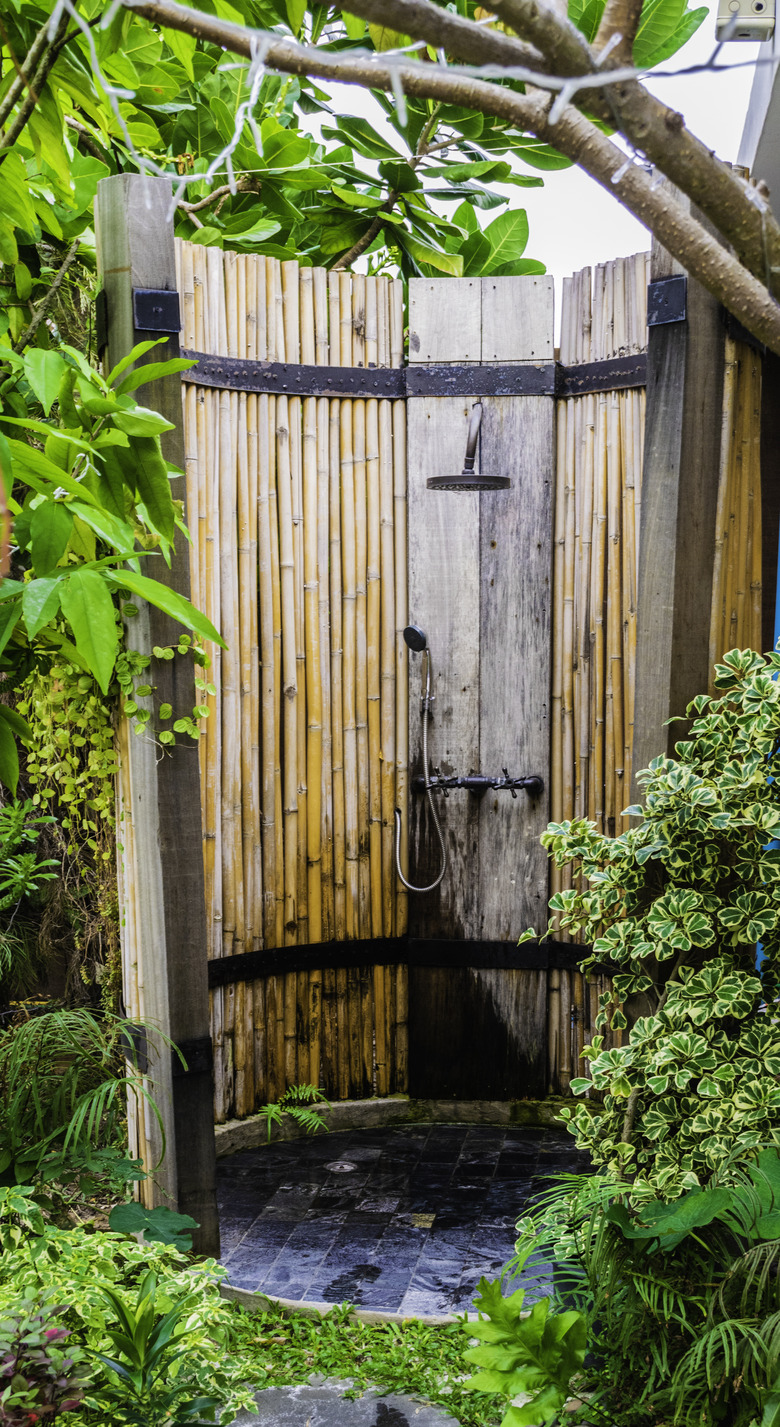
 Kanawa_Studio/iStock/GettyImages
Choosing the Right Materials
Choosing the Right Materials
There are three areas on which you need to focus when it comes to materials: the enclosure, the fixtures and the flooring materials. For the enclosure, slatted wooden walls are one of the most popular outdoor shower design ideas, but remember that some people will still feel uncomfortably exposed with these, though there are slatted walls with overlapping designs that allow for air to flow while still blocking the view.
Alternatively, there are many shower decorating ideas online that feature wood, vinyl, corrugated metal or similar materials to create partitions. For a more natural look and feel, you could also make a "garden shower" by planting a row of hedges or a vertical trellis fitted with climbing vines. If you use your home's wall for any shower walls, be sure to first apply a few extra coats of waterproof sealant.
When deciding on outdoor shower fixtures, it's best to go with marine-grade stainless steel for the plumbing pieces, as this holds up better than other materials when exposed to the elements, including salt exposure if you live in a coastal area. That being said, the shower valves and showerhead can be made from brass adorned in stainless steel, chrome, bronze or copper finishes according to your tastes. This will also make winterization easier since you'll just need to remove the fittings and drain the lines, and the stainless steel shower parts will survive outside just fine.
Many DIY shower kits are available with easy-to-install fixtures but always make sure they are made from quality materials before purchasing. When buying your fixtures, decide on your hookup method before purchasing since a design with two inlets won't work for a shower that only hooks up to one hose and vice versa.
When it comes to the shower floor, the most common option is a floor made from waterproof wooden slats, and wooden first-floor decks are actually ideal for this purpose, as the wastewater can flow directly into the ground below the deck. You can also use stone, a traditional shower pan or concrete, but these should be slip-resistant and have sufficient sun exposure to fully dry between uses, and the water needs to go somewhere it can properly drain, whether that means letting it flow into a dry well below the shower floor or redirecting it elsewhere. If you have a shower drain that redirects the water, be sure it is fitted with a quality cover to prevent debris, like leaves and rocks, from plugging up your drainage system.
References
- Cabin Life: How to Build & Enjoy an Outdoor Solar Shower
- PlumbingSupply.com: Outdoor Shower Buying Guide
- Signature Hardware: Outdoor Shower Buying Guide
- Gardenista: Hardscaping 101: Outdoor Showers
- Hudson Reed: The Ultimate Guide to Outdoor Showers
- Country Living: 16 DIY Outdoor Shower Ideas You'll Be Thankful You Built When Summer Rolls Around
- Outdoor Shower Company: How to Heat Water for Outdoor Shower
- Realtor.com: Top Price-Boosting Summer Fun Home Features
- Dimensions.com: Shower Heights | Clearances
- Swim Guide: 3 Reasons You Should Shower Before and After Swimming