Steps For Building A DIY Backyard Patio

We may receive a commission on purchases made from links.
As a DIY project, building a new patio is difficult in terms of the physical labor required but fairly easy as far as the expertise and skill required. The payback is substantial, as a backyard patio can greatly improve the quality of your outdoor living. Some patio materials, however, are more suitable for DIYers, so it's wise to consider options before launching into building.
Materials for a DIY Patio
Materials for a DIY Patio
There is a wide range of building materials that can be used to create a new patio.
- Poured concrete: This traditional outdoor paving material makes for a very durable patio surface, but it can be grueling for a DIYer to install, especially if the patio is large.
- Flagstone: The term "flagstone" generally refers to pieces of flat, thin, irregular natural stone used for paving. Limestone, sandstone, bluestone and slate are common forms of stone used for this purpose. A flagstone patio makes for an informal and very beautiful patio, but the surface will be somewhat rough and uneven, and it can take some skill and a good artistic eye to arrange the stones in an attractive fashion.
- Sand-set pavers: Pieces of cut natural stone, clay bricks or molded concrete bricks used in outdoor "floor" surfaces are known collectively as "pavers." Many pavers are rectangular in shape, but there are also geometric shapes often used for curved or round patios. A very popular method for DIY installation is to float pavers on a bed of sand laid over a crushed gravel subbase. The pavers are then locked in place with paver sand spread over the patio and brushed down into the cracks. Sand-set pavers comprise a large percentage of all DIY patios installed today.
- Mortared pavers: It is also possible to create a patio by embedding paver bricks into a bed of wet mortar and then filling the cracks with grouting mortar. This makes for a terrifically strong and durable patio, but installation is not easy. Most people choose to hire pros for this kind of paved surface.
- Loose-fill material: The most informal and least durable form of patio is to simply pour loose-fill gravel or another material, such as wood chips, over a prepared area. This is by far the cheapest option, and it works best where a very informal look is desired, such as for a social space around a fire pit.
While the details of how to build a DIY patio will vary considerably depending on the material you choose, all patio construction includes the same basic steps.
Research and Plan Your Project
Research and Plan Your Project
No matter what material you choose for a patio, the work will go more smoothly if you research how to use the material in a patio application. Most manufacturers offer detailed instructions on how to excavate, grade and lay a base and underlayment as well as how to install the paving surface.
Make sure you have all the tools and materials required before you begin. A patio usually requires a lot of bulky materials, which you'll probably want to have delivered. Designate a space for dropping off materials such as bulk gravel, sand and pallets of paver bricks.
Scheduling can be crucial, especially if you are renting tools, such as wet saws, or if you plan on having ready-mix concrete delivered for a concrete slab patio. Make sure you have arranged for the helpers you need to complete your project. A concrete pour in particular requires a lot of helpers.
Mentally practice the installation procedure for your patio so you know the process backward and forward. Patio installation is dependent on weather conditions, and you don't want to have to pause to research next steps midway through the project.
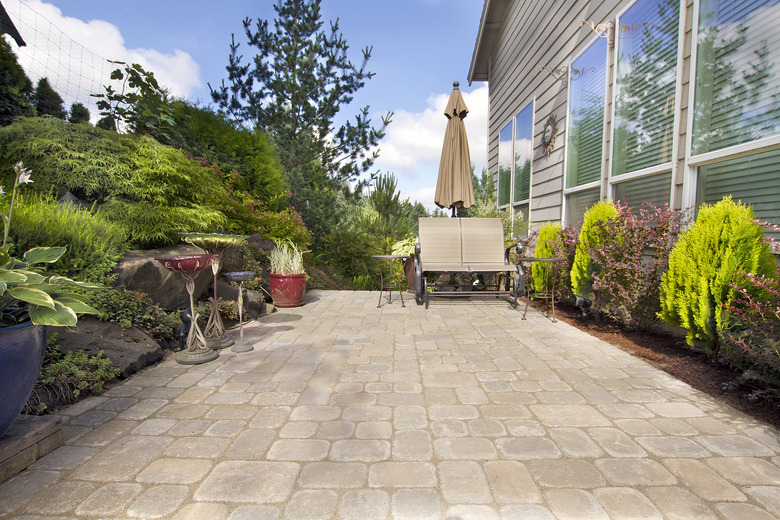 JPLDesigns/iStock/GettyImages
Assess the Building Site
Assess the Building Site
A key element of planning is to view your yard and determine if and where a patio can be installed. Things get quite complicated if you have a notably sloped yard without any flat areas for a patio. Most manufacturers of paving materials suggest that a worksite should slope no more than 1 inch per foot to reasonably accommodate a patio without major grading and earth-moving work. Even this amount of slope will require some heavy raking to flatten the site. A yard area that slopes more than 1 inch per foot may require considerably more earth moving, sometimes even to the extent of building retaining walls and backfilling to create a flat yard area.
At the same time, you want your patio to be located in the spot where it is most functional for your family and where you can best enjoy outdoor living. Generally, this means a spot that is reasonably close to the house and entryway, although some backyard patios work well when positioned at a distance from the house.
Establish the Layout
Establish the Layout
After making arrangements for all the tools, materials and labor assistance you need, the first active step is to stake out the location of the patio in the yard with stakes and layout strings. A patio can be any shape or size you want, but just remember that curved, irregular shapes will be more complicated to build.
When staking out the patio site, begin with layout strings that are perfectly level by using a line level. These strings will be your guide for excavating the site for the base. While you will create a very slight slope for your patio surface to allow for rainwater to drain, it is important for the layout strings to be perfectly level in the opening stages. Curved edges of the patio can be marked on the ground with a garden hose or rope.
With the boundaries of the patio marked with layout strings, rope or a garden hose, most DIYers find it helpful to then spray-paint the edges of the patio on the ground before beginning excavation.
Excavate the Patio Site
Excavate the Patio Site
All patios will require that you excavate to make room for a gravel base, whatever underlayment is required and the paving material itself. The goal is for the surface of the patio to be at or just slightly above the level of the lawn that surrounds the patio.
Consult the manufacturer's directions for depth of excavation. For example, one manufacturer of 2.36-inch-thick molded concrete pavers suggests an excavation of 7 to 9 inches to accommodate the paver thickness, a 1-inch sand bed and a 4- to 6-inch layer of gravel as a leveling pad. For sand-set patios, it's typical for the initial excavation to extend about 6 inches beyond the edges of the patio on all sides.
For a poured concrete patio, on the other hand, an excavation of 10 to 12 inches is required to accommodate 6-inch-thick gravel base under a 4-inch-thick poured concrete slab.
Grade and Flatten the Site
Grade and Flatten the Site
With the rough excavation done, the bottom of the excavation needs to be both flattened and slightly graded (sloped) in the direction you want. If your patio will adjoin the house foundation, then the patio should slope away from the foundation by a pitch of 1/8 to 1/4 inch per foot. At each stage, you will check and recheck this slope, but it begins with grading the bottom of the excavation itself.
A good bow rake is the best tool for flattening the bottom of the excavation. You can use level layout strings and a tape measure to gauge the slope of the excavation. For example, a 12-foot-wide patio should slope downward by 1 1/2 to 3 inches over its 12-foot width to ensure good rainwater runoff. This slight downward slope is more crucial for a patio that sits against the home foundation, but even a detached patio should have a slight slope to prevent rainwater from puddling on the surface.
Lay the Base
Lay the Base
Virtually all patios require that you install a base layer of compactible gravel before installing underlayment for the paving material itself. It's important to use the right kind of gravel for the base. Rather than a decorative hard, smooth gravel, the base layer should make use of a compactible gravel. This is often a crushed limestone material that will readily break and flatten as you compact it into a smooth layer.
The thickness of the base gravel layer varies according to the paving material that is being used, but a 4- to 6-inch layer applied in 2-inch-thick layers is typical for a sand-set paver patio. With poured concrete, a full 6-inch layer of gravel base is standard.
The gravel base layer should be laid down in 2-inch layers, and each layer is compressed with a hand tamper or power tamper before the next layer is applied. As you are laying the base, periodically check the grade by measuring from layout strings or using a long 2x4 and a level. Remember to maintain a slope of 1/8 to 1/4 inch per foot to ensure good drainage.
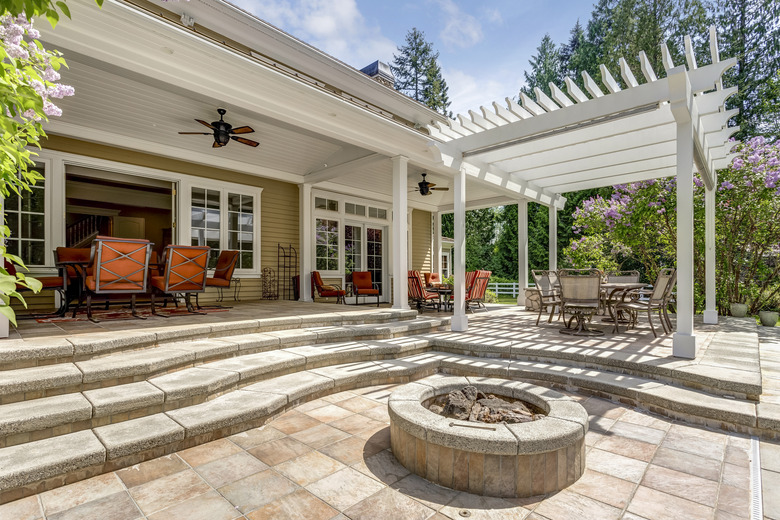 alabn/iStock/GettyImages
Install Edging or Forms
Install Edging or Forms
After the gravel base is installed, most patio materials require an edging material of some kind. This can be wooden 2x4 forms staked into place if you are pouring a concrete slab patio or a rigid plastic edging if you are installing a sand-set paver patio. Plastic edging comes in both straight segments and lengths that can be shaped into curves.
Follow the manufacturer's recommendations regarding when to install the edging. With some pavers, the recommendation may be to lay down the sand underlayment before the edging.
Install the Underlayment
Install the Underlayment
Over the gravel base but beneath the surface paving material, all patios have some kind of underlayment installed. In the case of a poured concrete patio, this involves installing wire reinforcement mesh or metal reinforcement bars (rebar) to help reinforce the slab when the concrete is poured.
The underlayment is more complicated with a sand-set paver patio. Here, it usually involves first rolling out geotextile fabric (landscape fabric) over the gravel base and then pouring a 1-inch layer of sand over the fabric. The fabric layer is designed to prevent weeds from growing up through the gravel, and the sand layer beds the loose-set paver bricks.
A very common way to install the sand underlayment is to first lay down two or more parallel 1-inch-diameter pipes. The loose sand is then spread over the landscape fabric, and the sand is screeded to a perfectly flat layer by drawing a long 2x4 along the pipes. When the sand layer is flat, the pipes are removed, and the gaps are filled by carefully sprinkling additional sand in them.
Lay the Paving Material
Lay the Paving Material
Now comes the major step of installing the paving material itself. Here, the techniques will vary considerably depending on the material. With a poured concrete slab, it involves spreading wet concrete over the reinforcement mesh and gravel base, spreading it out, screeding it flat and then smoothing it with a series of passes using a variety of concrete floating tools and edging tools. It is critical that control joints are cut into large slabs at this point.
It is also possible to create unique finish treatments in a concrete slab, such as "seeding" the wet surface with decorative stone, stamping patterns into the wet concrete or colorizing it with various dyes or acids. Note that concrete work is no easy skill to master. Homeowners without experience may want to hire pros for this phase of a concrete slab patio project.
Installing a sand-set paver patio is a considerably easier DIY project. It involves systematically positioning paving bricks over the sand underlayment in the pattern you choose and setting the bricks by tapping them into the sand with a rubber mallet. Edges of the patio are often established with an outer boundary of parallel pavers set at a different angle to the field pavers.
At the perimeter of the patio, it may be necessary to cut bricks to size, which is a job best accomplished with a power wet saw. This tool can be leased at home improvement centers or tool rental outlets, although DIYers who do a lot of tile or brick work may find that it's worth purchasing the tool.
 jodiejohnson/iStock/GettyImages
Finish the Surface
Finish the Surface
Sand-set brick pavers have a more elaborate finishing process that includes spreading paver joint sand over the surface and then tamping it with a power tamper or hand tamper to settle the sand. The final step is to lightly sprinkle water over the sand-set paver patio to fully lock the paver bricks into place. Paver joint sand has a special polymeric formulation that forms an elastic bond when soaked with water. When done correctly, a sand-set paver patio can be extremely durable, yet pavers can still be removed for repairs or replacement.
The finishing process is more straightforward with a poured concrete patio. Here, it's a simple matter of letting the concrete cure by covering it to allow moisture to slowly dissipate (this can take one to two weeks) and then sealing the slab by applying a silicone sealer of your choosing.