DIY Patio Design
We may receive a commission on purchases made from links.
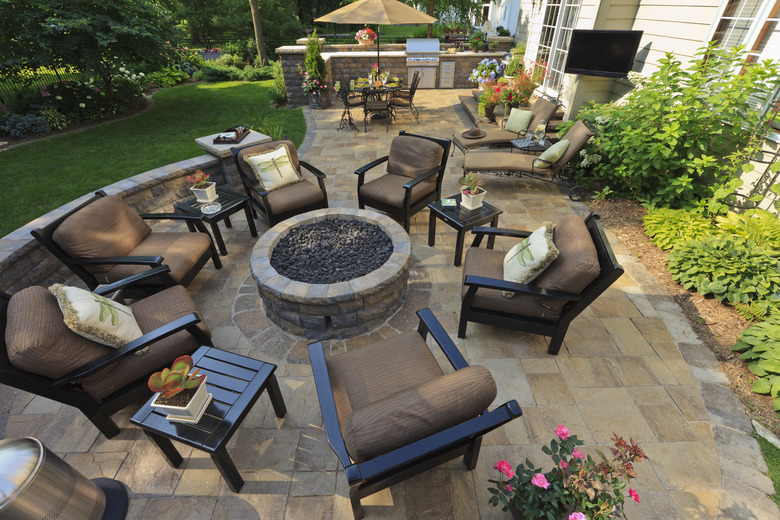
If you're planning a DIY backyard patio to provide a space for gatherings around the fire pit, quiet contemplation, outdoor dining or simply a place to enjoy outdoor living, the first step in the process is to come up with a patio design that suits your needs and fits in with the rest of your landscaping. You can find plenty of inspiration online, but even when you settle on a motif, there are plenty of nuts-and-bolts design decisions to make before you break ground. One of the most important is the intended use of the patio, which strongly influences the size, shape, layout and patio materials.
Intended use isn't the only important factor, of course. The constraints within which you have to work all come into play, including the amount of available space, the shape of your property and — definitely not least important — your budget. Practical considerations include how a large hardscape element like a patio will affect the overall landscaping in terms of shading, sight lines, drainage and growing space. A perfect patio design takes all these factors into account equally, but perfection is elusive, and homeowners typically have to prioritize some over others in the interest of creating a fashionable outdoor living space.
Good Patio Design Starts With a Drawing
Good Patio Design Starts With a Drawing
The size and shape of your patio determine how you use it, and they are in turn dictated by the existing landscape, including trees, shrubs and gardens. Patio dimensions and contours affect the choice of materials. While most materials are suitable for a rectangular backyard patio, which is the easiest to build, not all work as well if the patio has curved edges or an irregular shape. Fitting flagstone into a curved shape, for example, is difficult but doable (although you may have to pay an expert installer premium prices), whereas poured concrete easily assumes any shape.
Good patio design ideas, especially those that involve complex shapes, should be committed to paper by plotting a scale drawing of the patio and the surrounding landscape. Take the time to measure the dimensions of the property using a 100-foot tape measure, plot it on graph paper to a suitable scale (such as one square on the paper equaling 1 square foot) and then place all structures, gardens and other landscape elements in the drawing. This reveals exactly how much space you have to work with as well as the shape of the space, and you can then draw the patio on the paper, which incidentally gives you an easy way to determine its area so you can draw up a materials list.
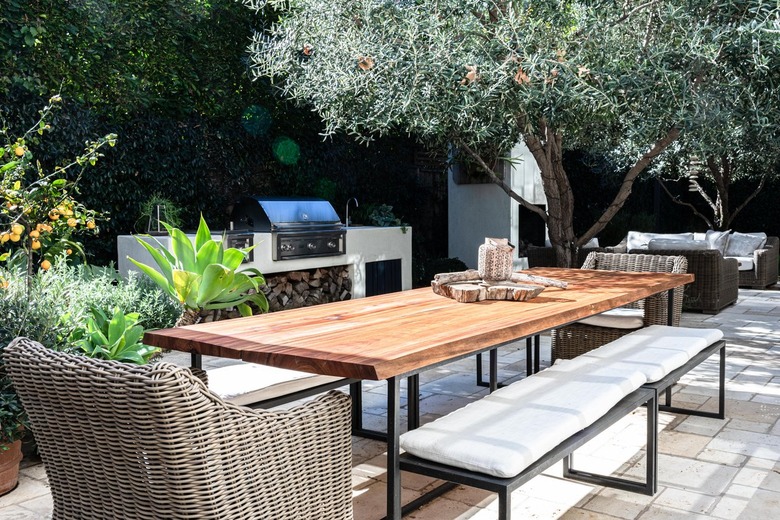
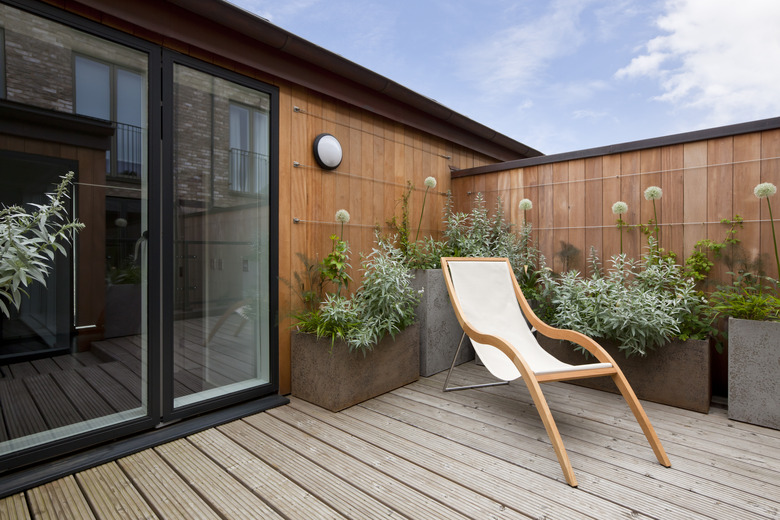
Once you've made a tentative drawing, test it by walking the site and looking for reasons you may want to make modifications. For example, one part of the patio may be in perpetual sunlight, which would necessitate the addition of a canopy, or the ground may be steeply sloped, which could call for a multilevel patio. If you're designing a rectangular patio in the middle of the lawn and you plan to use chairs and other outdoor furniture, arrange some patio furniture on the site and make sure it all fits comfortably without going over the edge. You may need to make the patio a little bigger, and it's good to find out before you do all the work.
 frazaz/iStock/GettyImages
Work Within Your Budget
Work Within Your Budget
Unless you're one of the lucky few for whom expense is no object, you'll have to consider cost when making design decisions, and that may affect your choice of materials. As far as the patio base, which typically consists of a layer of landscape fabric, fill rock and leveling sand, all patios basically consist of the same materials, but there's a large price disparity when it comes to the surface layer.
At $6 to $10 per square foot, the least expensive material is pea gravel or a similar loose material, and though it's a budget option, it makes a surprisingly long-lasting and serviceable patio surface. Poured concrete is not far behind, costing from $6 to $17 per square foot, the uptick in the high end being due to stamping, staining or other decorative embellishments. If you're looking for a paver patio, concrete pavers run between $13 and $20 per square foot, while brick costs roughly the same. At the high end, natural stone pavers, including flagstone, can cost between $14 and $28 per square foot.
Since it's a DIY project, you don't have to figure in the cost of installation, which isn't included in the material price, but if you're going to do it yourself, be sure you know what you're getting into. You may be able to build the forms for a small concrete patio and handle the pour yourself, but if you want to finish the surface by stamping or staining, you're wise to hire a pro with experience because mistakes can't be undone. Most sandset materials, like brick and concrete pavers or flagstone, are also DIY-friendly, but installation requires a significant amount of labor and attention to detail.
Check the Lay of the Land
Check the Lay of the Land
Whenever you add a large hardscape area to your landscaping, you have to think about where the water is going to go. The last place you want rainwater to end up is around the house, so the patio should slope away from the foundation with a minimum grade of 1/4 inch per foot. That runoff could end up overwatering a garden area or contributing to an existing drainage problem, so your patio design may have to include a perimeter drain.
On hilly terrain, the opposite problem can occur, which is that water drains down a slope onto the part of the land on which you want to build. In that case, you may want to incorporate a retaining wall into the design, and there are elegant ways to do this while providing seating areas, containers for plants and other extras. A stone wall is a natural extension of a stone patio, brick goes with brick and if you're planning an inexpensive gravel patio, a wood retaining wall would match up well.
If you have to add drainage trenches or retaining walls, don't forget to make room for them. Even though it's underground, a drainage trench needs about 12 inches of clear ground space above it, and it needs a root-free stretch of ground through which to extend to a runoff point. Retaining walls also need drainage, and even though the trench is on the uphill side of the wall away from the patio, you need to allow space for it as well as for the wall.
Solve Drainage Issues With Permeable Pavers
Solve Drainage Issues With Permeable Pavers
Locating a patio on a low-lying piece of land or on one with undulating rises and falls can make drainage difficult, and sometimes, the best solution is to install permeable interlocking concrete pavement, otherwise known as permeable pavers. These concrete pavers are designed to have gaps between them that typically get backfilled with pea gravel or porous sand, which allows water to seep into the ground instead of running off the patio. It's difficult to find these online, so you may have to order them through your local stoneworks dealer.
Along the same lines, the DIY builder can install plastic permeable pavers, which are interlocking grids that you fill with gravel or turf. These polyethylene grids are designed primarily for driveways, but they also provide an easy solution for patio drainage problems, and they offer one option you can't get with any other product: You can make your patio out of grass (although gravel is more common).
 TimAbramowitz/E+/GettyImages
Plumbing, Lighting and Gas
Plumbing, Lighting and Gas
You may intend to include a fire pit, an outdoor kitchen or a gas heater, and if any of them involve underground pipes, the pipes have to be part of the design. You may want to tie into your home's gas and water systems, run the pipes under the patio and stub them up in the appropriate spots, which means the pipes have to be installed before you lay the patio base. In the case of gas appliances, it's often more convenient to purchase ones that have tanks or hoses that connect to tanks so you can move them around. If you want heaters to make the patio comfortable at night and in chilly fall weather, add $200 to $300 for each freestanding propane heater you need.
You'll probably also want to consider lighting your patio at night, and solar fixtures offer the most flexibility, not to mention the fact that they won't increase your energy bill. Solar lighting can be unreliable, though, especially if the patio is in the shade or you don't live in a solar-friendly location, and even if you get lots of sun, it's weather-dependent. You can always rely on low-voltage lighting, however, even in bad weather, and if that's your choice, you'll want to bury any wires that go under the patio before you install the patio.
 chuckcollier/E+/GettyImages
Shading Your Outdoor Living Space
Shading Your Outdoor Living Space
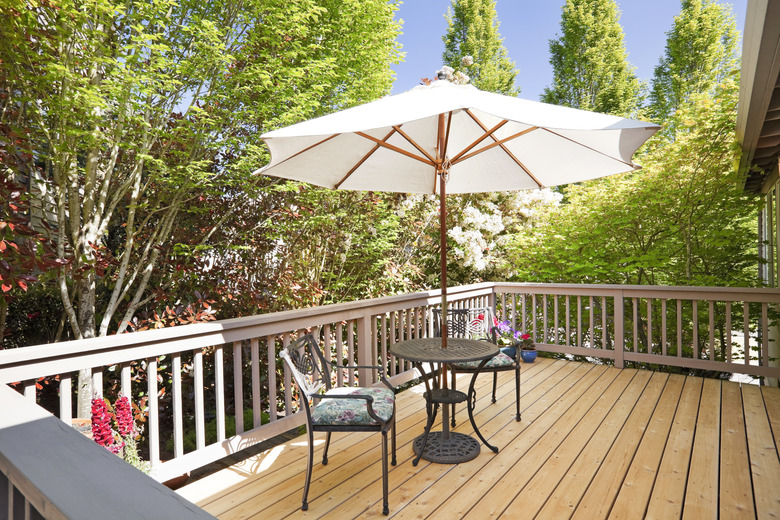
If you can't locate your patio in a shady spot, you'll probably want to make your own shade, and there are many ways to do this after you've finished the patio. You can erect a freestanding structure to hold a shade cloth or a tarp, or you can simply deploy umbrellas. If you want a more permanent shade structure, such as an actual roof or a trellis for lush, shading foliage, you should make that part of your design. It's a lot easier to install the posts you need for a permanent structure before you install the patio than it is afterward.
The posts for a sturdy, wind-resistant structure typically get buried in concrete like fence posts, and you'll want to locate the posts on your drawing so you can place them after you've dug out the pad for the patio. Solid posts buried in concrete can double as supports for benches, a countertop for your outdoor kitchen or dining area or containers for flowers, herbs and vegetables. They can also support a fence or a wall if you want to add some privacy to your outdoor living.
If you forget to add posts to your design and you later find that you need shade, there are plenty of options. You can build a simple structure that sits on the patio surface, or you can sink posts into the ground around the patio perimeter. These measures may look like an afterthought, though, so it's better to plan ahead. A good way to gauge the need for shade is to spend a half hour or so sitting in the area of the proposed patio at different times of the day.