How To Make A Stepping Stone Path
We may receive a commission on purchases made from links.
Installing a classic stepping stone path can enhance your home's curb appeal, guide the flow of foot traffic through your garden and separate your landscape into discernible outdoor spaces. As one type of hardscape, a stepping stone walkway provides a visual and textural contrast to the plants in your landscape. Even if you're not skilled in construction or masonry work, laying stepping stones is an attainable DIY project that you can finish in only a day or over a weekend depending on the project's scope.
Stepping Stone Path Considerations
Stepping Stone Path Considerations
Before you choose the type of material for your stone walkway, consider the type of path you want. Will it be for the walkway to your front door, or will it be a meandering garden path in a woodland setting or a stepping stone path that borders a flower bed and separates it from your lawn?
If the path is for your front walkway, choose a material that complements your driveway and the façade of your home. If you want to install stepping stones in front of your brick or stucco home, for example, and the path will also adjoin your concrete driveway, choose a type of stone for the path that coordinates with these two existing hardscapes. Otherwise, you may end up with a mishmash of three disjointed hardscape materials, which will detract from your home's curb appeal.
In your planning phase, you may also want to consider a couple safety features of stepping stones. The texture and even the color of your stone walkway can increase the comfort and security for you, your family and visitors to your landscape. HGTV notes that choosing textured stones offers more traction when the stone is wet rather than installing smooth stones that become slippery when it rains. Dark-colored stones can burn bare feet in hot weather.
Types of Stepping Stones
Types of Stepping Stones
When choosing materials for your stone walkway, you'll find a variety of options available. Among the most common choices are natural stone and precast pavers. Although each of these materials may turn out finished projects that look similar, each has different characteristics.
-
Natural stone. Southwest Boulder & Stone notes that flagstone is an umbrella term for
different types of natural stone that you use for walkways. In its natural
state, stone takes different sizes and shapes. To prepare flagstones, stone
masons break up large stones into thin sheets, which are further broken into
smaller pieces. Flagstone has different colors and textures depending on the
type of rock from which it was cut. Some types of flagstone are limestone,
sandstone, bluestone, shale and granite. -
Precast pavers. Although precast pavers are made
of some of the same raw materials that also comprise natural stone, Tile Tech
explains that they are formed from a mixture of pebbles, gravel, sand and cement. These
components are mixed to form concrete, and the mixture is poured into molds to
create pavers. These pavers replicate the look and feel of natural stone pavers
because some of the same types of stones, such as sandstone and limestone, are part
of the molding process.
Before Stepping Stone Installation
Before Stepping Stone Installation
The hardest part of your stepping stone walkway DIY project could be hauling the stones to your home, although you may want to pay the delivery fee so you're not stuck with this task. Whether you have your stepping stones delivered or you pick them up yourself, you'll need a wheelbarrow or cart for ferrying the stones from their on-site location along the length of your path as you build your walkway. Consider using a four-wheel wheelbarrow, which offers more stability than a standard one-wheel style when transporting heavy materials, or you can also use a four-wheel garden cart.
Before installing your stepping stones, call 811 (the national "call before you dig" hotline) to have the local utility providers mark the location of any utility lines that may be buried underground. The utilities typically do this by applying spray paint on top of the ground directly above any buried lines. Even though you probably won't need to dig very deeply to install your stepping stones, some utility lines may be shallower than when they were installed because of soil erosion or the natural heaving of the ground during freeze-thaw cycles. If you cut one of these lines while digging without calling a utility locator service to mark their location, you may be responsible for the cost of repairing the damage.
After the ground above any underground utility lines has been marked with spray paint, arrange your stepping stones along the path you want for your walkway without placing them on top of any marked areas. If your intended walkway crosses over any buried lines and it's impossible to reroute your path, consider leaving a gap between the stepping stones that straddles the line and simply bridge the gap with turfgrass or a low-growing ground cover.
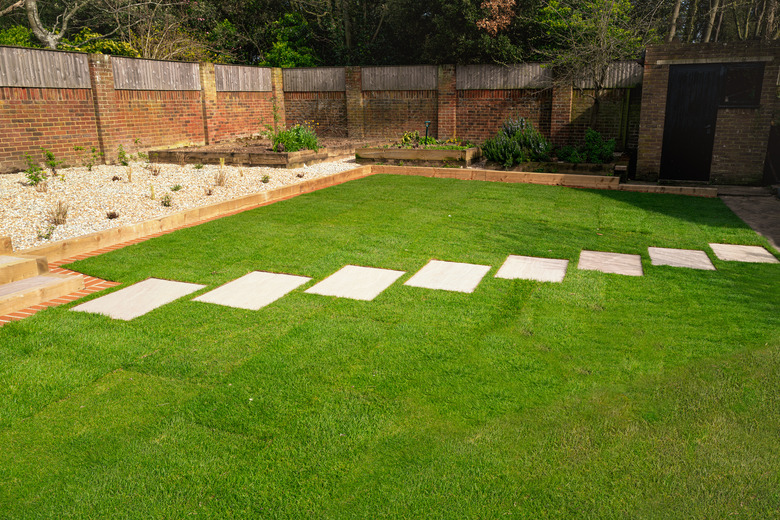
Picture placing the stepping stones as jigsaw-puzzle pieces that do not interlock or even touch, but be sure to place them close enough to accommodate a natural stride. Also, consider that your stride may be longer than that of shorter members of your household or even guests to your landscape, so place the stepping stones with this in mind.
Lay a Stepping Stone Path
Lay a Stepping Stone Path
Sever the grass roots around each of your stepping stones by using a half-moon edger. This type of long-handled edger has a half-moon-shaped blade that cuts the grass when you step on the tool. Although you can use a shovel or spade to cut the grass, the sides of these tools are rounded, whereas the half-moon edger is completely flat, allowing you to cut a precise outline of each stepping stone. If you thoroughly water the grass in the area of your intended path the day before installing stepping stones, the job of cutting and removing grass underneath each stone will be easier.
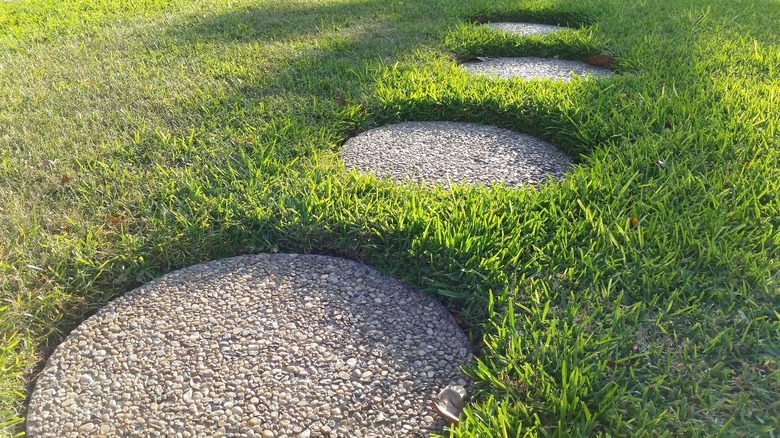
After you've completely cut through the grass roots around each stepping stone, set each one to the side and remove the sod underneath it using a shovel or spade, making sure to remove all the roots. Excavate enough soil underneath each stepping stone so that it sits slightly above the ground level. By doing this, the stones will be flush with the ground when they gradually settle.
Place builders' sand in each excavated hole and use a level to make sure each stepping stone is level after gently tamping it with a rubber mallet to seat it in the sand. As the stones settle, you may need to add more builders' sand to raise any low spots.
Stepping Stone Installation Options
Stepping Stone Installation Options
You may prefer to fill in around the stepping stones with pea gravel or mulch, or you may want to use ground-cover plants between them instead of setting them directly into your turfgrass. If you choose these options, remove all the turfgrass from your walkway instead of only removing the grass underneath each stepping stone. You may find that renting a sod cutter is an easier and quicker way of doing this instead of using a shovel, particularly if your walkway is a long one.
After you've removed all the grass, HGTV recommends spreading a 2-inch layer of builders' sand along the walkway. Place the stepping stones in the sand with each stone above the grade of the sand and check each stone with a level to make sure you'll have a level walking surface. You may want to use a weed-barrier fabric to help suppress weeds. After setting the stones, lay the fabric on top of the stepping stones, cut out around each stone and then add the desired ground cover.
If you are using pea gravel or mulch, spread it around the stepping stones to cover the weed barrier completely. For a neat finished look, edge the fabric with black plastic (or metal) edging or interlocking pavers to keep the pebbles or mulch from washing away.
If you are using ground-cover plants, fill in around the pavers with potting mix instead of gravel on top of the weed fabric. Note that potting mix will settle when it's watered, so use enough to allow for this. Use the recommended spacing for the particular ground cover you're planting so that it eventually forms a solid mat of plants around the stepping stones. Many ground covers, such as bugleweed (Ajuga reptans), a perennial in U.S. Department of Agriculture plant hardiness zones 3 through 10, are shallow-rooted.
These plants spread by stolons, which are stems that grow horizontally along the ground. This means you can plant them directly in the potting soil on top of a weed fabric, and their stolons will spread outward as the plants fill in while their roots grow in the shallow potting mix on top of the weed fabric. You can also cut a large "X" in the weed fabric and tuck the ends under to form openings for placing other types of ground-cover plants. Optionally, you can forego the weed fabric entirely and simply space ground-cover plants directly into the soil around your stepping stones.


