Laying Landscape Stones On A Slope
We may receive a commission on purchases made from links.
Landscaping stones can be used to solve a number of challenges on a slope. You can build tiered retaining walls, create edging to prevent erosion around flower beds or make a stepping stone path to ease the severity of the incline. Laying stones securely on a slope doesn't require extensive landscaping experience or skills. It does help to have a plan and the patience to lay the stones just right.
Laying Landscape Stones on a Slope
1. Determine the Scope of Project
Walk the slope and decide what purpose the landscaping stone will serve. If the slope is not too steep, consider laying paver stones to create a rustic walkway up the slope. If you plan to edge a garden, note if the area has any drainage issues. If the slope has a fairly sharp grade and rainwater has begun to erode your landscape, you may want to install a retaining wall to mitigate erosion damage.
2. Mark the Outline for Stones
Use flour or wooden stakes and string to outline where you plan to lay stones. Adjust the outline's shape to fit with other landscaping elements on your slope. When laying a path, consider how many people may use the path at a time. For instance, two people can pass easily on a 48-inch wide path, while 30-to-36 inches should suffice for a secondary path.
3. Remove Vegetation From Project Area
Use a garden hoe or shovel to clear grass and other growth from the outlined area. If you're laying a walkway, dig a trench as deep as the stones, plus 2 inches. If you're edging a garden, the trench should be deep enough to bury one-fourth of the stones in the ground so the garden will be raised high enough for water to run off and to stabilize the stones.
4. Add Sand or Gravel
Spread a 2-inch layer of sand or pea gravel over the trench with a trowel.
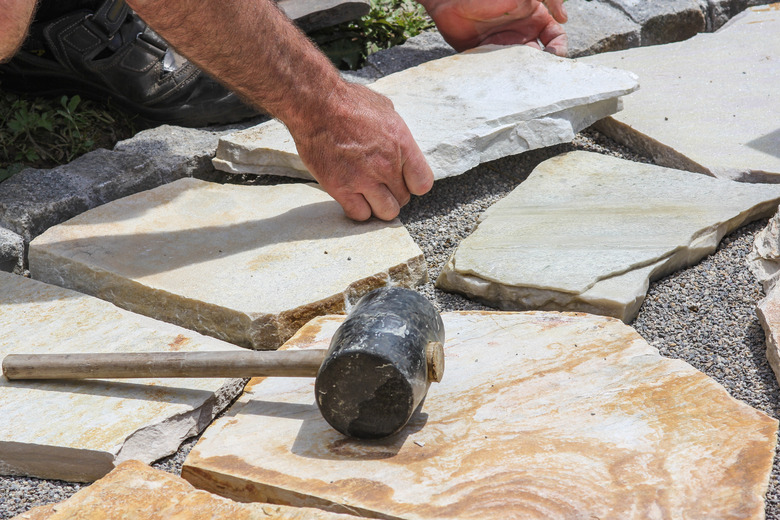
5. Secure and Level First Stone
Set the first stone at the bottom of the trench and tap it with a rubber mallet. The stone should sit even with the grass or slightly above if you're laying a walkway. Add or take sand away to adjust the height of the stone, and check to make sure each stone is even by using a level.
6. Install Subsequent Stone Sections
Lay small sections of stones at a time. Choose stones of similar sizes and shapes for a uniform look or fit small and large stones near each other like a puzzle. Leave about one-fourth inch of space between the stones; for a walkway, use a level to check that the stones are even so people won't trip. Check the side-to-side and back-to-front grade of each stone for proper leveling of walkway pavers.
7. Add Sand to Stabilize Stones
Lay stones from the beginning to the end of the trench. Pour sand over the stones and brush it into the one-fourth-inch crevices. Sand will keep the stones from shifting and prevent weeds from growing between the stones. Brush off the excess sand and pour water over the walkway or edging. The sand will cling to the stones like concrete when it dries.