Range Hood Installation: Everything You Need To Know
We may receive a commission on purchases made from links.
Installing a range hood doesn't always require a professional installer or an electrician. Once you've picked the best range hood for your kitchen renovation, inspect its parts and read the product manual thoroughly to ensure that no extra materials beyond ductwork are needed. Some new range hoods may require a bit of assembly before the actual installation — such as attaching the damper ( a part that inhibits air from flowing back into the kitchen ductwork) — and reading and inspecting the instruction materials also helps ensure that you purchase the right size of duct pieces for the job (if you've selected a ducted hood).
Though installing a range hood isn't exactly a project for a beginner DIYer, this project can be completed in about a day if you have some help from a willing friend or family member who can help you secure the unit in place.
Contact Your Building Department
Contact Your Building Department
Before you even begin tearing out your old hood, check to see whether or not you need a permit first. Some cities require a building permit for range hood installation — and this may be the case even if you're simply replacing an old kitchen range hood with a similar model. Contact your local building department or visit the portion of its website that refers to kitchen remodel projects to see if your project needs a permit.
If you're unsure of whether or not you need a permit, speak to a building department representative so that you can ask questions. There's a chance that the permit requirement doesn't apply to your project, for instance, if you are replacing a hood with a similar plug-in unit for which no ductwork or hardwiring is required.
Required Tools and Materials
Required Tools and Materials
You'll need to gather several tools and materials before you begin the range hood installation:
- Range hood, either undercabinet or wall mounted
- Rigid metal duct
- Foil HVAC tape
- Sheet metal screws
- Caulk
- Asphalt roofing cement (if necessary)
- Heavy-duty wall anchors (if necessary)
- Wire nuts
- Drywall saw or jigsaw
- Drill/Driver
- Drill bits and screwdriver bits
- Screwdrivers
- Wire stripper
 Peter Schweitzer
Costs of Installing a Range Hood
Costs of Installing a Range Hood
The cost of installing a range hood will depend on its type and whether it is ducted or ductless. Prices can vary for the units themselves, and the installation of ductwork will add to the price.
You can expect to pay about $200 to $500 for a standard undercabinet or wall-mounted hood, but the finish of the hood will affect the price. Some finishes, like stainless steel and copper, can even drive the price up to $1,500. Other specialty types of range hoods can increase the price further — island range hoods can range from $300 – $900, cabinet range hoods can cost $400 – $1,000 and down-draft range hoods can go for a whopping $1,000 – $2,500.
As for labor costs, you can expect that a labor charge for a contractor to replace an existing range hood with a new one will be about $300. If new ductwork must be installed, the price can range anywhere from $400 to $1,000 with the complexity of routing and installing the ductwork determining the ultimate cost. There may also be a charge for electrical work on some installations, either for installing a new outlet near the range hood or for hardwiring the unit to an electrical circuit.
Ducted and Ductless Installation Requirements
Ducted and Ductless Installation Requirements
When it comes to installation, a ducted range hood requires a bit more work since you'll have to deal with installing a duct as well. If your kitchen has a duct from an old range hood, you may still need to make minor modifications to ensure that the new hood's duct opening fits the old ductwork.
Electricity is required for both ducted and ductless range hoods. Some models plug into a wall outlet, while others are meant to be hardwired into your home's electrical system. Manufacturers such as General Electric require a 120-volt, separate grounded circuit with a 15- or 20-amp breaker for their hoods. If you're replacing an old hardwired hood with a similar model, the electrical wiring should already be in place. Even so, make sure the old wiring meets the specifications outlined in the hood installation manual as well as current electrical codes.
If you obtain a permit to do the electrical work yourself, a city inspector will have to approve the completed project to satisfy the permit requirements.
Choosing a Vent Hood Duct Path
Choosing a Vent Hood Duct Path
Before installing a ducted range hood, plot out the best path for the ductwork. The shortest, straightest path to an exterior wall or roof is the best option, as a shorter run means better venting power and much easier installation. The more the duct twists and turns on its way to your home's exterior, the less efficiently the air will flow, plus it could be difficult to assemble with the walls in place. For an undercabinet ducted hood, some of the cabinet space must be sacrificed to run ductwork.
If the ducting requires a few turns before it vents outside, it's better to use 45-degree elbows than 90-degree elbows, as the air will flow better. If you need to use a 90-degree elbow, use as few of these as possible so the air flows properly. In any case, the ductwork should be metal with all seams sealed with foil tape or duct mastic; do not use conventional plastic duct tape.
Tip
Note that the ductwork must absolutely vent outdoors, not into an attic.
Once you've plotted the path for the ductwork and measured that length, check the hood installation manual for recommended duct sizes. Buying the recommended size ensures the duct fits the point where it attaches to the hood. Also make sure that your plotted path does not exceed the length recommended in the hood manual, as a duct that's too long could mean insufficient venting power.
Installing the Ductwork
1. Turn Off the Power
Turn off the power to the circuit supplying the vent hood by switching off the correct circuit breaker in your home's service panel (breaker box). Even if you will be plugging the hood into an existing outlet, cutting the power will help prevent a dangerous situation should wiring be exposed during the project.
2. Cut Holes for Ductwork
Use the drywall saw to cut a hole in your ceiling or wall surface to fit the duct. If you are installing an undercabinet model and the unit vents through the cabinet, use a jigsaw to cut a hole large enough for the duct to fit through the bottom of the cabinet and cut another hole in the back or top of the cabinet depending on the duct path.
3. Work Through the Ductwork Path
Follow the plotted path for the ductwork and cut holes where necessary, such as through the ceiling into the attic and through the roof or an exterior wall. For roof installations, you will need to pry up shingles that are directly above the roof cap.
4. Install the Duct
Assemble and run the duct pieces through the walls, ceiling or roof, terminating them on the home's exterior with either a roof cap or wall cap. Seal seams with HVAC tape or duct sealant.
5. Attach the Duct Vent Cap
Screw the cap to the wall or roof. Seal the perimeter of the cap with caulk. The duct end nearest the hood should leave enough wiggle room to attach the hood. For roofs, press the shingles you pried up over the flange of the cap. Use roofing cement to hold the shingles in place. When complete, the up-slope part of the cap should look as though it was pushed under the shingles. The down-slope part of the flange should be resting on top of the shingles. Caulk all seams.
 Stephen Paul for Hunker
Installing the Range Hood
Installing the Range Hood
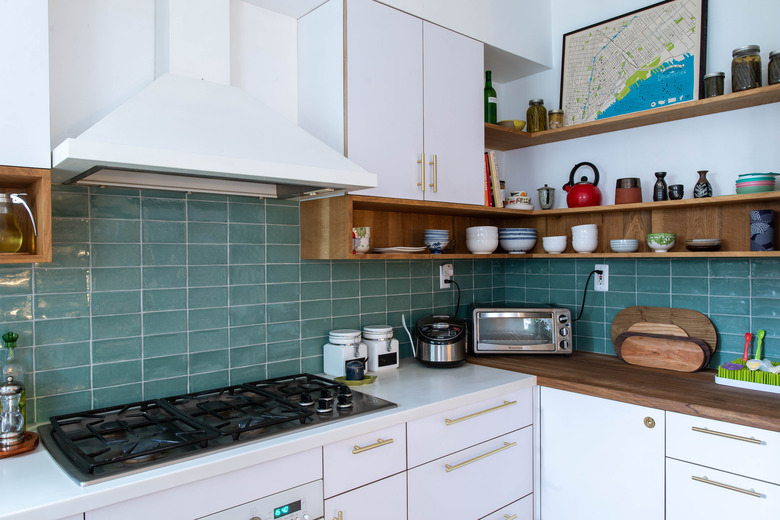
While the mounting instructions vary slightly for wall-mount and undercabinet hoods, either type requires sufficient support to hold the hood in place. Wall-mount versions should be attached to wall studs using the hardware included with the hood. For added support, wall anchors may be used as well.
Undercabinet range hoods often attach to the bottom of a cabinet. Either type of hood may come with mounting brackets that must be installed to the back or top of the hood before permanent hood installation; check the product manual for specifics. Also, read through the manual to ensure you assemble all the hood pieces that require assembly before installation.
1. Attach the Mounting Bracket
Mount the bracket (as applicable) to the wall studs or cabinet according to the manufacturer's instructions. Use heavy-duty wall anchors if a fastening point falls between studs. As you secure the hood in place, make sure the hood's wiring is accessible and in the proper position to either plug it in or connect it to your home's wiring. The manual and position of the wires will indicate the best way to do this. Some hoods will attach directly to the wall or cabinet without a bracket.
2. Connect the Duct to the Hood
Connect the end of the duct to the range hood unit using screws and HVAC tape. Seal the seams where necessary.
3. Make the Electrical Connection
Plug in the range hood if that is the type you are installing. For a hood that requires hardwiring, connect the hood wiring to the circuit wires using wire nuts and by following the manufacturer's wiring diagram. You may have to strip the insulation off the ends of the unit's wires using wire strippers. If required, have the installation approved by an electrical inspector.
4. Restore Power
Turn on the circuit breaker to restore power to the vent fan's circuit. Test the fan for proper operation.
References
- City of Poway: Residential Kitchen Remodel
- GE Appliances: Vent Hood – Electrical Requirements and Breaker Size
- Cavaliere: AirPRO 238 Professional Series Installation Manual
- Clover Electric: When Do You Need an Electrical Permit?
- Proline Range Hoods: How to Install a Vent Hood
- Fixr: How Much Does It Cost to Install a Range Hood?