Kitchen Island Design: What You Should Know
Whether part of new construction or a remodeling project, a kitchen island is one of the most popular components of kitchen design. A well-designed island checks a number of practical and decorative boxes for both traditional and modern kitchens.
Kitchen Island Benefits
Kitchen Island Benefits
Kitchen islands offer a number of benefits, not the least of which is their accessibility from all sides. This is something that is rare in most kitchens since appliances, counter space and storage are usually backed up against a wall.
Speaking of counter space or space for working, a good-size island can increase it dramatically. That space can be used to prepare food or for some other kitchen-centric activity, such as a place for the kids to do their homework. That open space can be a good staging area for food and drink when entertaining.
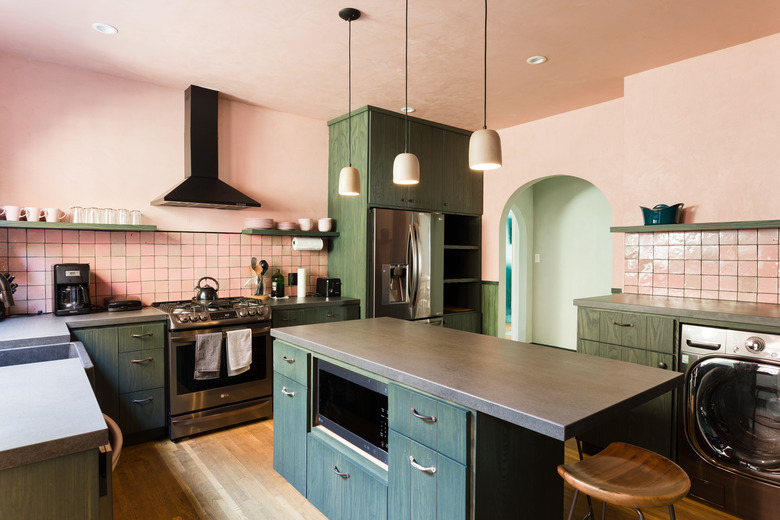
An island can influence how the kitchen functions. It can be the location of a major appliance or fixture like the sink, cooktop, dishwasher or microwave. If the main kitchen sink is placed along a wall, the island can be the location of a second prep or bar sink.
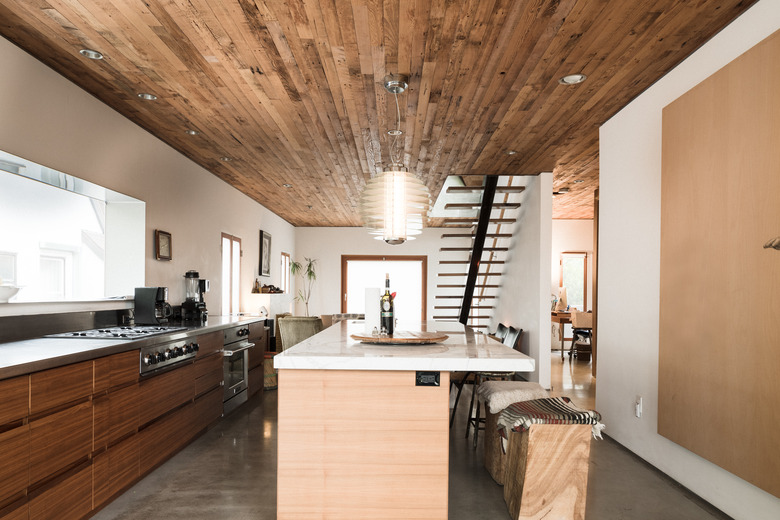
Islands usually contain cabinets, so including an island in the kitchen design is a plus in terms of storage solutions. The island is also a possible location for pull-out trash and recycling bins. Open shelving on the island can hold cookbooks or display collectibles.
In some ways, kitchen islands are the evolution of the traditional kitchen table, which was often not only the place the family gathered for meals but was also the food prep surface. The same can be said about many of today's islands. They can serve as food-preparation areas, and when designed properly, they can include seating for a breakfast bar or for having a snack.
 Stephen Paul
Kitchen Islands and Kitchen Layout
Kitchen Islands and Kitchen Layout
There may be an infinite number of kitchen designs, but most kitchens fall into a few basic layouts. Adding an island to some layouts can influence how the room functions.
One-wall kitchens have appliances and cabinets installed along one wall. This layout is popular in small apartments, but it is often used in homes that have an open design concept. Incorporating an island in the layout adds extra storage and more work and/or eating space. It also helps to visually separate the main part of the kitchen from the rest of the living area, creating a focal point around the kitchen island. The aisle between the island and the rest of the kitchen becomes a defined workspace.
L-shaped kitchens have cabinets and appliances installed on adjacent walls. As with one-wall kitchens, an island creates aisles that serve as work areas. Most L-shaped kitchens with islands are large enough to accommodate more than one cook. The island also serves as a traffic barrier, routing noncooks around rather than through the work area.
U-shape, or horseshoe, layouts usually have cabinets and appliances along three walls. A center island performs as one found in an L-shape kitchen by defining work areas and directing traffic. U-shape kitchens with islands are usually very large to be able to include the island and the aisles that surround it.
Galley kitchens are usually on the small side because of space constraints. Most islands would take up too much space in a small kitchen.
Kitchen Island Design Basics
Kitchen Island Design Basics
If you are contemplating adding an island to your kitchen, the first question to ask is what you want the island to do. Will it become a cooking center, provide seating for diners or have some other use? When the new island will be part of a total kitchen remodeling, you need to make sure that your plans for the island fit with the rest of the kitchen design. To get started, consider the list of questions to ask yourself developed by the National Association of the Remodeling Industry.
Kitchen islands take up floor space. The smallest is about 2 feet wide by about 4 feet long. That 2-foot-depth measurement is equal to the dimensions of a standard base kitchen cabinet, but the island can be as large as the kitchen space will allow.
In addition to the island's footprint, consider the space around the island. In general, plan on aisles around the island that are at least 42 inches wide, but 48 inches is better. At the very least, provide enough space so that you can open the oven, cabinet and dishwasher doors without hitting what is opposite. If people will be sitting at the island, allow 3 to 5 feet behind them so that traffic can pass by easily.
Consider how the island fits in the kitchen triangle. The triangle is an imaginary line that connects the refrigerator, range or cooktop and sink. The sum of the sides of the triangle should be no more than 26 feet, with no one leg longer than 9 feet. Academics in the 1940s developed the triangle idea to make working in the kitchen more efficient. It has evolved over the years, and today's kitchens often contain more than one triangle.
 Stephen Paul
Some designers consider the triangle outdated and prefer to think in terms of work zones or work areas instead, such as a food-prep zone, cooking zone, baking zone and the like. The work-zone concept means that everything you need for the zone is close at hand. A baking zone would include counter space to work and storage for mixing bowls, measuring cups, basic ingredients and the like.
One way to visualize how your island fits with the rest of the kitchen is to outline its footprint on the floor using painters' tape or masking tape. This is a must if the island is a DIY project. You will get an idea of how the island relates to the rest of the kitchen. The tape lets you make easy adjustments to size, shape and exact location before construction begins.
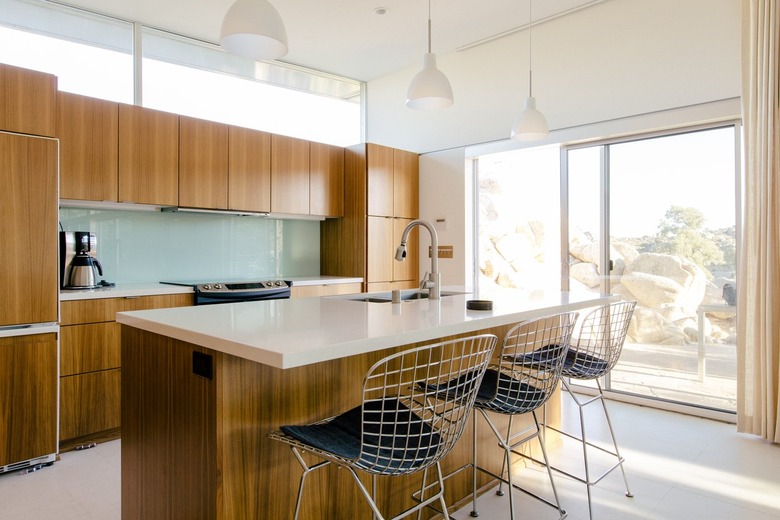
Kitchen Island Space Requirements
Kitchen Island Space Requirements
How you plan on using the island will also help determine its size. When planning for a cooktop or sink in the island, remember to include landing space around the appliance or fixture. Landing space is a clear counter space that facilitates the nearby appliance. For example, space around a cooktop helps when you must put down hot pots or pans. Provide as much space as possible but plan on a minimum of 12 inches on each side of a cooktop and 18 inches to 24 inches beside a sink if it is the main sink in the kitchen.
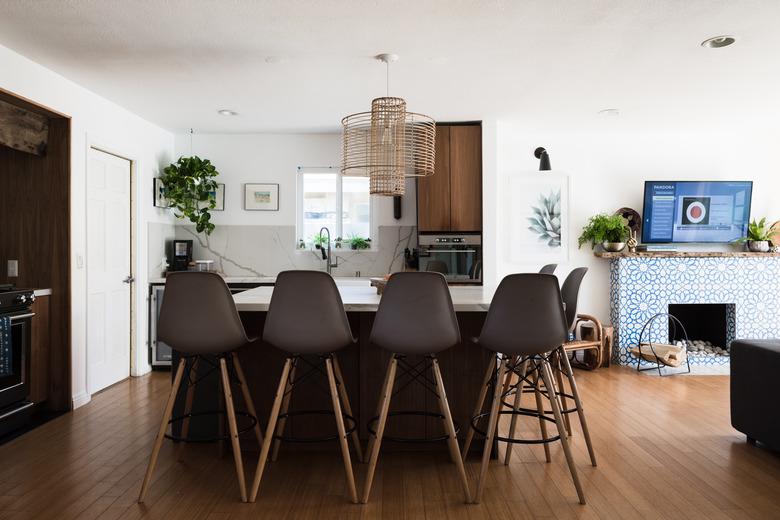
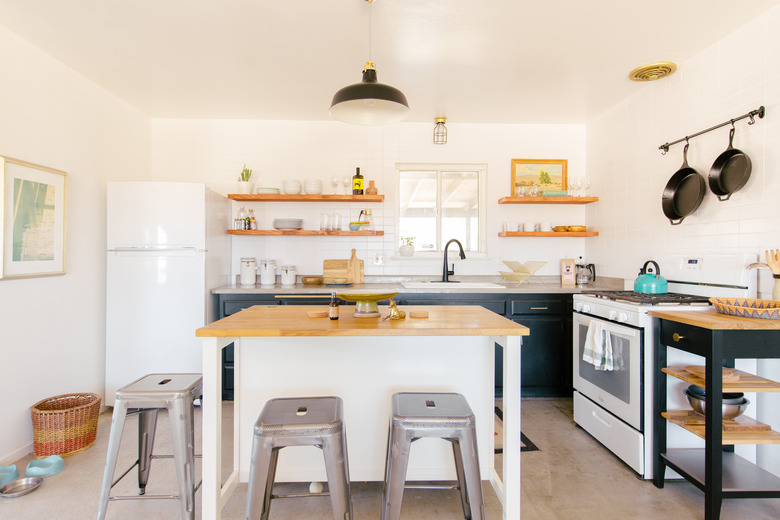
For islands that will be used for eating, you have a choice of placing a standard dining table in front of the island or using the island itself for dining. For counter dining, you will need the appropriate-size bar stools.
Plan on at least 24 inches of counter per person, but 30 inches is better for people who need more room. The height of the eating area will determine how much leg room is needed. For a 36-inch standard-height counter, you will need about 15 inches of knee space.
For two-level islands where the snack counter is higher than the rest of the island, usually 6 to 12 inches higher, plan on about 12 inches of knee space. If the island faces a living room or family room, the high eating level helps hide the mess of the cooking level from the rest of the room.
The design of the island should accommodate the needs of everyone who uses it, including the elderly and people who use a scooter or wheelchair to get around, a design approach called "universal design." An open area under the sink lets the wheelchair user pull up to use it. Placing the appliances and countertops at lower levels makes usage more convenient. The Kitchen Cabinet Manufacturers Association offers some guidelines.
 Paul Anderson
Kitchen Island Construction
Kitchen Island Construction
You can buy ready-made islands. They are usually small and come with wheels so that you can wheel them out of the way when not in use. There is no room for an appliance, but most have open shelves or cabinet storage. Some have a butcher block or stone top for a working area.
Permanent islands are built from scratch. Many start by combining standard base cabinets side by side and back to back. For islands open to a living area, many people use base cabinets on the working side of the island and display shelves or a decorative finish on the side that faces the living area. Some wood-cabinet manufacturers offer panels for the living-area side that match the cabinet doors in the rest of the kitchen.
In addition to the opportunity to install a sink or appliance, islands are usually covered with standard countertop material. You can copy what is in the rest of the kitchen or choose a surface that complements the other counters. Island counters give you the chance to splurge on a luxurious surface such marble or granite or provide a pop of color in the kitchen. It's good practice to install counters with rounded or chamfered corners rather than sharp edges.
There are building code requirements that govern islands. Permanent islands must have at least one electrical outlet. This receptacle means you can plug in an appliance without having to drape the power cord or extension cord across the aisle to get to a wall outlet.
 Paul Anderson for Hunker
Lighting and Ventilation
Lighting and Ventilation
Kitchen islands are primarily work surfaces, and you will need task lighting — lighting that is directed at the work surface — for the area. This usually means installing lighting fixtures directly above the island. Recessed lights in the ceiling are a possibility, but pendant lights that hang down from the ceiling make more of a design statement. The light spread should cover the entire surface without casting shadows.
Cooktops need to be ventilated to the outside. This can be accomplished by a downdraft system or a range hood. The hoods themselves can be very stylish, but large ones can block the view of the kitchen. An island hood will be more expensive than one over a range that is against the wall. Unlike a hood that backs up against a wall, an island hood is finished on all sides. An island hood usually requires more ductwork than a wall-mounted hood.
Island exhaust systems require a little more power than others. The hood area should be as large as the cooktop with about a 3 inch overlap on the sides. This helps make sure the exhaust is pulled up into the hood. Two-speed versions are more efficient than single-speed models.
Many building codes require that a make-up air system accompany exhaust fans that are rated over 400 cubic feet per minute. Because modern houses are tightly constructed, a large exhaust system can depressurize the home. The result can be backdrafting, where the low pressure created by the exhaust fan pulls exhaust from fireplaces and gas-fired appliances, like gas water heaters, back into the home.
A make-up system pulls fresh, outside air into the home while the exhaust fan is operating, replacing what the fan pulls out of the house. One system consists of a damper installed in an exterior wall that is connected to the hood by sensors. The damper opens when the hood is switched on and pulls clean air into the return side of a forced-air heating and cooling system.