Installing Cabinet Hardware: A How-To Guide
Installing kitchen cabinet hardware is a relatively easy job, and this little change can set the tone for your whole kitchen. The knobs and pulls you choose will not only influence the style of the kitchen but its function as well. Using the proper tools and following step-by-step instructions will help make your kitchen a comfortable place for years to come.
Common Types of Kitchen Hardware
Common Types of Kitchen Hardware
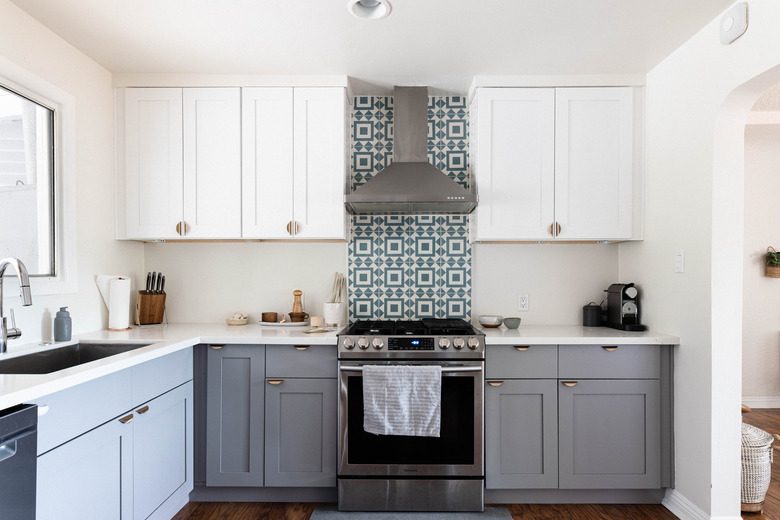
Kitchen hardware is both decorative and practical. According to Old House Journal, you can find everything from vintage Art Deco chrome to colorful Fiestaware handles for your kitchen. If your kitchen is more modern, there are plenty of styles from which to choose at big-box retailers and online as well. There are two types of handles affixed to cabinets:
- Cabinet Knobs: Small handles mounted with a single screw to a door or drawer face.
- Cabinet Pulls: This handle is bigger than a knob and is typically mounted with two screws on a door or drawer face. Some pulls do not use two screws, such as ring and pendant pulls, which only use one. Drop-handle pulls require a backplate in place of screws. There are also finger pulls that mount to the cabinet's top edge with a projection deeper than the door or drawer face. Recessed pulls mount flush on door and drawer faces.
Selecting the Proper Cabinet Hardware
Selecting the Proper Cabinet Hardware
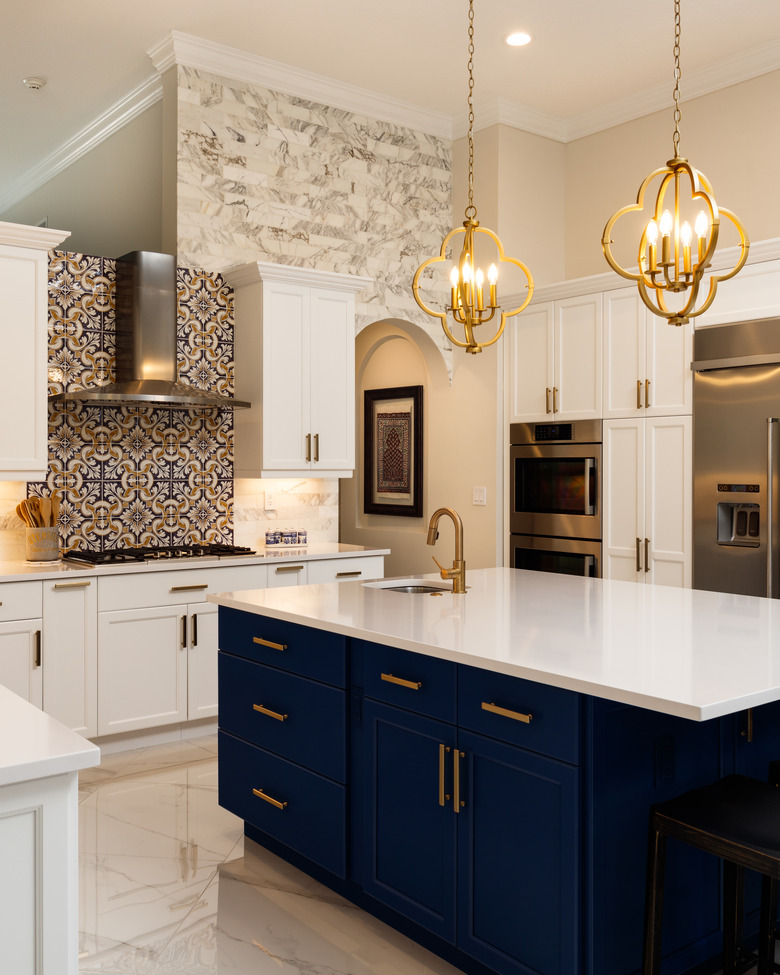
Before purchasing new hardware, measure the widths of the flat areas on your cabinet door and drawer fronts to make sure your chosen knobs and pulls will fit properly. Some cabinets may have smaller doors and drawer fronts on which larger pieces of hardware won't fit. Therefore, when choosing the pieces you want, base them on the width of the smallest drawer or door. Also, note how flat the area is where the base of the knob or pull will sit, as some pieces have bases that are too wide.
Most drawers and pulls come with 1-inch screws, which may be too small to anchor correctly. Conversely, if the hardware you choose has longer screws than your cabinet doors and the drawer fronts are thick, you'll need to find proper replacements. Measure door and drawer thickness to determine if the screws you have will work for you. You can easily find replacement screws at any hardware store. Bring a knob or pull with you to make sure the screw threads are compatible.
 ablokhin/iStock/GettyImages
Things Needed
-
Cabinet hardware (knobs and pulls)
-
Putty adhesive
-
Masking tape (optional)
-
Backplate (optional)
-
Wood putty (optional)
-
Thread sealant
-
Screws
-
Super glue (optional)
-
A few pieces of 1/2-inch-thick scrap wood (optional)
-
Cabinet drill template (optional)
-
Pencil
-
Drill with brad-point drill bits
-
Clamp
-
Screwdriver
Installing Kitchen Cabinet Hardware on Doors
Installing Kitchen Cabinet Hardware on Doors
If you already have existing knobs and pulls, simply unscrew the old ones and replace them with the new ones by screwing them into the same holes. If you don't have existing hardware, there's a step-by-step process to follow to drill holes that align on cabinet doors and drawers.
1. Measure the Cabinet Handles
There are no hard and fast rules for the location of knobs and pulls on kitchen cabinets. If you don't have existing holes, you'll have to do a little measuring to align them properly before drilling them.
To place knobs on doors and drawer fronts with rails and stiles, line them up with the top of the bottom door rail, which is the horizontal piece of the door at the bottom. To place pulls, line up their bottoms with the top of the door rail and center them on the door stile, which is the vertical part of the door. Attach the hardware to the door temporarily with putty adhesive to see how it will look.
For surfaces without rails and stiles, center knobs on the drawer fronts. On doors, knobs are typically aligned opposite the hinges. Place them between 1 and 4 inches from the top or bottom edge of the door based on your personal preference. This spacing is easiest for grabbing handles to open and close doors.
Pulls are usually vertical on cabinet doors. When placing pulls, use a 1- to 4-inch range from the top or bottom edge of the door for ideal placement. On drawers, pulls are horizontal — if drawers are 24 inches wide or greater, you can use pulls on one drawer front or consider using one larger, centered pull.
2. Mark the Holes With a Template
To install multiple pulls and knobs quickly, you may wish to invest in a cabinet drill template, a metal or plastic plate with standard hole spacing for various sizes of knobs and pulls. The template hangs from the door drawer edge, and you can mark through the holes with a pencil or simply drill the holes with the template in place. To avoid using the wrong holes, cover the entire template with masking tape and poke holes through those you intend to use. Hang the template on the door or drawer and mark where you'll drill with a pencil.
 Stephen Paul for Hunker
3. Cover Old, Unused Holes
When switching from pulls to knobs, cover the old holes with a backplate. If you don't have one, you can also use wood putty as a filler. If you're not sure what shade to use, buy the light, medium and dark tones that are closest to the wood grain of your cabinets and mix them to get the right color.
4. Keep Cabinet Knobs From Loosening or Twisting
Add a dab of thread sealant to hardware screws to keep them from loosening. Also, if you have oblong or rectangular knobs, they can sometimes twist over time. To keep this from happening, add a small amount of super glue to the back of the knob before installation. If you do this, however, be aware that the knobs will be permanent, so don't try and to remove them afterward.
5. Drill the Handle Holes
Drill from front to back, keeping the drill bit perpendicular to the drawer or door face. Do not force it in; go slowly with moderate pressure, as you don't want to experience tearout, the splintering of wood around the edge of a hole. You can also clamp a small piece of scrap wood (also known as backerboard) to the backside of the door before drilling. The drill bit exits the back of the door and goes directly into the backerboard to further ensure that tearout doesn't occur.
6. Insert Cabinet Handles Into the Holes
Pop the handles into the new holes and screw them in using a screwdriver. Don't use a power drill because it's too easy to overtighten the screws.
 RAUL RODRIGUEZ/iStock/GettyImages
Additional Tips for Installing Cabinet Hardware
Additional Tips for Installing Cabinet Hardware
Use a sharp brad-point bit to ensure the cleanest holes. A dull drill bit can do more harm than good, potentially damaging the wood behind the door or drawer front.
Drill a few practice holes before attempting the task on your doors or drawers if this is your first time installing hardware. Make sure to complete any cabinet, drawer or door adjustments before installing your hardware. Once installed, anything you didn't already adjust will look askew.
Use a drill bit that is slightly larger than the screw diameter but not too large. The screw should fit snugly in the hole but not require force to get it in. Holes that are too large can make the hardware prone to coming loose and made for a weaker installation.
If you are uncertain about anything when installing your cabinet hardware, contact a professional. While hardware installation is relatively easy, you can damage cabinet doors and drawers when drilling. They can be expensive to replace, so you'll want to get it right the first time.
References
- Better Homes & Gardens: How to Replace Cabinet Hardware
- Superior Stone & Cabinet: Drilling Your Own Cabinet Hardware (Knobs and Pulls)
- Wayfair: How to Choose Cabinet Hardware
- Old House Journal: Hardware for Kitchen Cabinets
- Ask the Builder: Cabinet Hardware
- YouTube: Gunflint Designs: DIY Drawer Pull Jig
- Woodworkers Guild of America: How To Install Cabinet Pulls