How To Install A Double-Action Hinge
We may receive a commission on purchases made from links.
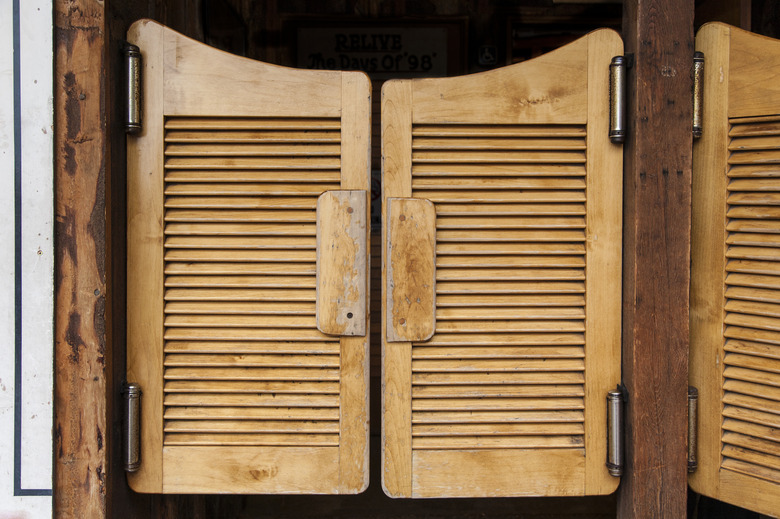
Double-action hinges allow a door to swing open in either direction, while internal springs pull the door closed automatically. These hinges are typically surface-mounted to a wood door frame or finished opening. Some hinges can be recessed or flush-mounted. Refer to the manufacturer's literature for specific installation instructions.
Most double-swinging doors need two hinges, but larger doors may need three. It's usually easiest to install the hinges onto the door before mounting the door to the frame or opening.
Preparing for Installation
Preparing for Installation
Before beginning the installation, make sure you have a drill with the appropriate size of drill bit to predrill where the screws will be driven. A screwdriver bit that fits the head of the screws, a tape measure, a pencil, and a level will all be necessary for proper mounting as well. Each door will need at least two double-barrel action hinges, one mounted on the top of the door and one mounted on the bottom. If a third hinge is required, it will be centered between the other hinges.
These double-action hinges work due to tension pins nestled in the barrels of the hinges. These pins must be removed before installing the hinges to the door. To do this, take the tension rod provided, slip it into one of the holes found on the barrel, and rotate away from the hinge. Remove the pin and set it in a safe spot where it won't be lost.
Things Needed
-
Cardboard
-
Pencil
How to Install a Double-Action Hinge
1. Mark the Upper Hinge Location
Measure 3 inches from the top of the door and mark this distance with a pencil. Find the center of the door's edge (front to back) and mark this in two places. Use a level and a pencil to draw a line through the center marks, starting at the 3-inch mark and extending several inches down. Place the hinge on the door so the top of the barrel is on the 3-inch mark and the center line runs through the centers of the top and bottom hinge holes. Mark the hinge holes with the pencil.
2. Mount the Upper Hinge to the Door
Drill a pilot hole in the center of each hinge hole location using a drill and a bit sized for the mounting screws. Position the hinge and fasten it to the door with the screws provided. Follow the manufacturer's instructions for orienting the hinges. The orientation and position of each hinge may vary based on where the hinge is installed.
3. Install the Lower Hinge
Mark, predrill, and install the lower hinge using the same process used for the upper hinge but place the lower hinge so its bottom edge is 7 inches from the bottom of the door. If you're installing two doors, repeat that same process to mount the hinges to the second door.
4. Mark the Door Frame for Hinges
Measure and mark the center of the door frame at the top and bottom of the opening and then connect the marks with a long line using the pencil and level. Hold the door up to the frame, lining up the hinges with the center line. Adjust the door so that it sits evenly between the top and bottom of the frame as well. Mark the hinge mounting holes with the pencil. Set the door aside.
5. Mount the Door(s)
Drill pilot holes for the hinges, reposition the door, and secure with the provided screws. Reinsert the tension pins into the hinge lugs. Repeat with the second door as applicable. Check the gap between the doors when closed. If necessary, add flat cardboard shims behind one or more of the hinges to make the door gap even.
6. Adjust the Hinge Tension
Adjust the hinge tension by using the tension pin and once again inserting it into one of the holes and rotating toward the door jamb. Insert the pin once the appropriate tension has been reached. If the door seems to be swinging too slow, there must be more tension applied to the hinge. The right tension has been achieved when the door swings back into place at a reasonable speed. Do not exceed five holes of tension on the top.