Easy Small-Scale DIY Projects Using Cane
We may receive a commission on purchases made from links.
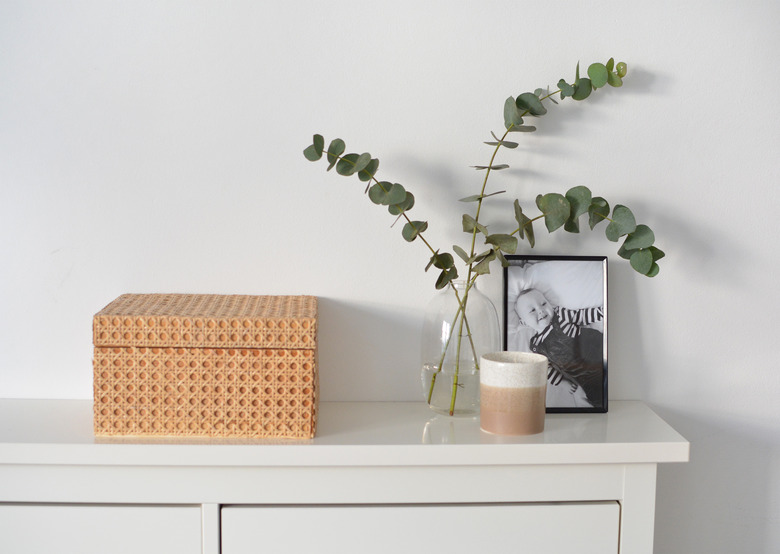
Cane is having a moment and we are absolutely here for it. If you've been DIYing your furniture with cane panels (see our projects here, here, and here), you may have some cane offcuts that you want to use up. We've been making some smaller home decor accessories using cane leftovers that are a perfect nod to the cane trend without being too overpowering. So, if you're looking for some cane inspo, these easy projects might be just the thing you're after.
Things Needed
-
Scissors
-
String
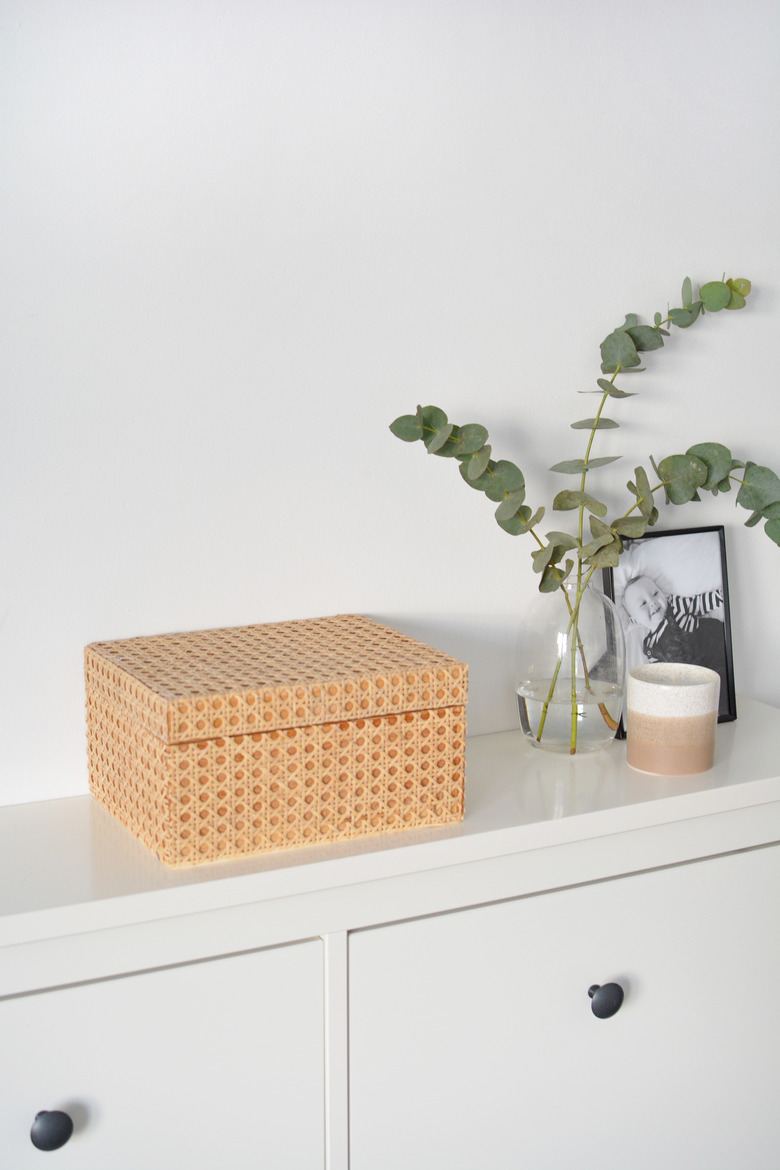
Cane Storage Boxes
Cane Storage Boxes
Storage is all-important, so if we can make it cuter, why not? This quick project is ideal for small boxes or even jewelery storage.
Step 1
Pick a wooden box to makeover.
 Caroline Burke
Step 2
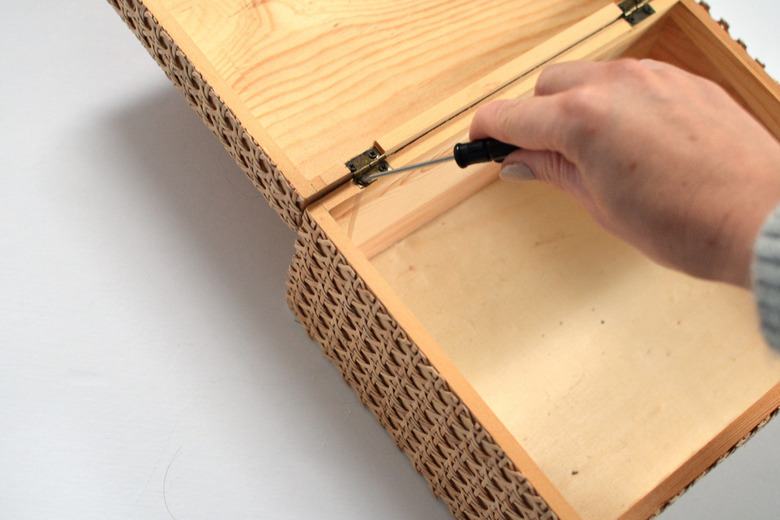
Unscrew the hinges so you can remove the lid.
 Caroline Burke
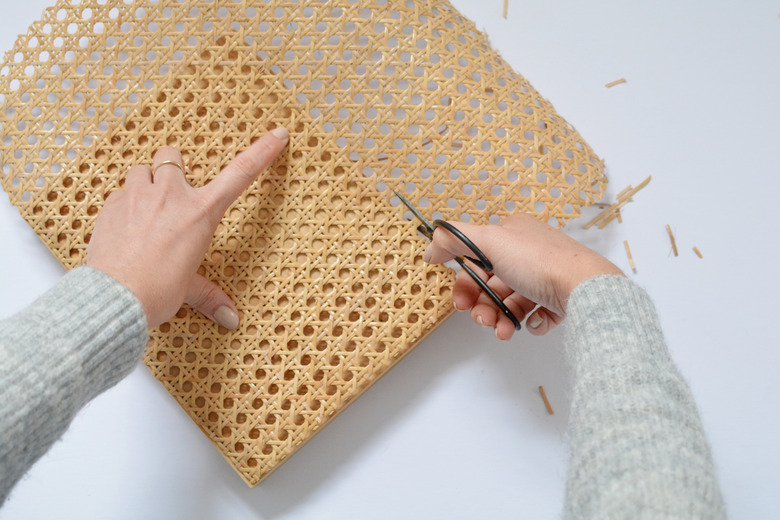
Step 3
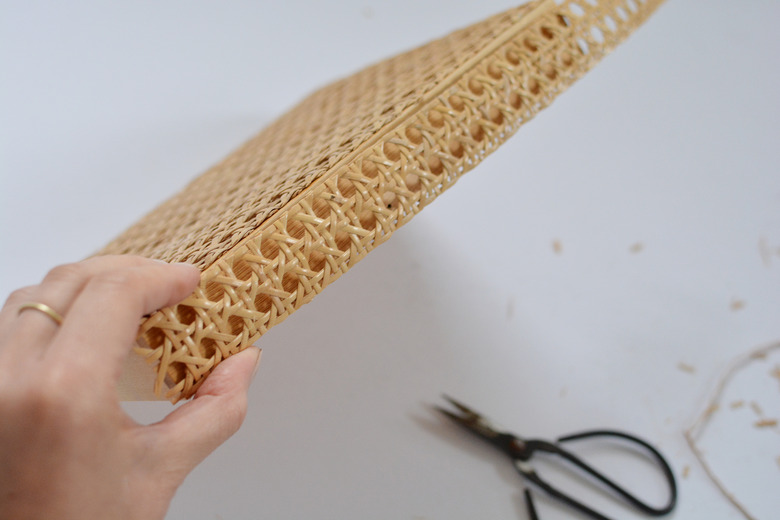
Take a piece of cane webbing and cut it to the same size as the lid.
 Caroline Burke
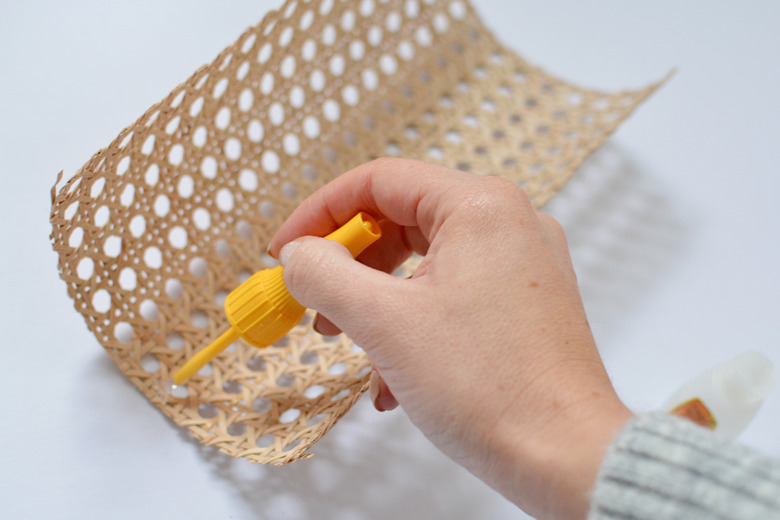
Step 4
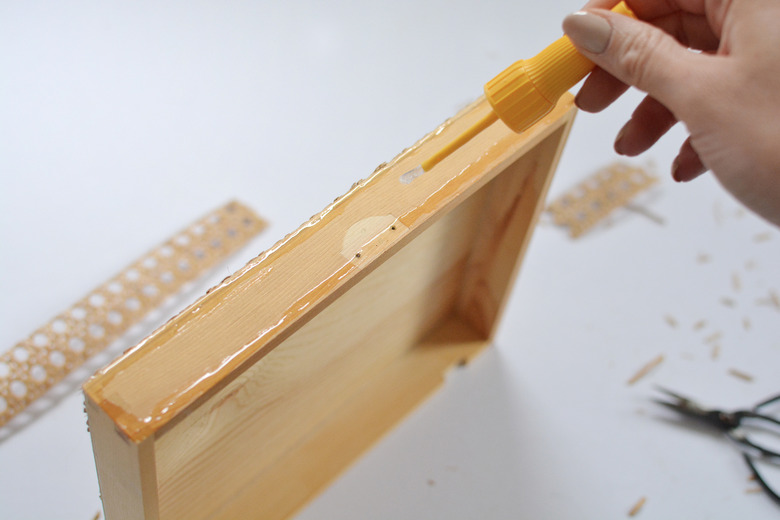
Brush glue over the back of the cane.
 Caroline Burke
Step 5
Place the cane glue side down onto the lid.
 Caroline Burke
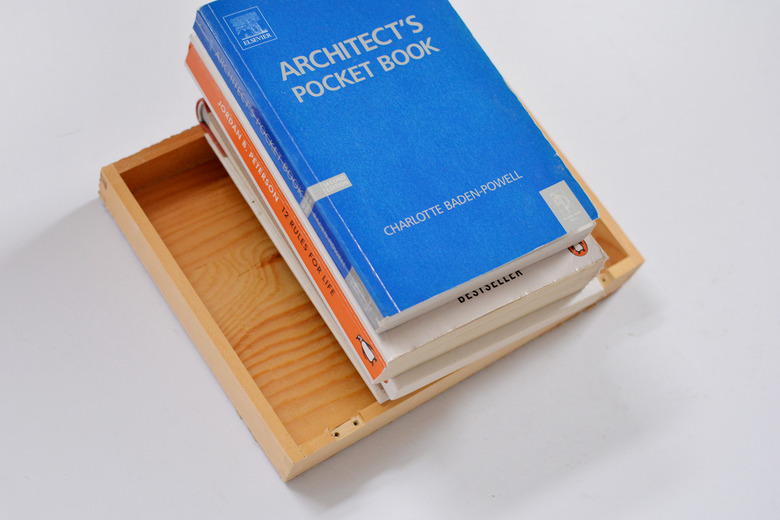
Weigh down the cane webbing with books to keep it in place while it dries.
 Caroline Burke
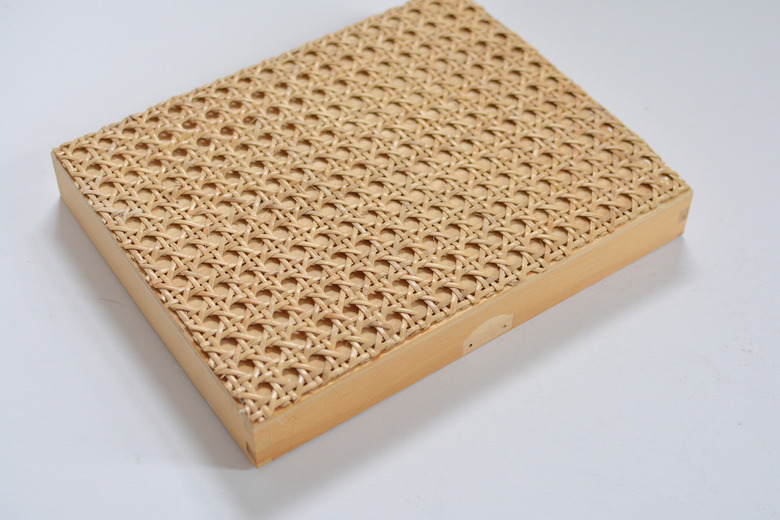
Step 6
Cut smaller pieces of cane to cover the other sides of the lid.
 Caroline Burke
For smaller sections, you can glue along the edges and place the cane on top. Repeat until you've covered the box.
 Caroline Burke
Step 7
Screw the hinges back onto the lid to finish.
 Caroline Burke
 Caroline Burke
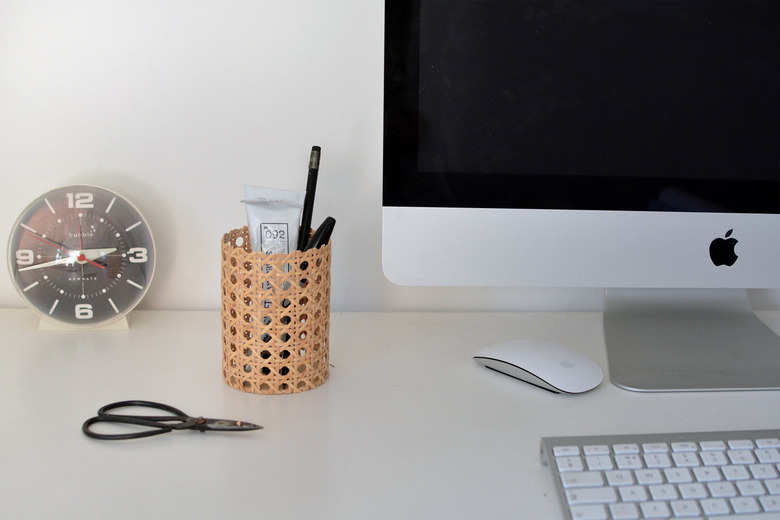
Cane Pencil Holder
Cane Pencil Holder
Making a cane pencil holder is very simple and hugely practical for your office space. This small scale DIY can be made in under 30 minutes and is a great way to update the look of your desk.
 Caroline Burke
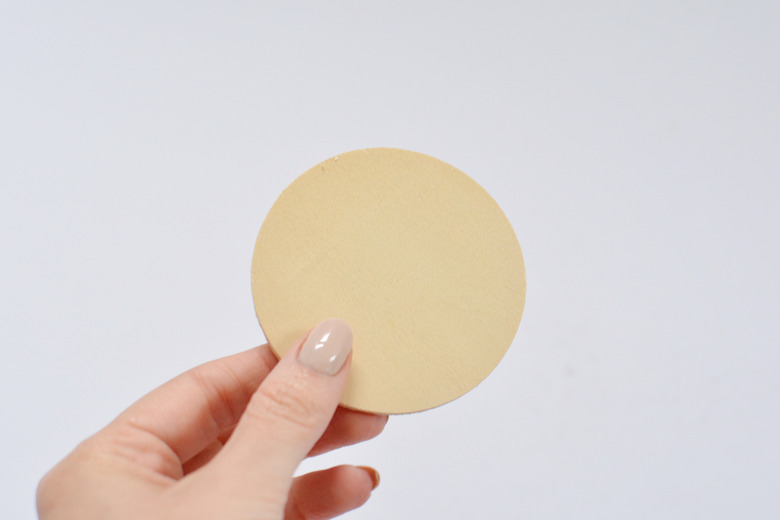
Step 1
Take a round wooden disk measuring approximately 3 or 4-inches in diameter.
 Caroline Burke
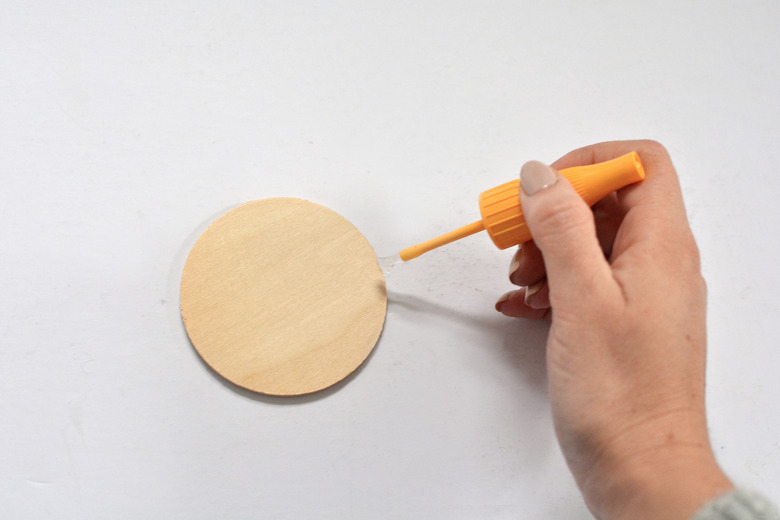
Step 2
Glue all around the edges.
 Caroline Burke
Step 3
Take a piece of cane and wrap it around the wooden disk so that the ends line up with the glue. You'll want about 1/2 inch of overlap on the cane, so run some glue along the joint where the cane overlaps.
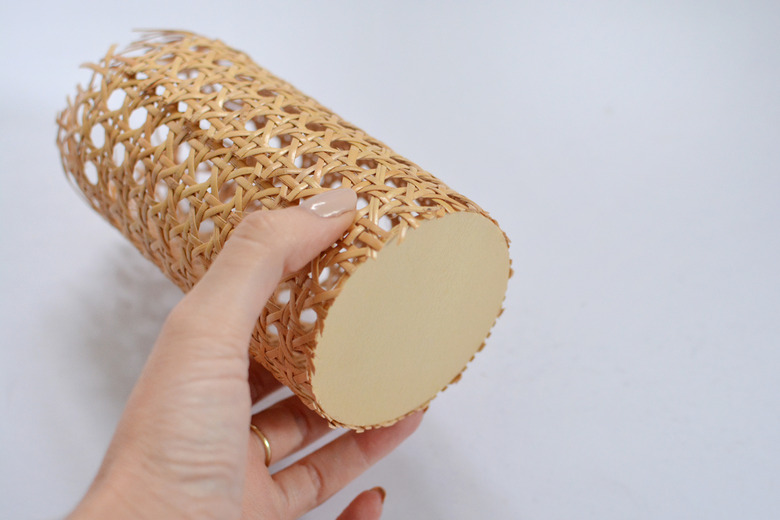 Caroline Burke
Step 4
Tie the cane with some string to stop it from unrolling while it dries.
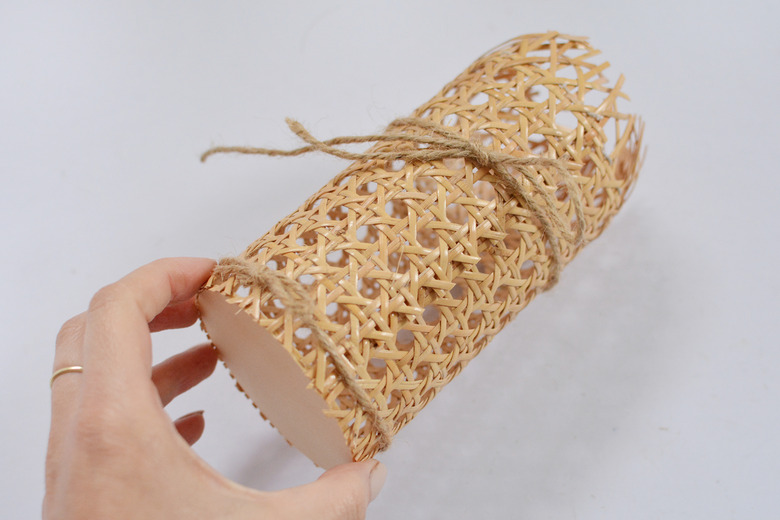 Caroline Burke
Step 5
Once dry, trim the cane to the height you want. (The holder pictured here is 4 1/2 inches high.)
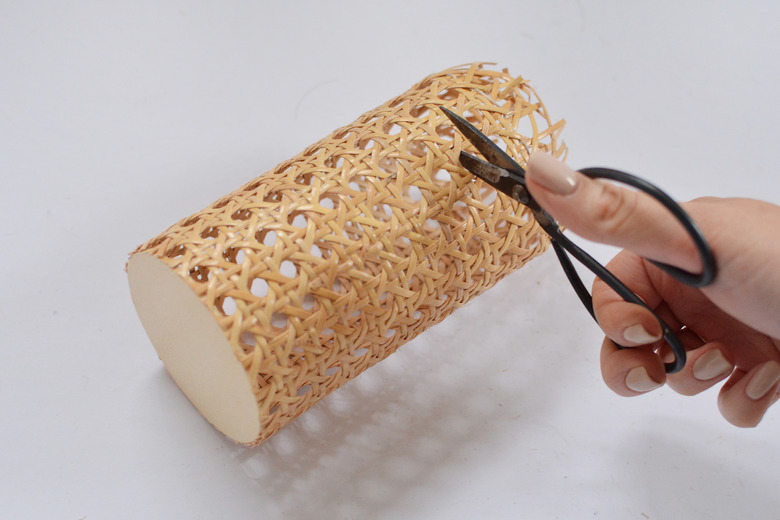 Caroline Burke
Pop in your pencils to finish!
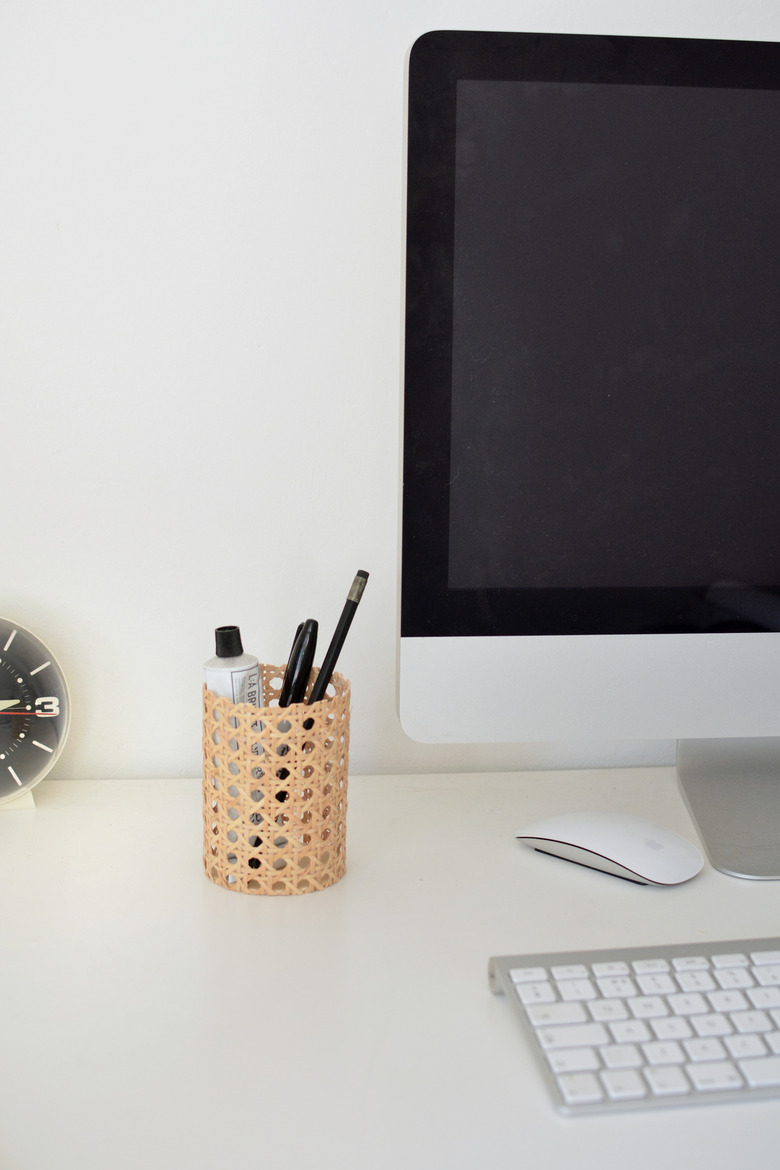 Caroline Burke
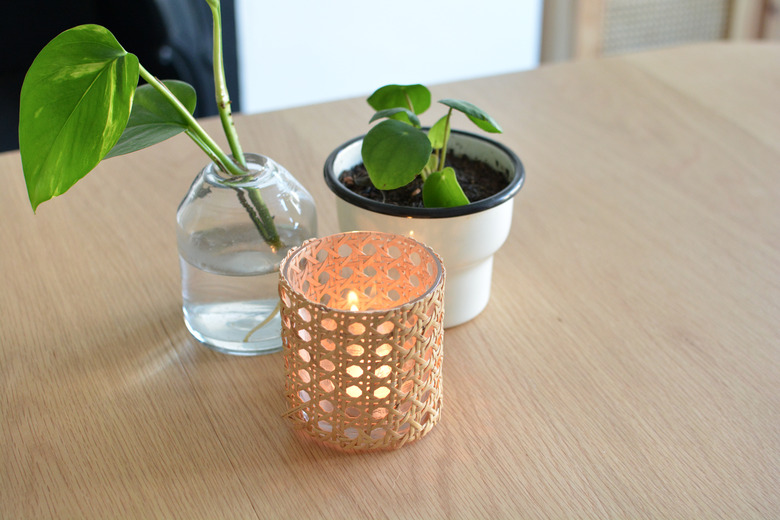
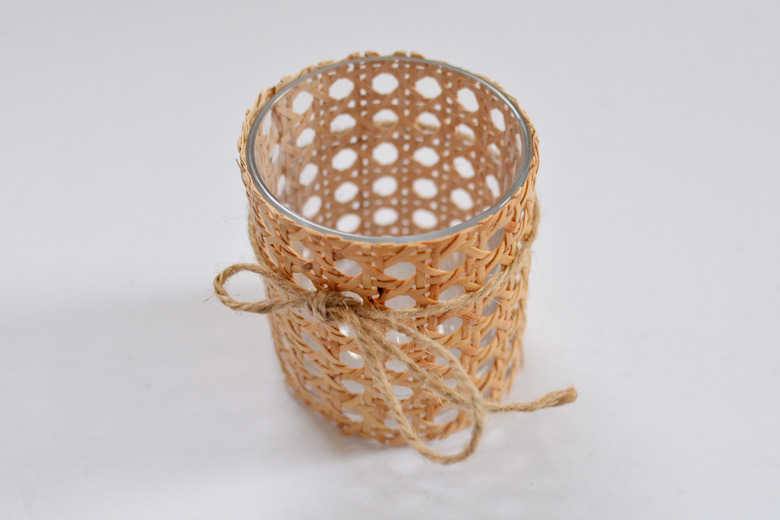
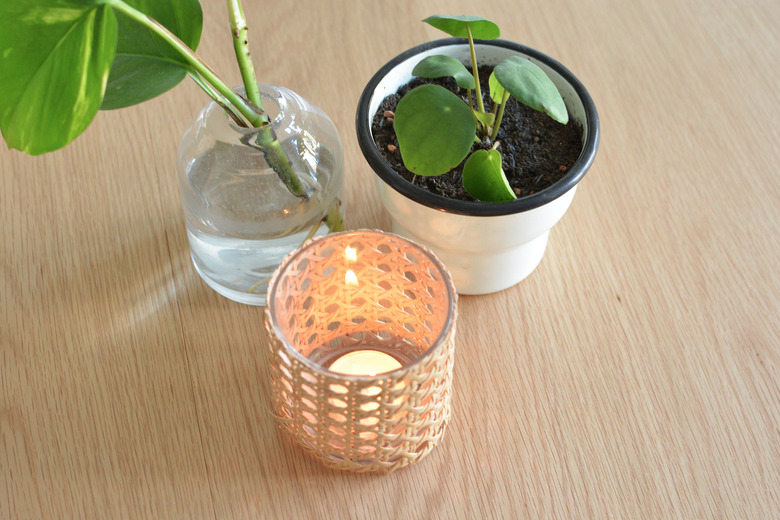
Cane Votive Holder
Cane Votive Holder
We couldn't make some cane home accessories without including some candles. Votive holders are a great way to incorporate touches of cane into your home decor.
 Caroline Burke
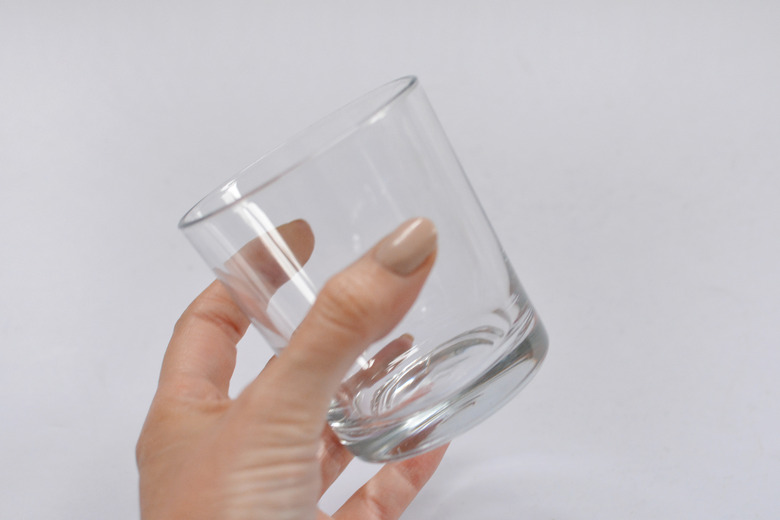
Step 1
Take a small drinking glass that's wide enough to hold tealight or votive candles.
 Caroline Burke
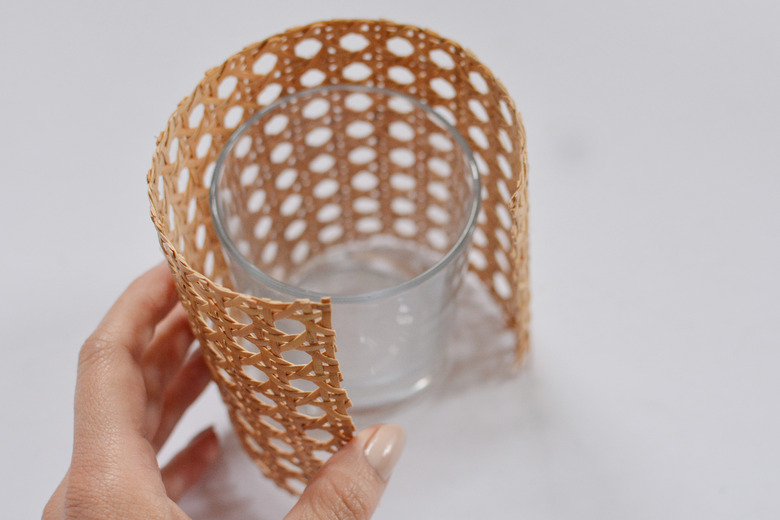
Step 2
Wrap cane around the glass and, using scissors, trim the cane to the same height. (You'll want about 1/2 inch excess on the width so that the cane overlaps when you wrap it around.)
 Caroline Burke
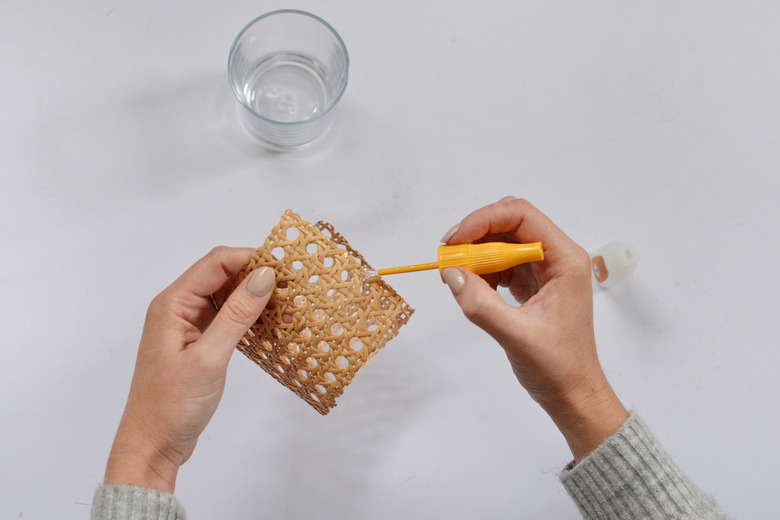
Step 3
Run some glue along the edge of the cane where it overlaps.
 Caroline Burke
Step 4
Wrap the cane around the glass. Tie the glass with string to hold the cane in place while the glue dries.
 Caroline Burke
 Caroline Burke