How To Install Peel-And-Stick Vinyl Flooring

We may receive a commission on purchases made from links.
Peel-and-stick vinyl flooring is one of the easiest types of flooring to install — even easier than installing laminate, provided the subfloor has been properly prepared. You don't have to worry about spreading messy adhesives, but you do need to make sure the subfloor is flat, dry and free of bumps and other imperfections, or the preapplied glue won't stick.
Where to Install Peel-and-Stick Tiles
Where to Install Peel-and-Stick Tiles
Peel-and-stick vinyl flooring is more susceptible to moisture than most other types of flooring, so below-grade installation generally isn't recommended and may void the flooring's warranty. Check the manufacturer's specs, though, because some allow installation on below-grade concrete subfloors that meet certain requirements, and you can conduct a moisture test to verify acceptable moisture levels. Vinyl tile is not recommended for floors with radiant heating.
Preparing the Subfloor
Preparing the Subfloor
You can install peel-and-stick vinyl flooring over some other flooring materials, including existing vinyl and concrete. It's also possible to go over old tile, but you have to fill the grout lines with floor-leveling compound to create a smooth surface for the vinyl, or you can cover the tile with untreated plywood or oriented strandboard (OSB) as an underlayment. Leading vinyl flooring manufacturer Armstrong recommends a minimum plywood thickness of 1/4 inch.
If there is no existing flooring in place, you can install the tile directly on the wood subfloor, provided it is flat and smooth enough to meet the flooring manufacturer's specifications. Often it's easier to install new underlayment rather than spend the time filling and repairing a rough subfloor. Plywood underlayment designed for vinyl and other resilient flooring is ideal, and you can install it quickly with staples.
 Walmart
The old flooring, subfloor or underlayment must be perfectly clean for the vinyl installation. Any oil, soap, wax or silicone must be removed from the existing flooring, or the tiles won't stick. Also get rid of all adhesive residue from flooring you previously removed.
Read more: How to Install Sheet Vinyl Flooring Over Ceramic Tile
Tip
Acclimate the new tiles by removing them from their packaging and stacking them in the installation area. Let them sit for 48 hours prior to installation.
How to Install Peel-and-Stick Vinyl Tile
How to Install Peel-and-Stick Vinyl Tile
Things Needed
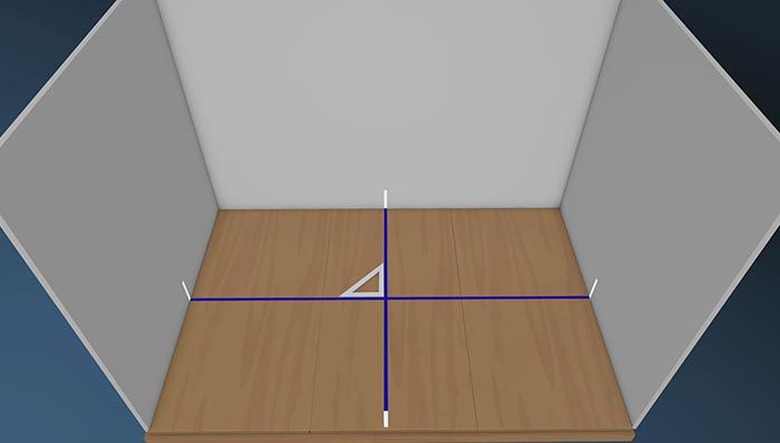
1. Create Layout Lines
Find the midpoints of two opposing walls using a tape measure. Snap a chalk line between these points. Locate the midpoints of the perpendicular walls and snap another chalk line that intersects the first one. Use a framing square to make sure these lines are perpendicular to each other. If not, adjust one or the other until they are square.
 Lowe's
2. Test-Fit the Tiles
Starting at the cross in the center, dry-lay a full row of tiles (not sticking them down) along both chalk lines, going all the way to the walls. Check the width of the tiles that will meet the walls: if they are less than half of a full tile, it might look better to adjust the row one way or the other so you end up with wider tiles at each end. If you make adjustments, snap new chalk lines, as needed, to create new layout lines. Note: Plan for a 1/4-inch expansion gap at all walls; you can cover these gaps later with baseboard trim and/or shoe molding.
3. Lay the First Four Tiles
Begin laying tiles at the cross, or intersection, of the chalk lines. Peel the protective coating from the back of each tile and lay it with one corner on the center of the cross, with two sides of the tile on the chalk lines. Position the tile and then drop it into place and push down so the adhesive makes good contact with the subfloor.
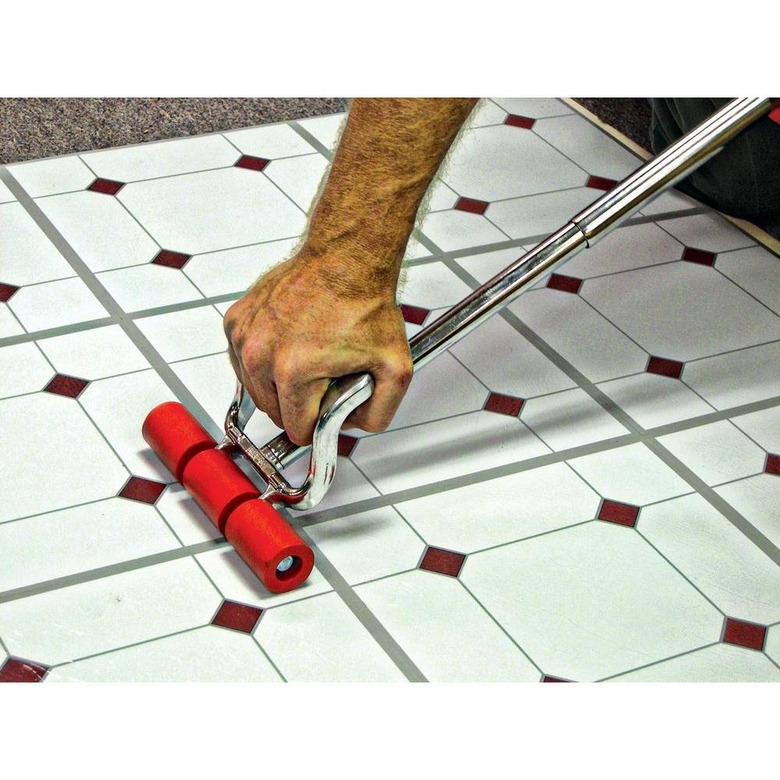
4. Work in Sections
Lay the tiles in sections of about 50 square feet. After completing each section, roll the tiles with a floor roller to seat them. It's generally best to extend the tiles in one section all the way to the wall before starting on another section.
Tip
When laying the tiles, it's a good idea to place a 2-foot square sheet of plywood on the floor and kneel on that. It will distribute your weight so you don't move any of the tiles while the adhesive is fresh. Move the plywood around as you work.
5. Finish Laying All the Full Tiles
Lay tiles out to the perimeter of the room in all directions before you do any cutting to install partial pieces. That way, you'll be able to shift your activity to cutting all the tiles at once rather than doing it piecemeal.
 Home Depot
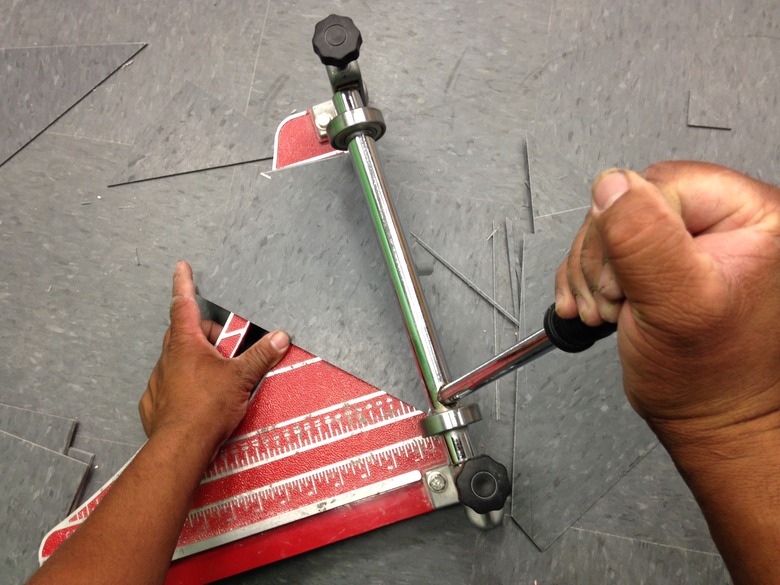
6. Cut the Edge Tiles
Use a sharp utility knife and a straightedge to cut tiles to fit along the room's edges. Use this easy technique to measure tiles along straight walls:
- Place the tile to be cut faceup on the installed tile closest to the wall so it completely covers the installed tile.
- Place a second tile on top of the upper tile (the one you will cut), push it against the wall, then back it off 1/4 inch to create an expansion gap.
- Draw a line along the room-side edge of the top tile, marking a cutting line onto the second tile.
- Remove the two loose tiles, and cut the marked tile along the line; the resulting piece will fit the space exactly, leaving a 1/4-inch expansion gap at the wall.
Of course, you can also make accurate cuts by measuring the gap with a tape measure and transferring the measurements onto the tile to be cut. Always use a straightedge when cutting to ensure a straight cut.
 Hisham Ibrahim/Moment Mobile/GettyImages
Tip
It's a good idea to make a template with kraft paper or lightweight cardboard when you have to make difficult cuts, such as notches or curves. Cut the paper with scissors, set it on the tile, draw the outline, then cut the tile with a knife.
7. Roll the Entire Floor
When you've finished installing the tiles, wipe off any stray adhesive with a damp cloth. Roll the entire floor one last time to bond the tiles to the floor. While you can walk on the floor 24 hours after the final rolling, it's best to wait for 48 hours before installing any baseboard trim or moving in your furniture.