Peel-And-Stick Vinyl Flooring: What You Need To Know
We may receive a commission on purchases made from links.
- What is peel-and-stick vinyl flooring?
- Size options for peel-and-stick vinyl tiles
- Advantages of peel-and-stick floor tiles
- Disadvantages of peel-and-stick vinyl flooring
- Style options for peel-and-stick flooring
- Preparing the subfloor
- Installing peel-and-stick vinyl tiles
- Cleaning peel-and-stick vinyl flooring
- Maintaining peel-and-stick vinyl flooring
When it comes to making home improvements, new flooring can serve as a real game changer that totally transforms the look and feel of any given room. Peel-and-stick vinyl flooring material is an appealing option for DIYers who want to give their floor new life without breaking the bank. Despite its reputation for looking "cheap," improved style options and the increasing quality of peel-and-stick tiles continue to increase its popularity.
What Is Peel-and-Stick Vinyl Flooring?
What Is Peel-and-Stick Vinyl Flooring?
Peel-and-stick vinyl flooring, also known as peel-and-stick tiles, is a self-adhesive vinyl flooring material. DIYers generally love peel-and-stick tiles because they are an affordable option that can be installed with relative ease and only a minimal investment of time and energy.
As the name implies, peel-and-stick vinyl tiles come with an adhesive backing that sticks to the subfloor and locks the tile firmly in place, which opens a whole new world of possibilities for giving any room a flooring facelift without breaking the bank. However, while you may not need any heavy-duty tools or special skills to install self-adhesive vinyl flooring, adequate preparation and a keen eye for detail both play a critical role in successful installation.
You can find lots of peel-and-stick vinyl flooring options at The Home Depot, Walmart, Wayfair, and even Amazon.
Size Options for Peel-and-Stick Vinyl Tiles
Size Options
for Peel-and-Stick Vinyl Tiles
Like other tiles, peel-and-stick tiles come in a variety of sizes. The average size for adhesive vinyl tiles is either 12 x 12 inches or 16 x 16 inches, and most popular styles are available in 4-inch increments. There is less variety when it comes to the thickness of the peel-and-stick tiles, with the average thickness ranging between 4 and 6 millimeters. Adhesive vinyl flooring options are available in both tile and plank and work well in virtually any room.
Advantages of Peel-and-Stick Floor Tiles
Advantages
of Peel-and-Stick Floor Tiles
The biggest advantage of peel-and-stick floor tiles and the most appealing factor for DIYers lies in its ease of installation. According to Flooring Clarity, peel-and-stick vinyl is by far the easiest to install if you plan to handle the installation yourself. The idea of installing new flooring can be daunting to a novice, which is why opting for peel-and-stick floor tiles that require only basic skills for installation is a considerable advantage and avoids the added expense of labor fees if you have a professional do it.
Saving money is usually a primary motivator for DIYers, which adds to the benefit of opting for peel-and-stick vinyl tiles over traditional tiles or other flooring materials. In addition to saving on labor fees, the materials cost for peel-and-stick vinyl flooring is less expensive than other flooring alternatives. On average, you can expect to pay anywhere from 50 cents for the most inexpensive self-adhesive vinyl flooring to between $2 and $5 per square foot for higher-end, luxury vinyl flooring products. Even at the highest price range, though, this type of flooring is still considerably less expensive than its non-vinyl counterparts.
Another advantage of peel-and-stick vinyl tiles is that while not completely waterproof, they are water resistant and easier than other materials to replace if damaged. Self-adhesive vinyl flooring is also a good choice for renters who are not at liberty to make permanent home improvements but would like to add their own personal touch to the space while they occupy it. Keep in mind, however, that if you intend for the flooring to be temporary, you will need to avoid adding any other adhesives to the tile when installing it and remove it carefully to avoid damage to the subfloor.
Disadvantages of Peel-and-Stick Vinyl Flooring
Disadvantages
of Peel-and-Stick Vinyl Flooring
Despite its perks, Fixr reminds environmentally conscious consumers that vinyl is a product of the petroleum industry. As a result, vinyl flooring products emit vapors called volatile organic compounds (VOCs) into the indoor airspace. In response to these concerns, the flooring industry developed a certification process called FloorScore that measures and rates the VOC content in flooring products like vinyl. Consumers can use the FloorScore rating to choose a vinyl flooring manufacturer with the lowest VOC.
Another disadvantage of peel-and-stick vinyl tiles is that they are more prone to damage from sharp objects than other flooring materials. Using self-adhesive vinyl flooring in kitchens or other high-traffic areas could lead to some tile damage if sharp objects are dropped or heavy furniture or appliances are dragged on top of it. Of course, it is relatively simple to remove and replace individual tiles if damaged, but it is important to note that they are slightly more vulnerable to this type of damage than other materials.
Whereas installing new wood or tile flooring is likely to increase the value of a home, the same cannot be said for peel-and-stick vinyl flooring. While being a cheap alternative to traditional flooring is a plus for the DIY homeowner or tenant, don't count on it to boost the resale price of a property. It likely won't hurt the resale value, but it certainly won't help it either.
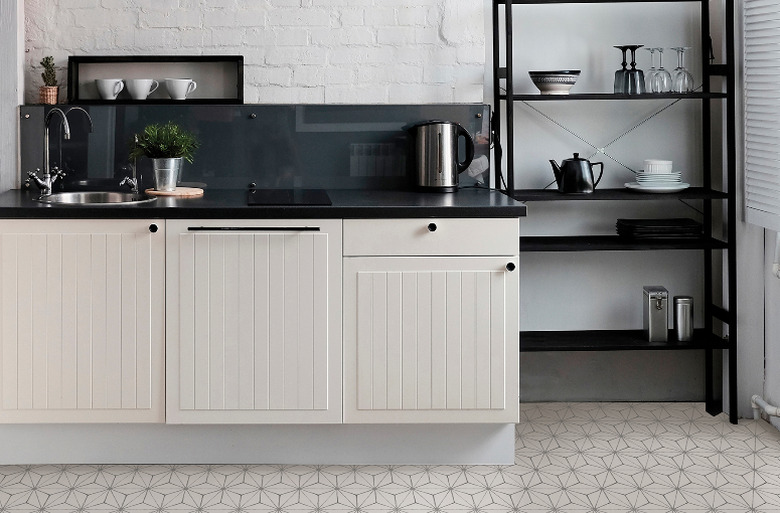
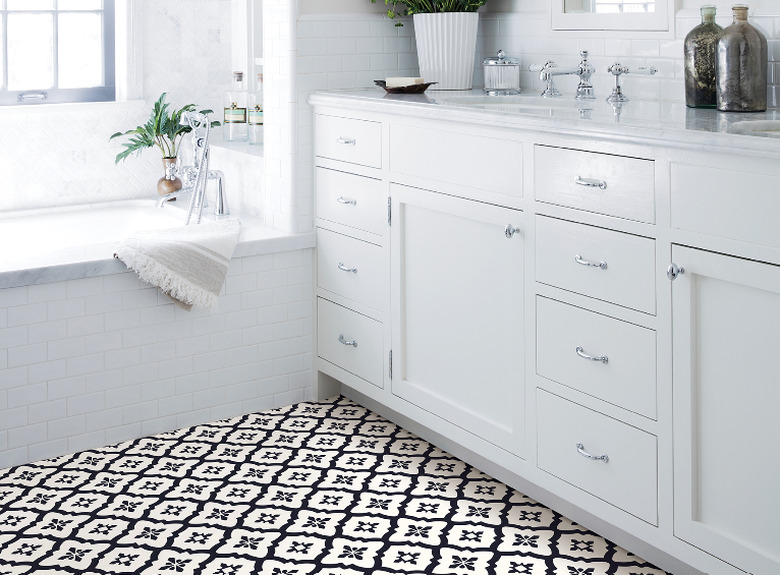
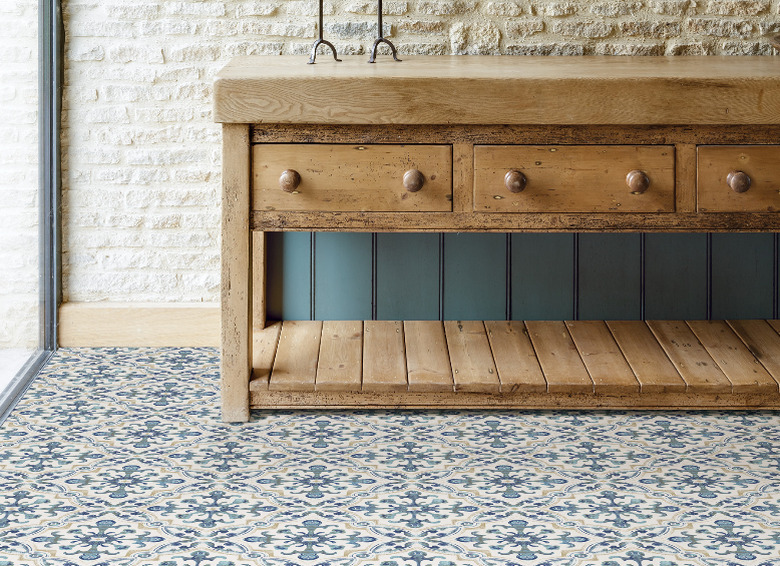
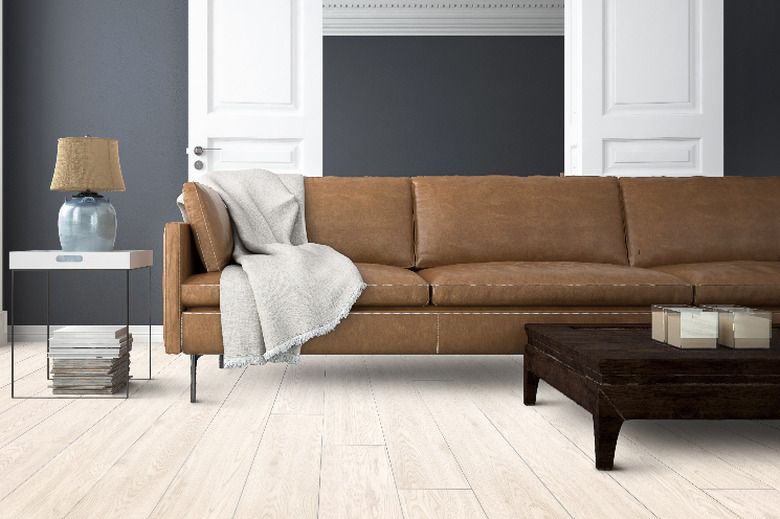
Style Options for Peel-and-Stick Flooring
Style Options
for Peel-and-Stick Flooring
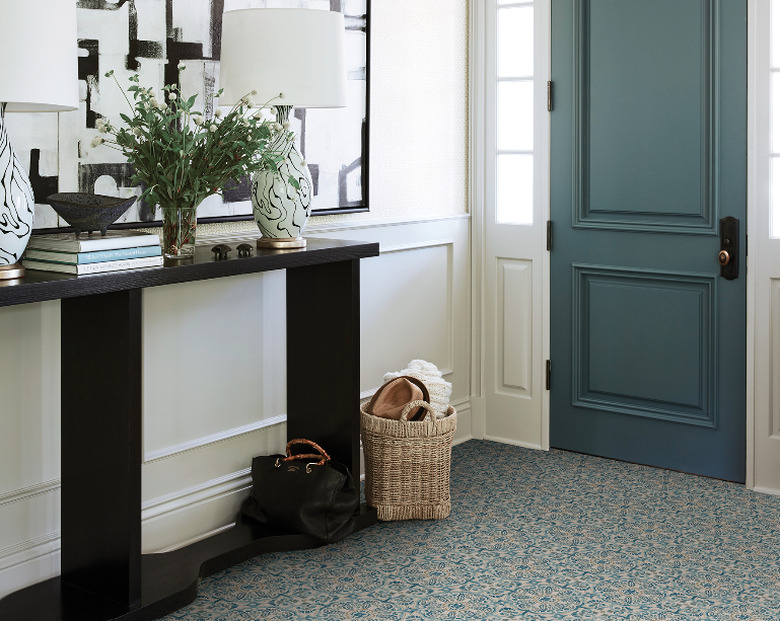
Thanks to peel-and-stick vinyl tiles, saving money on materials and installation does not mean having to compromise on style. According to Home Reference: You'll have a vast variety of vinyl colors and styles to choose to harmonize with virtually any design theme.
From tiles that mimic wood, stone or other natural materials to elaborate patterns and a wide range of colors, peel-and-stick vinyl tiles offer something for every preference. Self-adhesive vinyl tiles make it possible to add a wood look or stone look to a room without incurring the cost of real wood or stone.
The option to install with or without the use of grout gives peel-and-stick flooring even greater design possibilities. To install without grout, simply line up the tiles close together. To give the floor more of a ceramic tile or stone appearance, leave space for grout between each tile. The additional cost and effort required for adding grout between the peel-and-stick tiles is minimal and can really elevate the overall look of a room.
Preparing the Subfloor
Preparing
the Subfloor
While it is possible to install peel-and-stick tile on top of virtually any subfloor, adequate preparation of the subfloor is essential to both successful installation and the longevity of the new floor. Prep the subfloor by making any necessary repairs and cleaning it as thoroughly as possible. Any dirt or loose particles that become trapped between the subfloor and the vinyl could lead to unsightly bumps on the surface of the thin tile or interfere with the adhesive bond.
Decide if a primer is necessary, which depends largely on the subfloor surface material. According to Better Homes & Gardens: Some manufacturers don't recommend a primer while others do, but only on porous surfaces such as plywood. To avoid using a primer unnecessarily or failing to use one when needed, refer to the manufacturer's guidelines. The quality of adhesive on peel-and-stick vinyl tiles today is typically enough to secure each piece in place without the need for extra adhesive.
Installing Peel-and-Stick Vinyl Tiles
Installing
Peel-and-Stick Vinyl Tiles
The installation process itself is straightforward. Before removing the paper backing, line up the tiles in the position you plan to install them to ensure that you are happy with the way the area is covered. Once everything is in place, start in one corner of the room and work your way to the next corner by removing the paper backing on each tile one at a time.
The accuracy of the first row is key in keeping the rest of the tiles properly aligned, so take extra care to use as much precision as possible in this stage of installation. If possible, use a straight edge to line up the tile on which you are working with the one previously laid to ensure alignment.
Keep in mind that once a tile meets the subfloor, the adhesive does its job, and it won't be possible to further adjust the positioning of that tile without damaging it. If you make a mistake in aligning any given tile, your best bet is to pull it up and replace it with a new tile. Continue laying one tile at a time and working your way from one corner of the room to the other until you complete the area to be covered. It should only take you a few hours depending on the size of the room. An 8- x 10-foot floor, for example, would likely take approximately two hours to install.
A good practice to employ when installing your new flooring is to keep a trash can at your side while you lay the tiles and dispose of the paper backing after each tile you complete. This will not only keep your work area clean but will also make it less likely for you to accidentally slip on a paper backing if you step on it. Don't forget to inspect each area of subfloor prior to laying down the tile to ensure that no loose particles have made their way onto the scene before you finalize that tile's placement.
Read more: How to Install Vinyl Flooring
Cleaning Peel-and-Stick Vinyl Flooring
Cleaning
Peel-and-Stick Vinyl Flooring
Keeping your new vinyl floors clean means protecting them from the two greatest threats to its longevity: dirt and chemicals. Keep the dirt at bay by frequently sweeping with a soft broom. The more you sweep, the longer your floors are likely to last. Reduce the chemical impact by avoiding heavy-duty cleaners. A broom, vacuum and warm-water mop are your best defense against dirt and chemicals.
If it is necessary to clean using soap, use a mild cleanser designed specifically for no-wax floors and carefully follow the instructions to avoid damaging your floors. After using the cleanser, rinse the floor again with clean, cool water to remove the soap residue from the floor even if you can't see it.
A soap-scum residue is much like a dirt magnet, which is the last thing your vinyl floor needs. The best way to avoid leaving a soap-scum residue on your floors is to use two mops for cleaning: one for washing with the mild soap and the other reserved only for rinsing with nothing but water.
Read more: Vinyl Flooring Cleaning Tips: How to Clean Vinyl Floors
Maintaining Peel-and-Stick Vinyl Flooring
Maintaining
Peel-and-Stick Vinyl Flooring
To keep your vinyl flooring in optimal shape, use floor protectors on the feet of any heavy furniture and appliances that will bear down on the floor. Also, avoid dragging heavy furniture or appliances across the floor since this will likely lead to scuff marks on your vinyl.
When you mop your floors, use a damp mop rather than an overly wet one. If too much water from a soaking mop frequently makes its way into the seams of your floor, it could eventually erode the adhesive bond and cause the vinyl to come loose or start curling.
References
- Home Reference: The Pros and Cons of Vinyl Flooring
- Better Homes & Gardens: How to Install Self-Stick Vinyl Tile
- Flooring Clarity: Peel and Stick Vinyl Floor Tile Ultimate Guide: Pros & Cons, Cost and Best Brands
- Floor & Decor: Self Stick Vinyl Plank & Tile Flooring
- Fixr: Vinyl Floor Installation Cost
- Flooring Inc: Peel and Stick Flooring: 5 Myths Debunked!
- Reader's Digest: How to Clean Vinyl Floors: 11 Tricks You Need to Know