How To Organize And Hide Television Cables
We may receive a commission on purchases made from links.
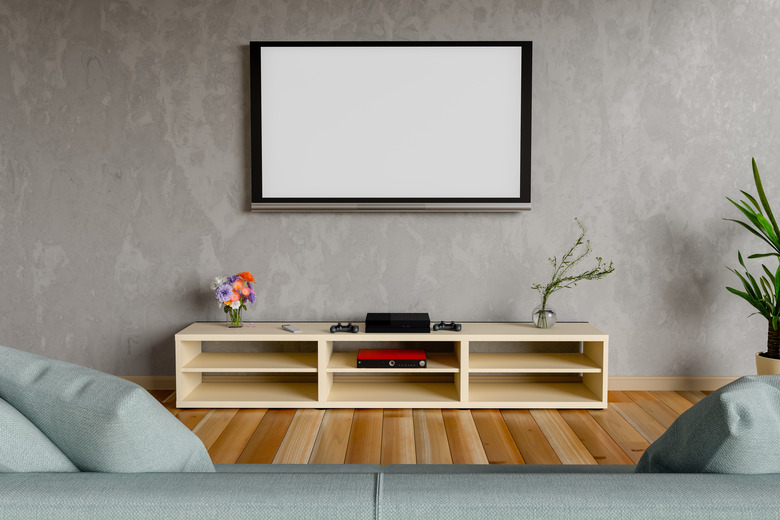
As television technology advanced through the decades, so did the likelihood of a tangled mess of electronics cords emanating from the TV. Today, a typical TV owner has to deal with a slew of extra cords and cables, whether from a digital video recorder (DVR), video game console, external speakers or smart-home devices. Wall-mounted TVs make the potential for cord clutter even greater, but there are ways to ditch the electrical spaghetti and opt instead for systems that hide those cords inside or along the wall.
The Cord-Cover Method
The Cord-Cover Method
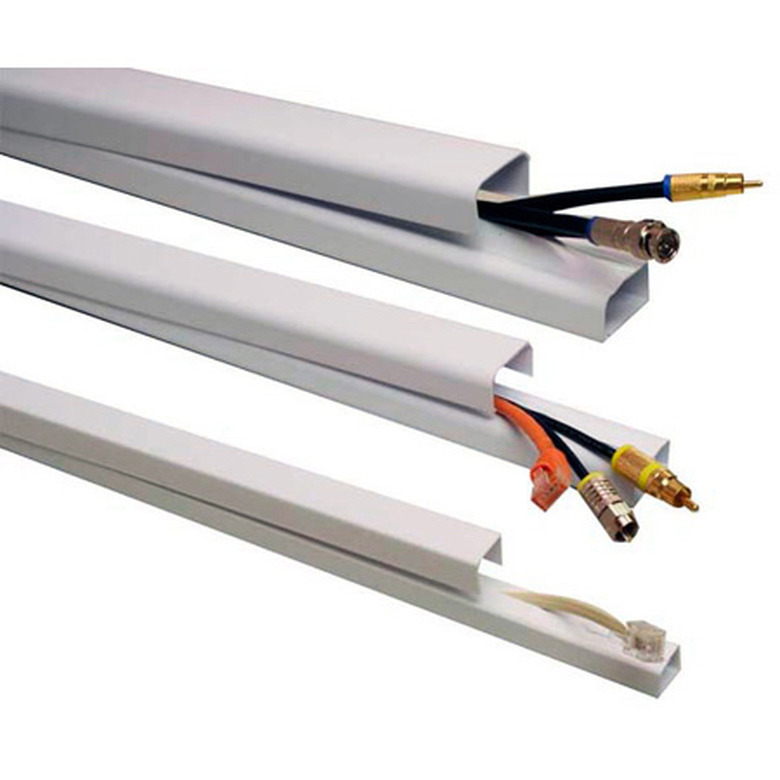
Cord covers, also called cord channels or raceways, are simple to install, requiring far less time and effort than in-the-wall cord systems. They're also a viable solution if you rent a home, as most landlords don't want holes cut into the walls. Most raceways come in black or white versions, but they can also be painted to match the wall color. Some are designed to look like quarter-round or half-round wall trim, while others are square tubes.
 Allied Electronics
Things Needed
-
Tape measure
-
Wire ties
-
Bubble level
-
Pencil or painter's tape
-
Cord raceway kit
-
Hacksaw or raceway cutter
1. Planning the Layout
Choose the ideal path for your grouped electrical cords. Measure the length of channel needed to reach vertically from the TV down to an outlet, for instance; or horizontally if an outlet isn't vertically aligned with your home electronics. In some cases, you may need to plot out both vertical and horizontal runs. Since not all cords emanate from the same device, group the cords in your hand and temporarily tie them together with wire ties or hook-and-loop straps every few inches. This way, you can plot out a realistic path for the raceway, ensuring all cords can reach their intended devices or outlets.
2. Purchase the Appropriate Raceway Kit
Select a raceway kit long enough to contain the path of the grouped cords. A raceway kit with 90-degree elbows is an excellent option for cord runs traveling both vertically and horizontally along the wall. A peel-and-stick PVC raceway kit allows you to install the system without drilling into the wall. The plastic raceway can also be cut to size, as needed.
3. Ensure Level and Plumb Installation
Before adhering the raceway to the wall, ensure a straight vertical or horizontal path for it. Hold a bubble level, also known as a spirit level or carpenter's level, against the wall vertically or horizontally, centering the appropriate bubble inside its housing to get a reading. Use a pencil or painter's tape to mark the level path for the raceway. Repeat the process perpendicular to the first line if you are running a 90-degree channel for the cords.
4. Cut and Install the Raceway
Trim the raceway to size, if necessary, using a hacksaw or raceway-cutting tool. Slide the cord or cords into the appropriate raceway piece. Snap the raceway closed, if your chosen model snaps to secure cords in place. Snap the connector elbows in place if running a channel that requires a 90-degree angle. Peel the backing off the adhesive on the channel back, then press the channel against the wall in the marked location(s).
Hiding Cables in the Wall
Hiding Cables in the Wall
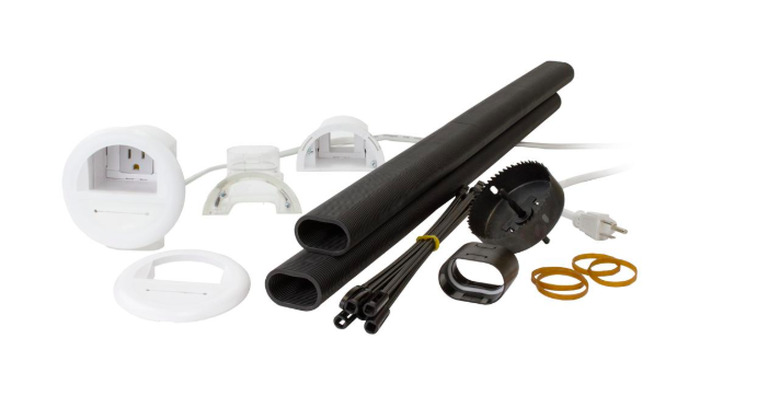
If you own your home and don't mind cutting holes in the drywall, an in-wall cord-control system offers the best way to keep cords completely out of sight, even with a wall-mounted TV. Cord-hiding kits sold at big-box home improvement stores come in several types, but the one we're describing includes tubing that fits inside the wall for holding various AV cables, plus a power cord that also runs inside the wall. Two wall plate assemblies link the ends of the tubing, one behind the television and one near the floor; each wall plate assembly includes a sleeve fitting for running the AV cables, plus an outlet assembly for plugging in the TV for power. The kit we used also included a hole saw for boring holes in the wall, and a flexible fishing tool for pulling cables through the wall.
The TV must be removed from the wall before installing this kind of in-wall kit.
Things Needed
-
Pencil
-
Stud finder
-
Tape measure
-
In-wall cord kit
-
Power drill
-
Phillips screwdriver or driver bit
-
Painter's tape
 Carolina Tactical Gear
1. Mark and Cut Holes
This project is based on the in-wall kit offered from Commerical Electric, widely available at home centers. Rather than merely fishing loose wires through the wall cavity, it uses plastic tubing to hold the wires. Our in-wall cable kit allows for a maximum of 5 feet of tubing to be installed inside the wall. If your required distance is less than this, the tubing will need to be cut down to size, using a utility knife.
- Use a stud finder to locate the wall studs, and mark their location with light pencil marks.
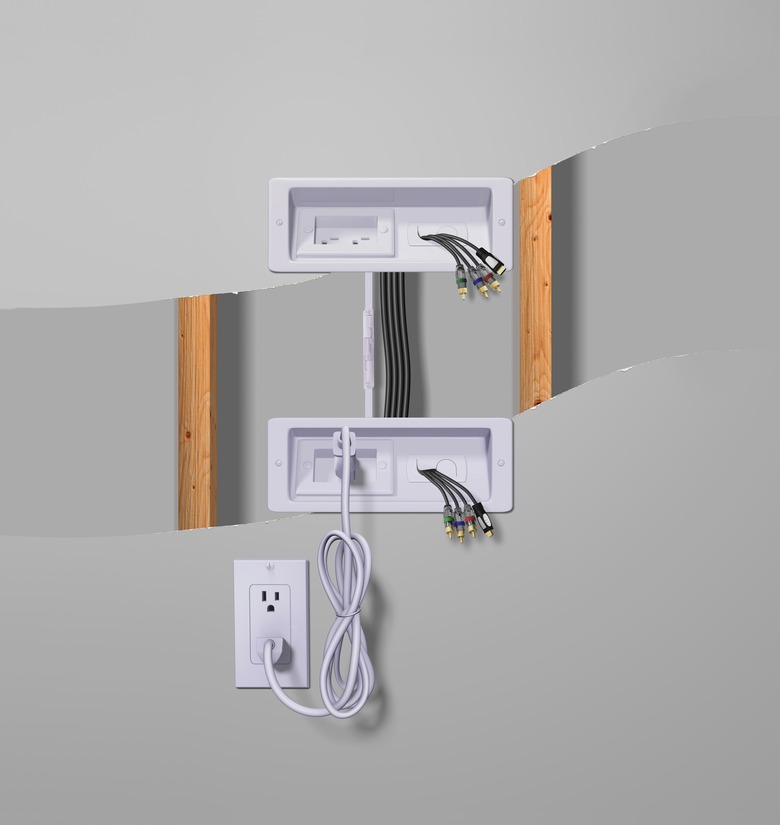
- Mark locations on the wall to indicate where the AV cables and power cord will enter the wall, and where they will exit below. The top location is normally positioned so it will be hidden behind the television. The bottom location is often behind a cabinet or other hidden location, but it must be within reach of an electrical wall outlet. Ideally, the holes should be in the center of stud cavities.
- Mount the hole saw included with the kit into a power drill, then cut the entrance and exit holes in the wall.
Tip
Make sure the spots chosen for the holes are not over wall studs. Use a stud finder if you aren't sure of the nearest stud location. The holes should ideally be centered between wall studs.
2. Prepare the Tubing
The plastic tube that will hold the AV cables is attached to the kit's NM power cord, and the two components will be "fished" down through the wall cavity at the same time.
- Assemble the flexible in-wall cable tube using the coupler fitting. If necessary, cut it down to size with a utility knife, following the kit instructions. Our kit requires the tube to be 3 1/2 inches shorter than the measurement between the top and bottom wall openings.
- Attach one end of the tube to the top AV cable box by inserting the tubing into the box's fitting.
- Using rubber bands, attach the NM power cord to the tubing. Make sure the cord is properly aligned so the power receptacle end (the end with slots) is near the box.
3. Fish the Tube and Power Cord Through the Wall
- Assemble the kit's fish tool and insert it up through the wall from the bottom hole, pulling the end out of the wall through the upper hole.
- Hook the tip of the fish tool around the inlet plug on the power cord.
- Carefully feed the tube and power cord into the top hole, down through the wall cavity. Pull gently on the fish tool from below while pushing the tube from the top. Having a helper makes this easier.
- When the cable tube reaches the bottom hole, carefully extract the end through the hole, and attach it to the bottom AV cable box. Remove the fish tool.
- Fit the top and bottom AV cable boxes into their respective holes. The top box should be situated in the bottom of the top hole, while the bottom box should be aligned with the top of the bottom hole.
4. Attach the Power Receptacle and Power Inlet Boxes
- At the top hole, pull the power receptacle plug though the opening in the power receptacle box, and snap it into place. At the top hole, the power receptacle box should be oriented to the top of the hole.
- At the bottom hole, pull the power inlet plug through the opening in the power inlet box and snap it into place. At the bottom hole, the power inlet box should be positioned at the bottom of the hole.
- Push the top power receptacle box into the hole, align it with the AV cord box, and tighten the mounting screws on both components. Repeat with the lower AV cord box and power inlet box.
5. Run AV Cords
- The AV cords can now be run through the in-wall cord tube. This kit allows up to 4 cords for various electronic devices. Usually, the cords will feed smoothly from the top AV box, through the in-wall tube, and out the lower AV box; but if necessary, the fish tool can be used.
- At the top box, slide the cables through the flexible slits in the rubber membrane on the cover plate and snap the cover plate into place against the wall box assembly. Repeat on the bottom box.
- Connect the power supply cord to the power inlet on the lower box, and plug the opposite end into the wall receptacle.
- The television and electronics can now be connected via their respective cables. Use the power receptacle outlet on the top box to plug in the TV's power cord.
Other Simple Options
Other Simple Options
If you prefer to wrangle cords instead of feeding them through walls or cord channels, several options can make those cords less unsightly.
- Group them all together and tie them off every few inches with zip ties or hook-and-loop straps.
- If your TV-related electronics sit on a cart, console or table of some sort, attach a power strip to the back of the furniture, then plug all the devices into the power strip. This way, only one cord—the one from the power strip—will be visible at the outlet. Tidy up long cables with zip ties or hook and loop straps, tucking the cords behind the furniture, along with the power strip.
- If you enjoy sewing, whip up a fabric tube that matches or blends in with the walls and that is long enough to encase most of the cord length. Sew in snaps or hook and loop tape so you can open and close the tube to add cords. Group your electronics cords in the fabric.
No matter what your home-entertainment setup, grouping cords together makes the view much less cluttered.
References
- Young House Love: How to Hide TV Wires for a Cord-Free Wall
- Google Store: Google Home and Entertainment
- Home Depot: How to Hide Wires
- Home Depot: CordMate Installation Instructions
- In My Own Style: How to Hide Cords on a Wall-Mounted TV
- Home Depot: Commercial Electric In-Wall Power Cord and Cable Kit