Mounting A Wall Coat Rack
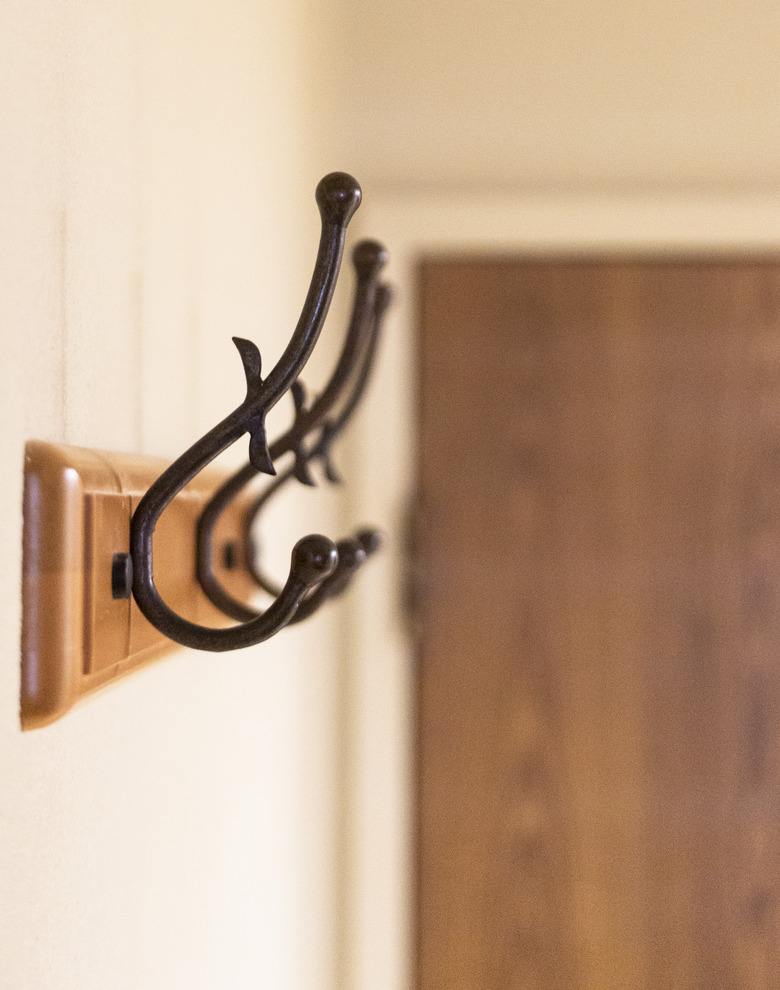
Three things are important when mounting a coat rack on a wall. The first is height. If you mount it too low, long coats will brush on the floor, but put it too high and it may be out of reach for some people. The second thing is making sure the coat rack is level. The rack should be exactly horizontal—even a slight tilt will be noticeable. The third important thing is stability. Winter coats are heavy, and your rack may need to hold quite a number of them. The best way to make the rack stable is to attach it to studs behind the wallboard. Keeping these three details in mind, mounting your wall coat rack is a straightforward procedure that shouldn't take more than 20 minutes.
Things Needed
-
Stud finder
-
Tape measure
-
Pencil
-
Torpedo level
-
Drill
-
1/2-inch spade bit (if necessary)
-
3/16-inch wood bit with countersink
-
Toggle or molly bolts (if necessary)
-
3-inch wood screws
-
Wood plugs (if necessary)
 tab1962/iStock/GettyImages
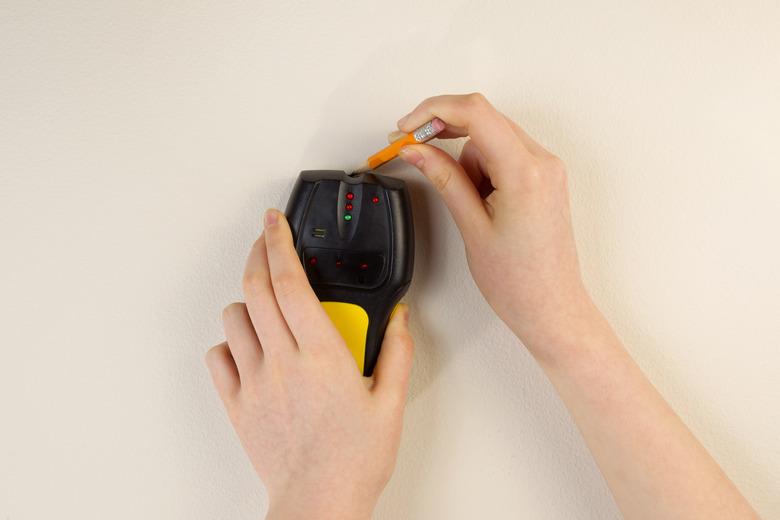
1. Find the Studs
Determine the rough position of the rack, then use a stud finder to locate the nearest studs. The best type of stud finder to use is a sonic stud finder, which senses the density of the wood or metal framing behind the wall surface. You may need to refine the position of the coat rack in order to align its mounting holes with the framing members in the wall. If the rack is less than 16 inches in length, center it in front of the stud nearest your chosen position, or make sure one of the predrilled mounting holes aligns with a stud.
2. Measure the Height
Use a tape measure and a pencil to mark the position of the rack on the wall. The height is up to you, but keep in mind that The Americans with Disabilities Act specifies a maximum height of 48 inches and a minimum height of 15 inches. You don't have to conform to these stipulations unless you're working in a public building, but it's a good idea to do so. To make the rack accessible to everyone, including people in wheelchairs, the optimum height is about 44 inches from the finished floor.
 Stanley Corporation
3. Level the Rack
Hold the rack against the wall with the mark you made touching the bottom of the rack plate. Place a torpedo level on the top of the rack and adjust the rack to center the bubble in the level's center vial. Daw a very light reference line along the bottom of the rack. If your rack has pre-drilled holes, they should be in front of the studs. If the holes aren't pre-drilled, mark the positions of the studs on the rack so you can drill holes for mounting screws.
Tip
If the rack is too short to intersect two studs, you have two options. You can drive two screws into the central stud, one above the other, or you can support the ends of the rack with wall anchors. Or, you can attach one side of the coat rack to a stud, and use a wall anchor to attach the other side. When using wall anchors, make sure to use toggle bolts or molly bolts, as they are the strongest option.
4. Drill Holes
Some coat racks have countersunk hole for mounting screws already drilled in them. If so, you'll simply need to drill pilot holes at these locations into the wall studs through the drywall or plaster. If the coat rack has no predrilled holes, you'll need to drill pilot holes for the screws using a 3/16-inch drill bit. It's a good idea to countersink these holes so the screw heads will sink past the surface of the wood and be less noticeable. If you don't have a countersink bit, you can do the countersink with a 1/2-inch spade bit before you drill the pilot hole. Sink the 1/2-inch bit about 1/4 inch into the wood, then drill the 3/16-inch hole for the screw in the center of the depression.
 Do It Best
5. Install Anchors
Install toggle or molly bolts if you choose to support the ends of the rack with wall anchors. Set the rack back against the wall after drilling the pilot holes and mark the positions of the holes by poking a sharp pencil through each one and making a mark on the wall. Drill a hole for a bolt sleeve on each mark and tap the sleeve into the wall so its flange is flush with the wall surface. Made sure not to force the anchor all the way through the wall surface at this point.
6. Mount the Rack
Line up the bottom of the rack with the reference line you penciled on the wall and drive a 3-inch wood screw through each of the predrilled holes into the stud behind the wall, using a drill with driver bit. Sink the screw heads as deep into the countersinks as possible. If you are using toggle or molly bolts, carefully thread the bolt into its sleeve, which has already been installed. As you tighten the bolt down, the "wings" of the molly or toggle bolt will open up to grip the wall on the inside surface.
 The Home Depot
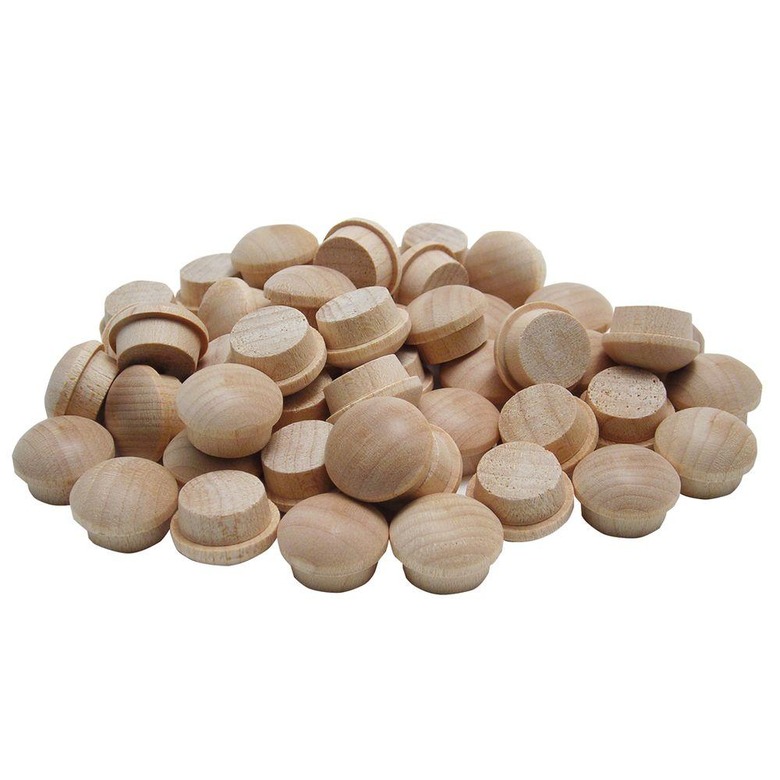
If the coat rack came with decorative plugs to fill the countersunk screw holes, insert them now to finish up your installation. If you drilled your own countertsinks, you can cover the screw heads with purchased wooden plugs. Be sure to purchase plugs that will fit into a 1/2-inch hole. If you choose not to use plugs, don't try to fill the screw holes with wood filler. It usually ends up looking worse than simply leaving the screw heads uncovered.