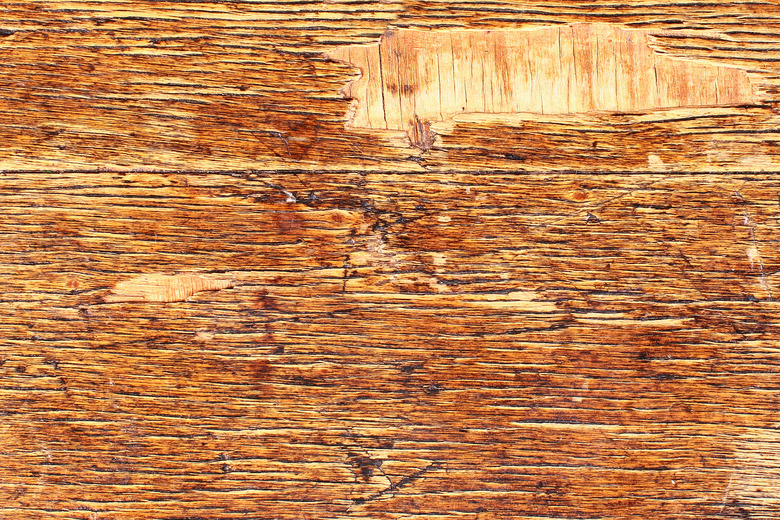
Wood Veneer Repair

A table or other furniture piece that looks like solid hardwood often is not—in many instances, the tabletop surface is actually a thin layer of high-quality veneer glued to a base layer of less expensive wood or a composite material, such as MDF (medium-density fiberboard). But should that veneer develop a few chips, bubbles, or dings, your favorite wood table, once a sight to behold, now becomes an eyesore. There's no need to hide those blemishes under a tablecloth—in many cases, repairing wood veneer, in many cases, isn't all that difficult.
 aquatarkus/iStock/GettyImages
The Epoxy Putty Method
The Epoxy Putty Method
A two-part epoxy putty designed specifically for wood offers a simple way to make repairs when the damage involves small missing pieces of veneer. (Where the veneer is just loose, or bubbling, other repair methods are better suited.) This putty comes with both parts of the epoxy (resin and activator/hardener) within one malleable roll. Folding and working it together with your hands activates the putty, which stays soft for only a matter of minutes. Read the putty packaging to determine the working time, as it varies depending upon the selected putty colors.
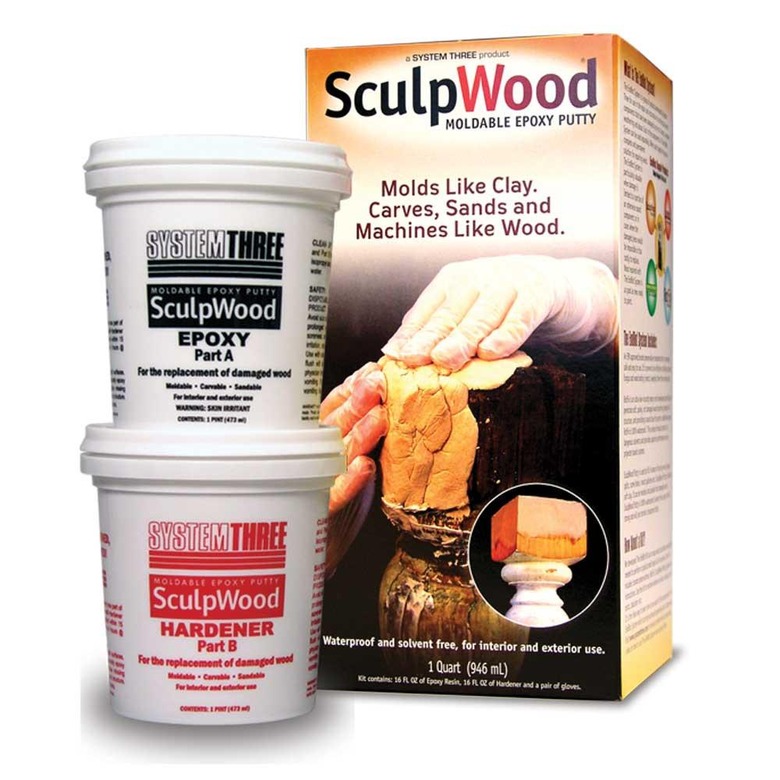 System Three
Things Needed
-
Craft knife or razor blade
-
Medium-grit sandpaper
-
Tack cloth
-
Rubber gloves
-
Wood epoxy putty in desired shade
-
Small bowl of water
-
Putty knife
-
120-grit and 220-grit sandpaper
-
Gel stains to match veneer color
-
Scrap cardboard or plastic lid
-
Inexpensive artist's brush
-
Rag
-
Varnish finish and foam brush (optional)
Step 1
Preparation involves examining the area surrounding the damage for any loose veneer pieces so small they may chip or flake. Remove these with a craft knife or razor blade, slicing carefully to avoid scarring areas that are still well attached to the project piece. Rough up the area missing the veneer using a medium-grit sandpaper, sanding in the direction of the wood grain. Wipe the area with a tack cloth to remove fine particles.
Step 2
Slice the desired amount of epoxy putty off the roll using the knife or blade while wearing rubber gloves. Work the putty slice in your hands to blend the two parts of the epoxy together. The putty is ready when it is sticky and one solid color throughout.
Warning
Always wear rubber gloves while working with epoxy wood putty.
Step 3
Flatten the putty into the area missing veneer, shaping it and removing excess putty. Dip a finger into the water to help smooth the putty and to keep it from sticking to your glove. While the putty is wet, draw a putty knife over the surface to remove excess putty and flatten the patch so it is flush with the surrounding veneer. If the patch is at the edge of the furniture piece, you can trim away excess putty using a razor blade.
Step 4
Use the razor blade to slice faint lines into the putty to resemble the lines of the wood grain found in the surrounding veneer. This is delicate work—the aim is to create a pattern that blends the patch area with the wood grain lines found in the rest of the veneer.
Step 5
Allow the putty to cure, which normally takes about one hour. Sand the repair with fine-grit sandpaper after the putty cures, which takes about one hour. Take care not to damage surrounding veneer as you sand the patch area. Wipe the dust away with a tack cloth.
Step 6
Pour a small amount of the desired gel-stain color or colors onto a scrap piece of cardboard or a plastic lid. Brush a little of each color over the hardened putty, swapping colors as needed to create a look similar to the surrounding veneer. Brush in the direction of the grain. Wipe excess gel stain from the surrounding area using the rag. The rag also helps blend the stain color or colors into the surrounding area, making the repair less obvious. Once dry, the repair should be difficult to spot.
Step 7
If the wood surface has a gloss finish, you can finish up by coating the stained patch area with a matching varnish, using a foam paintbrush. Follow manufacturer's directions for application.
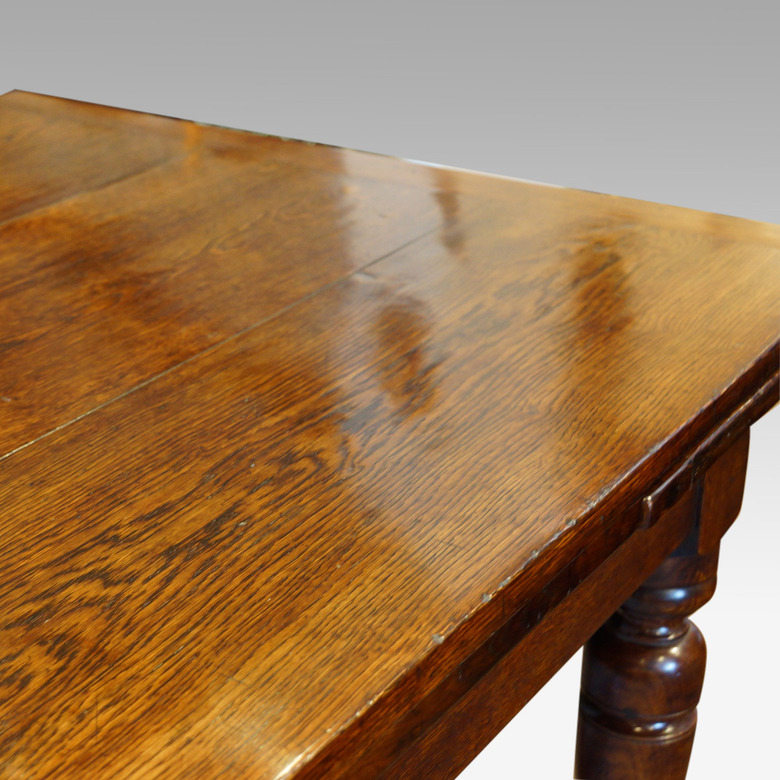
Repairing Loose or Bubbling Veneer
Repairing Loose or Bubbling Veneer
In cases where the veneer is intact and just loose or bubbling, epoxy putty is unnecessary. The same holds true for areas requiring large repairs—isn this case, new veneer pieces offer a better option.
Things Needed
-
Damp white cloth
-
Clothes iron
-
Heavy book
-
Craft knife
-
Wood glue
-
Flat-ended toothpicks
-
220-grit sandpaper
-
Wax paper
-
Scrap wood block
-
Wood clamps
-
Paper
-
Pencil
-
Matching veneer
-
Wood stain and finish, as neededs
References
Method 1: Repairing Blisters with Heat
Bubbles and blisters in veneer on a flat surface such as a table can sometimes be repaired with a damp white cloth and a hot iron, as long as the original glue used is a hide-type glue that reactivates when heated. Before trying to repair a blister in other ways, try this heat method.
- Set a slightly damp, white cotton cloth over the bubble, then iron the cloth with a clothes iron set to medium heat and no steam. Iron only for 30 seconds or so, or until the blister looks flatter.
- Wipe excess moisture off the surface with another dry cloth.
- Set a book or other heavy, flat object over the bubble for several hours, then inspect the area. If the bubble remains flattened, your repair is complete.
Method 2: Repairing Blisters with Glue
If the heat method doesn't work, blisters or bubbles can often be reglued.
- Slice a hole in its center of the bubble area with a craft knife, following the direction of the wood grain. Make the slice large enough to insert glue underneath the bubbled veneer.
- Apply wood glue to the underside of the veneer on each side of the slit using a flat-ended toothpick or a thin, long slice of cardboard for a larger hole.
- Press both sides of the bubble back down, rubbing the top with your fingers to force out excess glue.
- Wipe the excess glue away with a damp cloth.
- Place wax paper over the bubble, followed by a wood block. Clamp the wood block down.
- Allow the glue to cure overnight, then remove the clamp, block and wax paper.
 Rockler
Method 3: Adding New Veneer
For flat surface missing a large piece of veneer, a patch of new veneer makes a less obvious repair than a putty or wood filler. This method requires some precision in order to cut a patch that exactly matches the missing area.
- Sand or scrape any old glue or small veneer chips out off of the area being patched, then thoroughly clean the area of dust and debris, using a tack cloth. The patch area needs to be perfectly smooth and clean in order to apply an effective patch.
- Place a piece of scrap paper over the chipped area and trace the outline of the hole. If this is difficult, you can rub a pencil over the paper to get a pencil rubbing of the missing-veneer spot.
- Cut out the paper template along the outline.
- Trace the template shape onto a piece of wood veneer, making sure the patch grain direction matches.
- Carefully trim the veneer to size, using a craft knife.
- Apply wood glue to the back of the veneer piece with a foam paintbrush, then set the patch in place, smoothing it down with your hands.
- Wipe off excess glue with a damp cloth.
- Set a piece of wax paper over the patch, followed by a block of wood.
- Clamp the block in place and allow the glue to harden as directed on the glue bottle.
- If necessary, stain and finish the patch area to match the surrounding veneer.
 Hingston of Wilton
Tip
Pre-tinting a veneer patch offers a way to get a close match to the project piece ahead of time. Start with small scraps of veneer, applying a water-based dye in layers of color until the piece matches the project. Green dye can help balance out a piece that appears too red, for instance. Experiment and feel free to thin the dyes or even mix them a bit before application. Once everything is dyed, dried and glued in place, apply your favorite wood sealant to the entire revamped surface in order to make it look more uniform.