How To Restain Furniture Darker
Restaining your dresser, coffee table or other piece of wood furniture is a good way to give it a second life and bring it into harmony with your changing decor. If you want to restain to a lighter color, you will have to strip the old finish and sand the wood. Stripping and sanding aren't always necessary when darkening the color; you can sometimes get good results by staining over the old finish.
The Toning Option
The Toning Option
Shading the existing color of your furniture to hide worn areas and generally darken it involves a relatively simple procedure. Start by cleaning the finished wood with a solution consisting of 1/2 cup trisodium phosphate and warm water to remove grease and dull the finish. When the wood dries, scuff the finish with 180-grit sandpaper — going with the wood grain to avoid cross-grain scratches — then brush the wood stain of your choice directly onto the wood and wipe off the excess with a rag, again following the grain of the wood. When the stain dries, apply one or two coats of clear finish, and you're done.
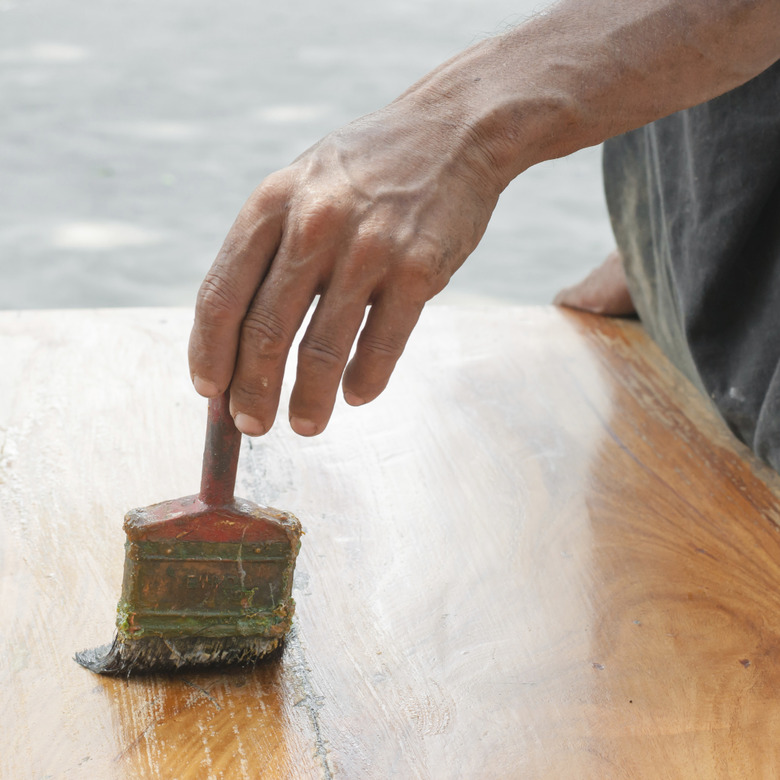
Stripping the Old Finish
Stripping the Old Finish
You may be going for a color that has a significantly different hue than that of the existing stain, which may require removal of the stain. For example, you should remove a warm stain, such as golden oak, before applying a darker, cool stain, such as walnut, or the final color may resemble neither. You need to sand out the stain, and to do that, you must first strip the finish. Stripping is a messy job that is best done outdoors. Apply stripper gently with a paintbrush; wait for the finish to bubble and scrape it off with a putty knife or paint scraper. Wear goggles, rubber gloves and a mask when using any type of stripper.
Preparing for the New Stain
Preparing for the New Stain
After scraping off as much finish as possible with a scraper, soak a wad of very fine steel wool in mineral spirits and use that to wash off the residue and clean crevices inside moldings and carvings. Wash the wood with clear water and, after it dries, sand it with 120-grit sandpaper, using a palm sander for flat surfaces and a sanding block or a folded sheet of sandpaper for curved ones. A rotary tool and a sanding accessory can help clean out crevices, but use the tool at no more than half speed to avoid reshaping the wood. Sand once more by hand with 150-grit sandpaper just before restaining.
Staining and Finishing
Staining and Finishing
Some woods, such as birch and knotty pine, take stain unevenly and need a coat of wood conditioner to ensure color uniformity. Apply the conditioner with a paint brush and give it one or two hours to dry before staining. Apply the stain with a paintbrush or — if you use gel stain — with a rag. Some of the stain remains on the surface, so wipe that off with the separate rag before it dries. Give the stain eight hours or more to dry before finishing with at least two coats of clear finish. Scuff the first coat of finish with 220-grit sandpaper before applying the second coat.