How To Stain Wood Floors
Staining a hardwood floor is almost always done as an application to bare wood—one of the finishing steps when installing new, unfinished hardwood flooring—although it is also possible to change the stain color of an existing floor by staining over the old finish.
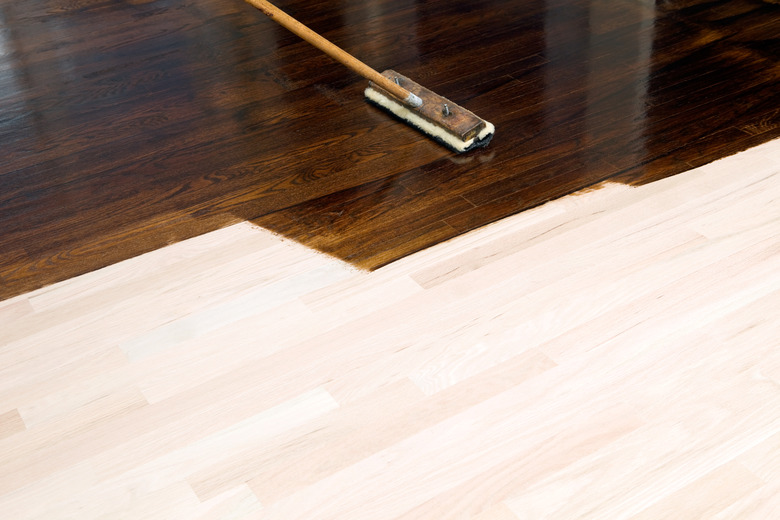
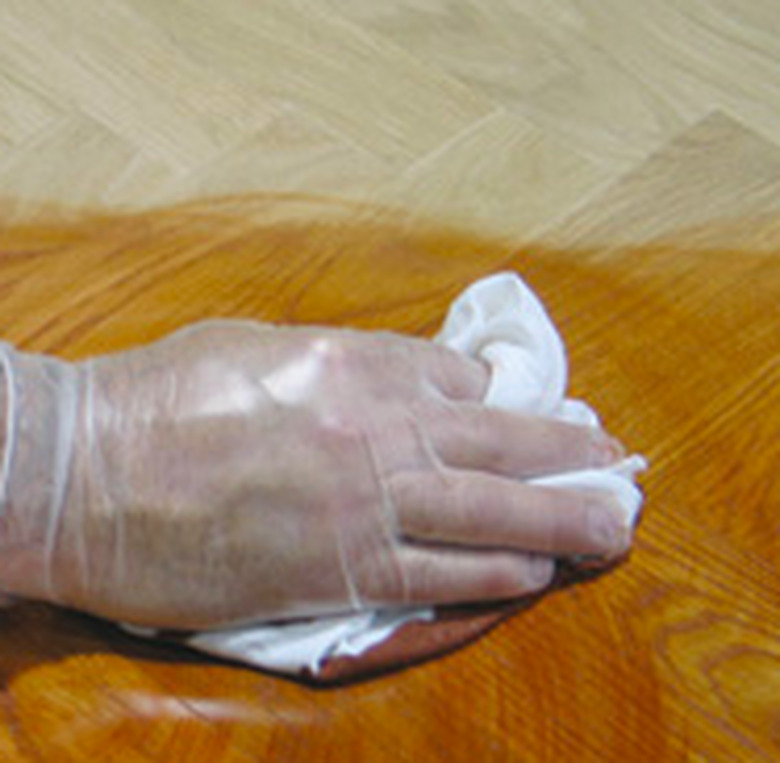
In either case, forget the pad applicators, paint brushes and spray bottles. The best way to apply stain is with a rag. The essence of the method is to rub the stain color into the wood grain with a clean rag, then use a second rag to wipe off the excess after most of the product has penetrated.
Once you've decided on a color that goes with your walls and furniture, shopping for stain color is easy. Virtually any stain will work; they are widely available in both oil-based and water-based forms. If you're sensitive to VOCs, you might want to go with a water-based product.
You'll still need need plenty of ventilation, though, because these products aren't entirely odor-free, and you'll be working close to the source of those odors. A better idea for sensitive folks is to wear a paint-grade respirator while working. If you do this, you can go with a solvent-based product, which penetrates more deeply, dries more quickly and is easier to find than water-based stains.
Is Staining a Good Idea?
Is Staining a Good Idea?
Not every hardwood floor is a good candidate for staining. At the top of the list of floors that should often be left natural are ones with close-grained wood. Hard maple, birch and alder are among species notorious for taking stain unevenly. The same is true for pine, but you can often eliminate blotching on pine by applying a conditioner before you stain. Conditioners don't work as well on dense hardwoods because they don't penetrate deeply enough.
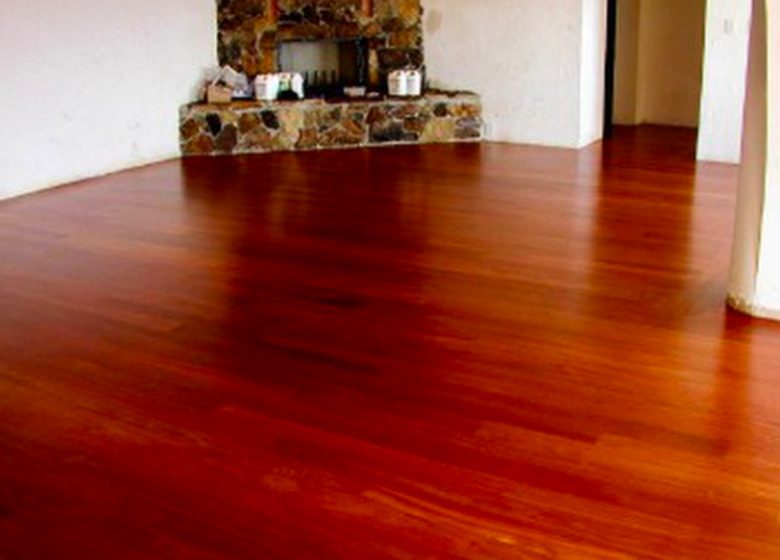
Next on the list are wood species that are already attractive and don't need the help of a stain. Walnut, cherry and mahogany are examples. Go ahead and stain if you want, but you probably won't improve on the natural color of the wood.
Finally, you should think twice about staining a floor that has been poorly sanded. A drum sander, when handled by anyone without the proper expertise, can leave ridges, valleys and chatter marks in the middle of the floor. Moreover, an edger—a heavy-duty disk sander for sanding the edges of the floor—often leaves swirl marks. You might not see these marks when the floor is dry, but after you apply a stain color, they tend to show up more clearly.
When Is the Best Time to Stain Hardwood Floors?

When Is the Best Time to Stain Hardwood Floors?
You obviously have to stain the floor after you've finished sanding it and before you apply the finish, but how soon after sanding should you apply the stain color? The answer is as soon after sanding as possible. Bare wood begins weathering as soon as it's exposed to the atmosphere and moisture begins penetrating. If left too long, the wood may discolor unevenly, and the grain may raise. Stain doesn't provide much of a seal to prevent this, but it provides just enough to keep the color and texture stable until you apply a top-coat finish.
You can also stain a floor with an existing finish, if you use the right product. You need a restorative finish containing stain and a protective varnish like polyurethane (conventional stain is not recommended for a finished wood floor). If the old finish is worn and there are small patches of exposed wood, applying a coat of restorative finish can even out the color while adding a new protective layer. It's also an easy way to change the color of a floor. A typical finish restoration involves sanding or screening the floor with a buffer and applying one of two coats of restorative finish.
How to Apply Stain
How to Apply Stain
Getting down on your hands and knees to stain a floor with a rag may seem daunting, and you may prefer to use an applicator—particularly one with a long handle. But the problem with applicators is that stain doesn't always soak in evenly, and some residue may dry on the surface and be visible under the finish. If you apply the stain with a rag and wipe the excess stain with another rag after about 5 minutes, you eliminate this possibility.
You could use an applicator and wipe down with a rag as a second step, but that's more work than doing the entire job with rags. So you might as well get out the kneepads and rubber gloves and get intimate with your floor.
Start by vacuuming the floor to remove any dust left over from sanding or buffing. Be sure to get all the dust out from between the floorboards. These seams will appear darker than the rest of the floor if you stain over them. After vacuuming, you can wipe the floor with a damp rag to bring up the wood grain (sometimes called water-popping). This makes the resulting stain darker, but it's tricky for beginners, and you must let the wood dry completely before staining.
Stain the floor in sections long and wide enough to allow you to wipe the stain off about 5 minutes after application, without walking on it. Work toward the door from the farthest corner in the room; you don't want to have to walk over your freshly stained floor to get out of the room. Apply the stain color with one rag and keep a second rag handy for wiping off excess stain. Use a swirling motion to apply the stain, but when you wipe off residue, move the rag only in the direction of the wood grain to avoid cross-grain swipe marks.
The drying time is at least 8 hours; then apply a floor finish. The best practice if to wait overnight. You don't want dust accumulation and stray footprints to ruin the finish job, though, so don't wait too long.