How To Use Non-Sanded Grout
We may receive a commission on purchases made from links.
When you tackle a tiling job, you have plenty of decisions to make, from the type of tile material to the type of grout you use. Sanded and non-sanded (sometimes called unsanded grout) are the two main types of tile grout. Each works best for specific types of tiling jobs. Once you decide if non-sanded grout is right for your project, you can tackle the actual application process.
When to Use Non-Sanded Grout
When to Use Non-Sanded Grout
The primary determining factor when choosing sanded versus non-sanded grout is the size of the tile joints. Narrower joints typically call for unsanded grout because it's easier to get into the joints. The sand chunks and thicker consistency of sanded grout can make it challenging to squeeze into narrow spaces. The general rule is to use sanded grout for any tile joints that are less than one-eighth inch wide. Unsanded grout is also common when you're grouting tiles on walls because it's stickier and easier to spread on vertical surfaces without it sliding off before you can press it into the joints.
You may also choose non-sanded grout for smooth or delicate tile types, such as granite, limestone or marble. The sand in sanded grout can have a harsh abrasive effect, which can cause damage to the tiles. So even if you have wider gaps between them, you want to use unsanded grout on delicate tiles.
How to Mix Non-Sanded Grout
How to Mix Non-Sanded Grout
It's always best to follow the specific package instructions for mixing your grout as the ratios may vary from brand to brand. If you're using more than one package of unsanded grout, mix the powder from all packages together first to ensure a uniform color. Once the dry powder is combined, you're ready to mix the grout.
- Add the specified amount of mix and water in a bucket.
- Mix the materials together with a trowel, making sure to scrape up all the dry powder from the bottom and sides of the container. Rolling the bucket occasionally while you're mixing your grout helps to get all of the powder mixed in. The ideal non-sanded grout consistency is similar to peanut butter.
- Once you reach the ideal consistency, you need to let it sit for about 10 minutes. This is called slaking.
- Give the grout another good stir, and you're ready to apply it.
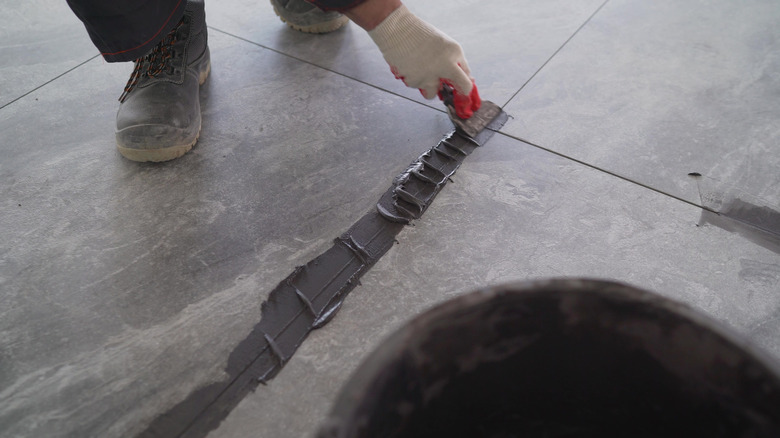
How to Apply Non-Sanded Grout
How to Apply Non-Sanded Grout
Using non-sanded grout is the same as using sanded grout.
- Dip your grout float into the prepared grout to load it.
- Hold the float at an angle, and spread the grout across the joints diagonally. You want all of the joints to be fully loaded with the grout.
- Once you fill the lines, you can make an initial pass with the float to remove excess grout from the tiles. Move the float in an S shape along the tiles, being careful not to dig into the grout lines.
- After about 20 to 30 minutes, you'll notice your unsanded grout is starting to dry. Now is the time to grab a damp sponge and wipe in a diagonal motion to clean off more grout from the tile surfaces.
- Rinse the sponge and wipe more until you remove most of the excess grout.
- You can then use your sponge to smooth and shape the lines by carefully running it along the joints.
- Wipe away any remaining grout haze from the tile surfaces with a soft cotton or microfiber towel.