How To Repair Grout
If tile grout looks bad, so will the tiles — it's as simple as that. Grout can look bad because it's moisture-damaged and moldy, which means it probably wasn't sealed properly, or it's cracked, which may or may not point to an issue with the tile substrate. If the substrate is at fault, you'll probably also see some cracked or missing tiles, and they are telling you to make foundational repairs before you move on to the grout or the damaged tiles.
Even if the substrate is in good condition, tile grout can crack for a number of reasons, and it can get so discolored that replacing it is the only viable option. Fortunately, it's one of the most doable DIY projects in all of home improvement, and it involves just two basic steps, which are removing the old grout and applying new grout. Both steps are necessary because the damaged grout has to go to make way for the new grout. Simply applying a thin layer of new grout over old grout does not work; the new grout will crack and chip if you spread it too thin in an effort to mask the damage.
Use the Right Tool
Use the Right Tool
Removing damaged grout may be a doable project, but it still takes effort, and if you have to remove a lot of it, especially from a tile floor, you should do it with a power tool. Dremel sells a grout-removal bit for use with its rotary tools, and online outlets sell grout-removal blades for reciprocating saws. Before you buy, it's worth checking online reviews, such as those at Tilers Place, to find the tool that suits you best. This may end up being a manual grout saw or even a hammer and screwdriver if you have to make only a small repair.
 Sanford Creative
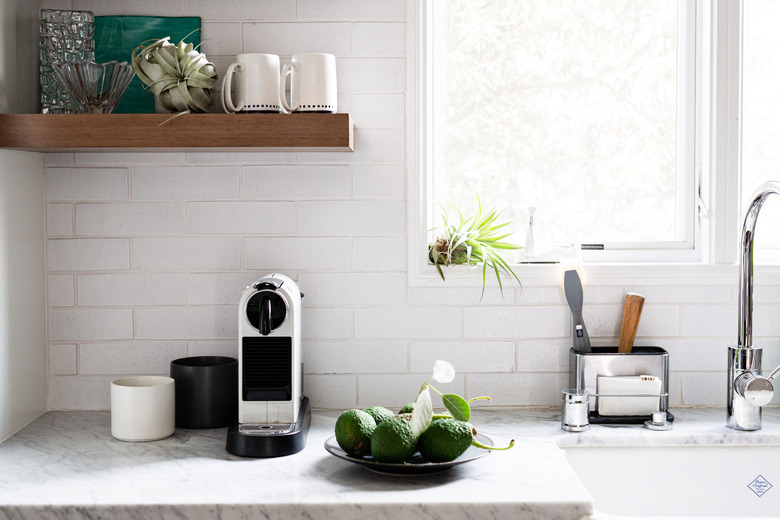
Matching the Grout Color
Matching the Grout Color
Before you start the job, it's a good idea to make sure you have the right grout on hand so you can do everything in a single go without extra trips to the hardware store. In most cases, you'll need sanded grout because the unsanded variety is only for joints that are 1/8-inch wide or less, and thin joints are less likely to crack. It can happen, though, and thin grout lines can also get hopelessly dirty, so it's important to know the difference between sanded and unsanded grout to make sure you get the right kind.
To get a good color match, you'll need a sample of the old grout that is as clean and as close to the original color as possible, so it's probably a good idea to chip out some from underneath the top layer. Use the color chart at the store to match colors, keeping in mind that you can lighten powdered grout that is slightly too dark by adding more water when you mix it. You can also add water to premixed grout to lighten it as long as it's not epoxy based.
How to Repair Grout
How to Repair Grout
Things Needed
-
Mild detergent
-
Commercial haze remover
-
Grout sealant
-
Buckets
-
Sponges
-
Hammer (optional)
-
Screwdriver (optional)
-
Grout-removal tool
-
Goggles
-
Shop vacuum
-
Crevice tool
-
Trowel (optional)
-
Drill
-
Mixing paddle
-
Grout float
-
Rags or cheesecloth
1. Clean the Tiles
Mix a mild detergent in warm water in a bucket and use a sponge to clean the tiles. This prevents dirt from contaminating the new grout.
2. Remove the Old Grout
The techniques you use to remove the grout depend on which tools you're using. If the cracked grout is in such poor condition that you can almost pull it out with your fingers, all you may need to do is chip away with a hammer and screwdriver. In most cases, though, you'll have to break and cut grout that is still fairly solid, and a power tool is best for that.
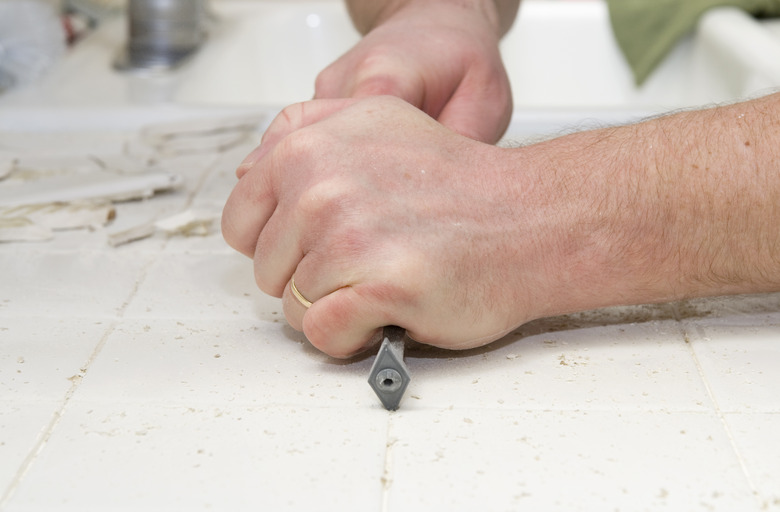 pink_cotton_candy/iStock/GettyImages
You don't necessarily have to remove all the old grout, but the more you remove, the better. At a minimum, any grout that remains within the grout lines should be no thicker than half the thickness of the tile, or else the new grout will be too thin, and it will crack. Whether or not you use a power tool, be sure to wear goggles to protect your eyes from flying shards of cementitious material.
3. Clean Up With a Vacuum
Use a shop vacuum with a crevice tool to remove all the material from the grout lines, including dust. After vacuuming, check for bits of grout still clinging to the tiles and scrape them off or tap them off with a hammer and screwdriver and then vacuum again. Remember that porcelain and ceramic tile is fragile, so use caution when tapping.
After vacuuming, it's a good idea to run a damp sponge through the grout lines to pick up any particles the vacuum didn't get.
4. Mix the New Grout
Follow the instructions on the container for mixing the grout. Most will tell you to add the powder to clean water incrementally, mixing as you go until the consistency is such that it's flexible enough to spread but stiff enough to form clumps. You can mix by hand with a trowel, but it's a lot easier to use a drill and a paint-mixing paddle.
If you're using premixed grout, you generally don't have to mix it unless you want to lighten the color. If so, add water in small amounts because a little makes a big difference in consistency.
5. Spread the New Grout
Spread the grout liberally on floor tile by dropping some on the tiles and using a grout float and a sweeping motion to spread it across the floor and into the grout lines. When the lines are full, pick up any excess grout with the float and return it to the bucket. Work in small sections and keep an eye on the grout in the bucket to make sure it isn't setting and becoming too hard to use; if so, you must discard it and mix more.
When you grout tile on a wall, you may have trouble getting the grout to stay on your float. One trick is to pick up some on the tip of the grout float and squeeze the float against the side of the bucket to compress the grout so it stays in place. Then apply the grout by sweeping the float across the tiles.
6. Wipe Off Excess Grout
Make a second pass with the grout float to remove excess grout from the tile faces. Hold the float at a steep angle (about 80 degrees to the tile surface) and wipe diagonally across the grout joints. Scrape the float clean on the edge of the bucket as you go. Next, dip a sponge in clean water and wring it out well. Use the sponge to clean off excess grout from the tiles while the grout is still pliable. Avoid using too much water, or you may change the color of the grout. Rinse the sponge often and wring it out thoroughly after every rinsing.
7. Buff the Tiles to Remove Grout Haze
Wait for the grout to harden. When it does, a haze will develop on the surface of the tile. Buff this off with a rag or, as many tilers use, a piece of cheesecloth. If the haze is difficult to remove, you may need to use a commercial haze remover.
8. Seal the New Grout
Wait for the grout to cure, which usually takes a few days, and then apply a polyurethane or acrylic sealant to lock out moisture and prevent discoloration. This is important everywhere but especially when repairing bathroom tile or a tile floor in a wet location.