How To Install A Quartz Countertop In 6 Easy Steps
We may receive a commission on purchases made from links.
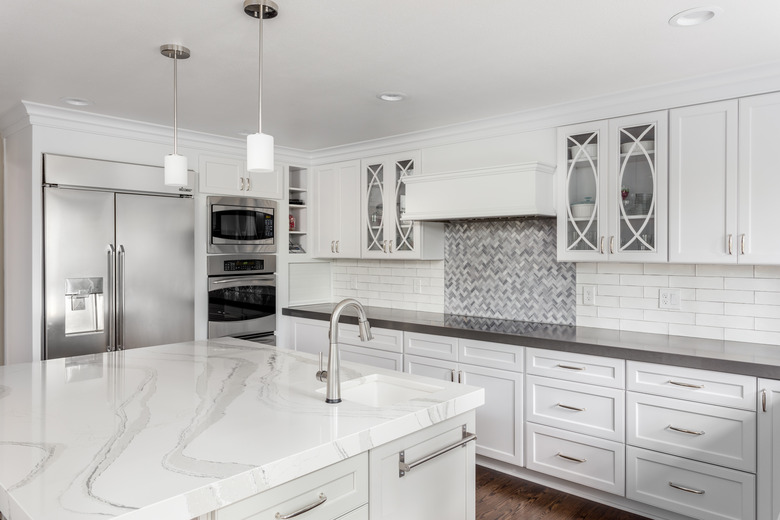
Whether you are upgrading from an outdated laminate countertop or you simply want to be a part of the moment that quartz is having in kitchen design, installing quartz countertops will definitely elevate the look of your cooking and dining space. Made from crushed quartz and resin binders, quartz countertops are less porous and offer better waterproofing than other countertop materials like natural stone — such as granite or marble — reducing the need to seal the material and reducing maintenance requirements.
If you want to make and install a quartz countertop yourself, though, think again because even though quartz is a man-made material, it's actually harder than granite, and it's heavy. Those are great qualities for any countertop material, but think about what that means for the fabricator — who has to cut holes for the sink and faucet, cut the countertop to size and shape the edges — and for the installer, who has to blend seams when more than one slab is required for a full countertop (which is common with quartz), position the slabs just so and bond them to the cabinet.
Quartz countertop fabrication is not a DIY project, but it's a different story if you purchase a prefabricated countertop that you can simply drop in place. If all you have to do is remove the old countertop, set the new one in place, glue it down and install the sink and the rest of the plumbing, you can save on installation costs by doing the job yourself (although you'll probably need help with the heavy lifting), but for a number of reasons, you should still consider hiring a pro.
Preparing for a Quartz Countertop
Preparing for a Quartz Countertop
The main thing you have to do to prepare kitchen cabinets for a new countertop is to remove the old countertop. Sometimes, this is a relatively simple job, and sometimes, it's not. Often, the old countertop has been fastened to the cabinet with screws or easy-to-remove clips that you can access from under the countertop, or it hasn't been fastened at all. The latter scenario is common with some solid surface or granite countertops that are heavy enough to resist movement as long as they are properly sealed to the backsplash. Once you disconnect all the plumbing, remove the sink and faucet and cut the seal between the countertop and backsplash with a utility knife, you and a helper should be able to slide the countertop forward and off the cabinet with little effort.
If the countertop has been fastened with clips, all you need is a Phillips screwdriver to loosen and remove them, but that may not free the countertop because some installers affix countertops with glue or caulk as well as with screws or clips, and some just use glue. Either way, you have to break the glue bond to move the countertop, and this usually involves a fair amount of tapping between the bottom of the countertop and the top of the cabinet frame with a hammer and chisel. If the old countertop has been glued to the cabinet, it's important to scrape off all the old glue from the top of the cabinet to prepare for the new countertop. If you don't do this, you won't be able to get the countertop to sit level, and this is crucial, so use the hammer and chisel to gently tap away at the glue until it's all gone.
You need to do one more thing before getting started on the installation, and that's to choose a sink and faucet. Undermount sinks work best with countertop materials like quartz and natural stone, and faucets generally mount on the countertop surface and need precut holes, and you'll have to decide where the holes should be. Once you've chosen a sink, discuss with the fabricator whether you want waterfall edges (otherwise known as a negative reveal) or you want some portion of the sink edges to be visible.
How to Install a Quartz Countertop
How to Install a Quartz Countertop
Quartz countertop fabricators typically come to your home to create a detailed template or diagram of the cabinets and kitchen space to ensure the new countertop is a perfect fit. Once the template is done, the process of fabricating the countertop takes about one to two weeks. Installation usually takes just a few hours.
1. Making a Model of the Countertop
The fabricator will create a full-size template of the countertop area using strips of wood and gluing the pieces together with hot glue. This typically allows for a 1 1/2-inch overhang on all sides except for those that butt against walls, but this can be adjusted as desired. The fabricator will also draw a diagram for dimensions and notes, including the position and dimensions of the sink cutout and faucet holes as well as any drop-in appliances, such as a cooktop.
2. Finalizing Style Details
Once your countertop template has been created, you can visit the fabricator's facility to choose a quartz slab and to discuss style options, such as edge treatments and how many pieces of quartz are required. In some cases, the entire countertop can be cut from a single slab; otherwise, the countertop will come in two or more pieces that must be joined on-site. It's best to make these decisions when you have the material in front of you, especially if the quartz has graining (veining) or color variations.
 photovs/iStock/GettyImages
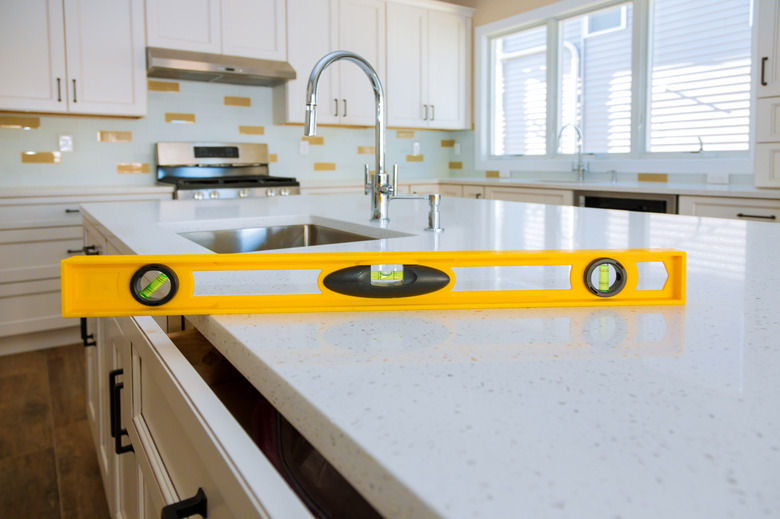
3. Dry-Fitting and Leveling the Countertop
When the countertop arrives at your home, the installers will carry it carefully to the cabinet using straps and suction handles as needed to prevent back strain and to avoid dropping the slab. Then, they will hoist it onto the cabinet and slide it into position. The next step is to check it for level at several places using a 6-foot level. If there are low spots, adding cedar shims between the cabinets and countertop brings them up to level. The shims will be glued in place before the countertop is secured. Dry-fitting and leveling is critical because the countertop must be dead-level in all areas, and the slab sections at all seams must be perfectly flush.
4. Joining the Seams
If the countertop has seams, each seam is created with a special epoxy resin that matches the color of the countertop. Seam epoxy is sold in pre-colored form (from the countertop manufacturer or adhesive supplier), or it can be custom mixed on-site using pigments. To create the seam joint, epoxy is applied to the edge of one of the slabs and then the slabs are pulled together with a seam setter tool that suctions to the slabs and has leveling adjustments for bringing the edges perfectly flush while they are pulled together. Excess epoxy is removed with a razor blade, and the epoxy in the joint is allowed to cure. Finally, the seam setter is removed, painters' tape is applied to both sides of the seam and a fill layer of epoxy is applied to the joint to further hide the seam. This layer is scraped clean with a razor and allowed to cure.
5. Securing the Countertop
The countertop is secured to the cabinets with silicone caulk or construction adhesive. The countertop is tilted up so the caulk can be applied to the top edges of the cabinets. Then, the top is lowered into place, and the caulk is allowed to cure for 24 hours. The sink is installed with caulk and may also be secured with clips. Installers often place a board or block under the sink to force it against the underside of the countertop while the caulk cures.
6. Installing the Backsplash and Hooking Up the Plumbing
A backsplash is an optional feature and can be made of quartz to match the countertop if desired. Otherwise, you can leave the backsplash as a painted wall or add tile or other decorative (and washable) finish. A quartz backsplash is bonded to the wall with silicone caulk or construction adhesive. The installers will also the seal the joint between the backsplash and the countertop using silicone caulk of a matching color. The final step is to install the faucet, sink drain, disposer and any other plumbing accessories and then turn on the water.
 hikesterson/iStock/GettyImages
Can You Install Quartz Countertops Yourself?
Can You Install Quartz Countertops Yourself?
Some homeowners can DIY any home improvement project, but when it comes to quartz countertop installation, the question isn't so much whether you can but whether you should. A quartz countertop is bound to be the focal point of any kitchen, and even small defects from an amateur effort to install the quartz will be noticeable. For these reasons as well as others, it's probably best to bite the bullet and make the installation costs part of your budget:
- Quartz is heavy. You can hurt your back trying to lift it, and you can easily lose your grip and drop it. It's breakable.
- Your cabinets may need reinforcement to support the weight of the countertop. A pro will know how much and where to put it.
- It takes factory equipment to cut and shape quartz accurately. If you use the wrong tools and the quartz overheats, it can crack.
- Professionals are insured. You're covered if anything goes wrong, and the warranty on some products is only valid with professional installation.
- It takes experience as well as the right equipment to produce a flawless new quartz countertop.
Advantages and Disadvantages of Quartz Countertops
Advantages and Disadvantages of Quartz Countertops
Quartz countertops have a lot going for them and not many drawbacks. The average cost of a quartz countertop is on par with a natural stone one, so if you're choosing from different types of stone, price shouldn't be an issue. Of course, stone countertops, including quartz ones, cost significantly more than those fabricated from many other materials, including laminate or solid surface, so the cost of quartz countertops can also be a deterrent.
Because it is dense and nonporous, quartz is low-maintenance. It won't absorb spills and doesn't stain easily, although the color will fade if the countertop is in a very sunny spot. Because it's a man-made material, quartz is available in a variety of patterns and colors.
On the downside, quartz slabs are produced in standard dimensions, and a seam is always necessary when installing on oversize cabinets. No such limitation exists with natural stone.
References
- BuildDirect: How to Install a Quartz Countertop
- YouTube: Construction Coach – Quartz Countertop Install 4 Complete Demonstrations on 4 Different Projects
- Countertop Guides: Should You Hire a Professional or DIY a Quartz Countertop Installation?
- Capitol Granite: Should I Choose a Quartz or Granite Countertop?