How To Make New Wood Look Weathered And Reclaimed (Farmhouse Chic!)
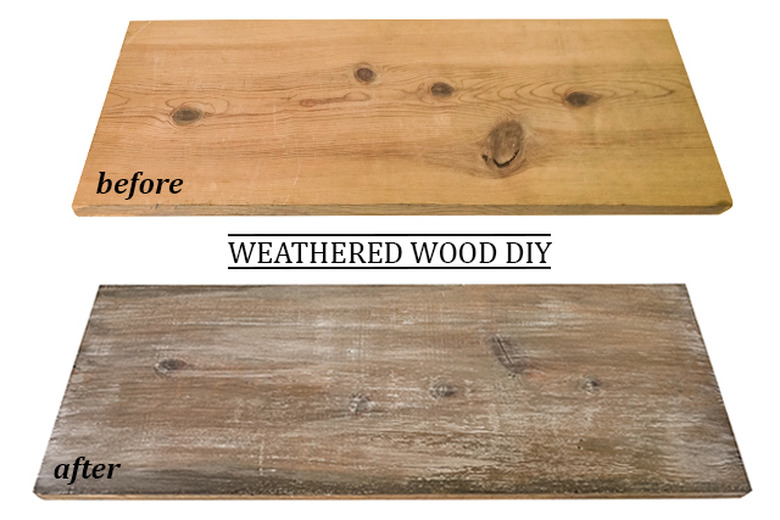
Call it weathered, aged, antiqued, or whatever else the design world decides to dub it for the moment — a "grungy" looking wood finish remains as popular today as it did when '90s shabby chic overthrew the slick, lacquered, painfully perfect aesthetic of the '80s. However, today's weathered wood is a bit less French country flea market and more reclaimed barn wood. In addition to fitting in perfectly with farmhouse decor, this versatile look can be incorporated into practically any of today's trending design styles, including industrial, boho, and midcentury modern.
However, if you're not lucky enough to get your hands on genuine reclaimed wood, here's an easy way to get the look on new (or new-ish) wood using paint and stain, without having to strip an old barn bare.
 Maya Marin
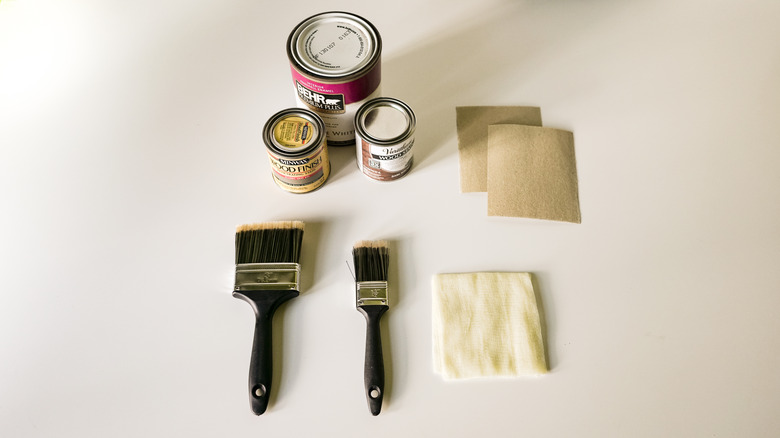
Things Needed
-
Dark brown wood stain (we used dark walnut)
-
Gray wood stain (we used classic gray, but any gray will do)
-
Off-white latex paint
-
Wood staining brush
-
Straight-edge (not angled) paint brush, at least two inches wide
-
Sand paper (or electric sander if removing a previous finish)
-
Cloth rag or old towel
 Maya Marin
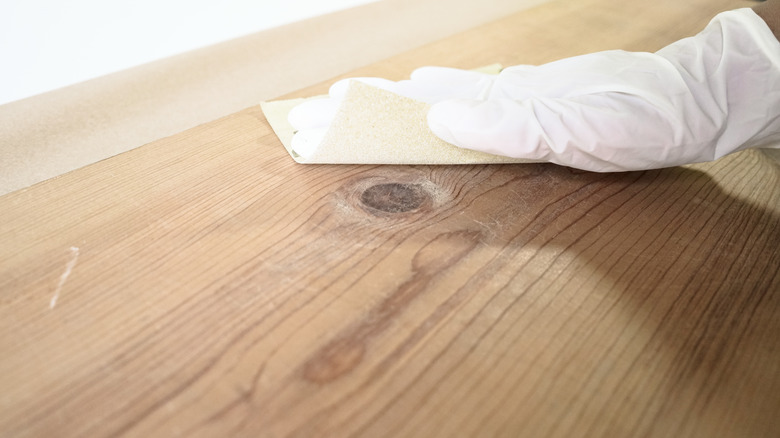
1. Sand the wood for staining.
Use sandpaper or an electric sander to smooth and clean the surface of the wood (and to remove the previous finish, if any) before staining. This will allow the stain to deeply penetrate the wood.
 Maya Marin
Dust off completely before proceeding to the next step.
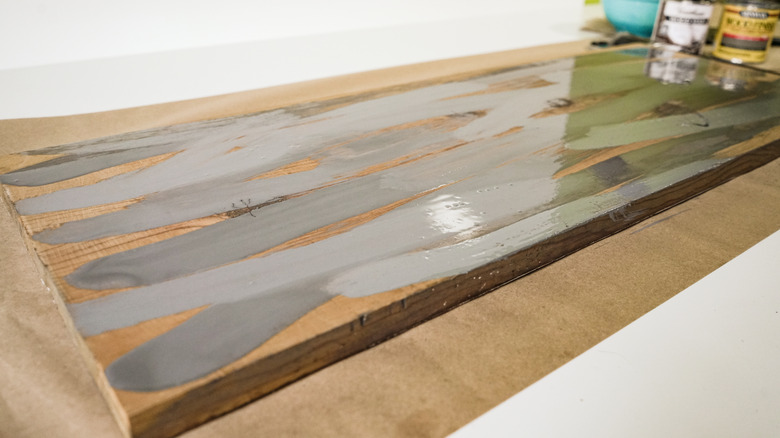
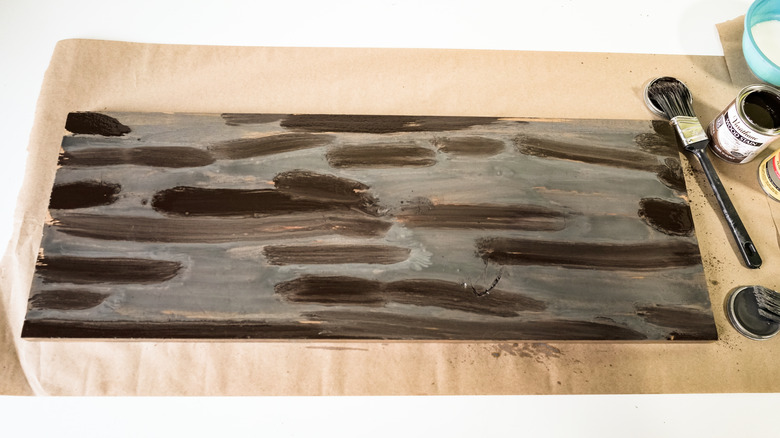
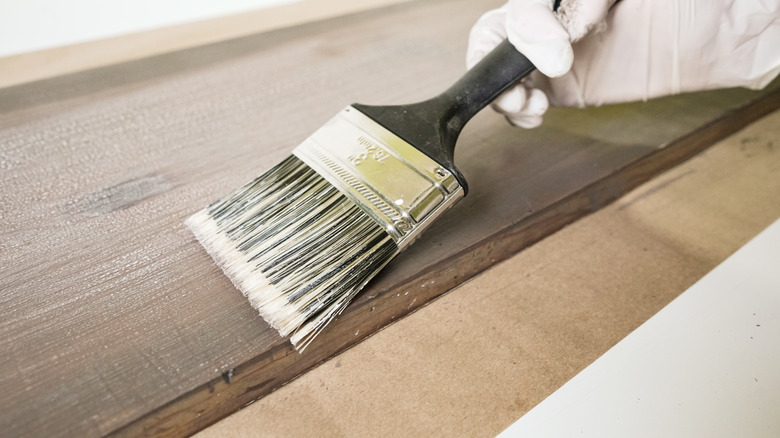
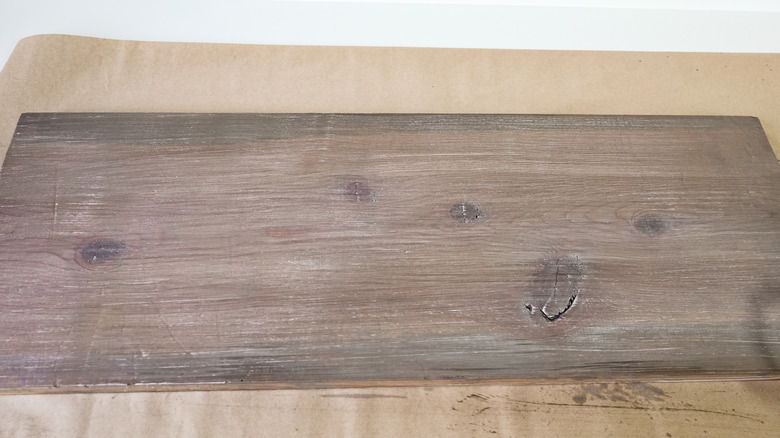
2. Streak the surface with gray wood stain.
Using your stain brush and gray wood stain, apply random streaks to the wood, along the grain as shown. Leave a bit of the raw wood bare.
 Maya Marin
 Maya Marin
3. Streak the surface with dark brown wood stain.
Clean your stain brush and repeat Step 2 with the dark brown wood stain, filling in most but not all of the bare spots.
 Maya Marin
The amount of brown stain you use depends on how brown or warm you'd like the final finish to be. If you'd like a grayer or cooler finish for a more sun-bleached appearance, apply less brown.
 Maya Marin
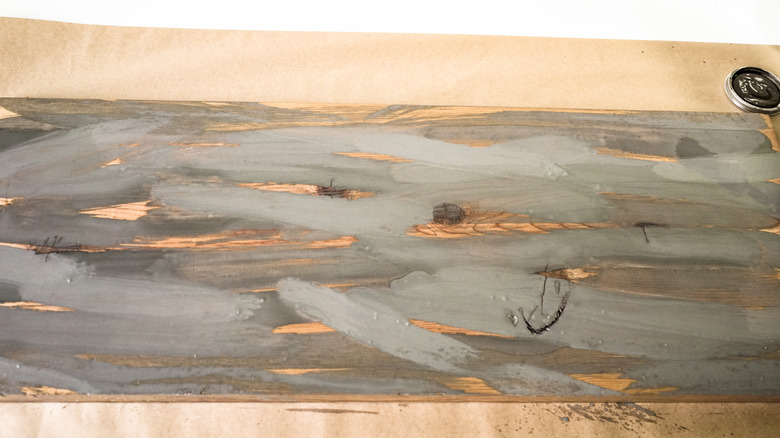
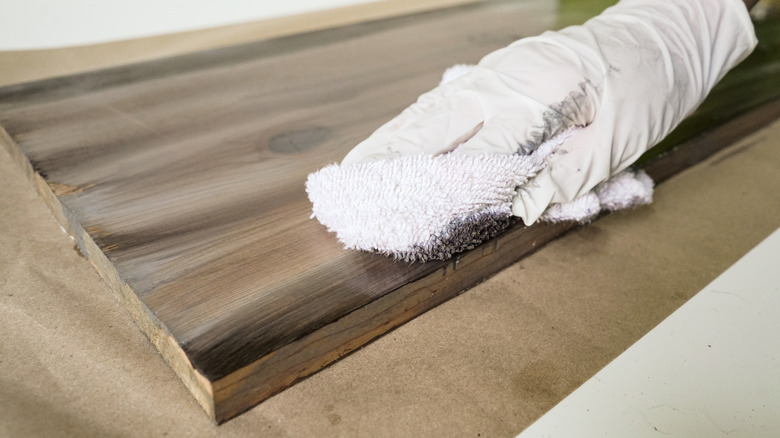
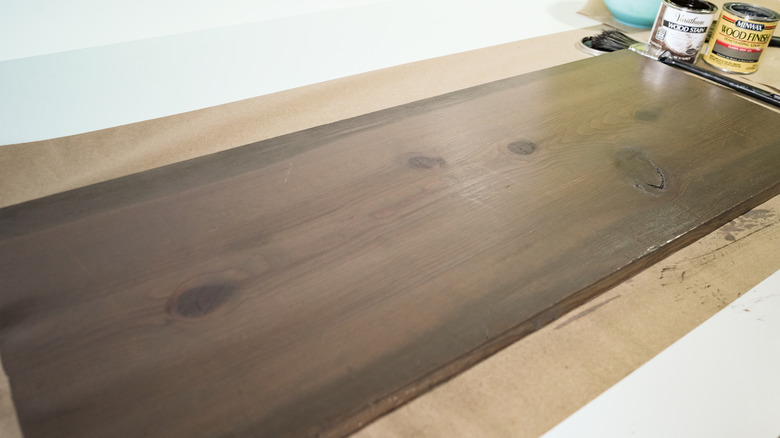
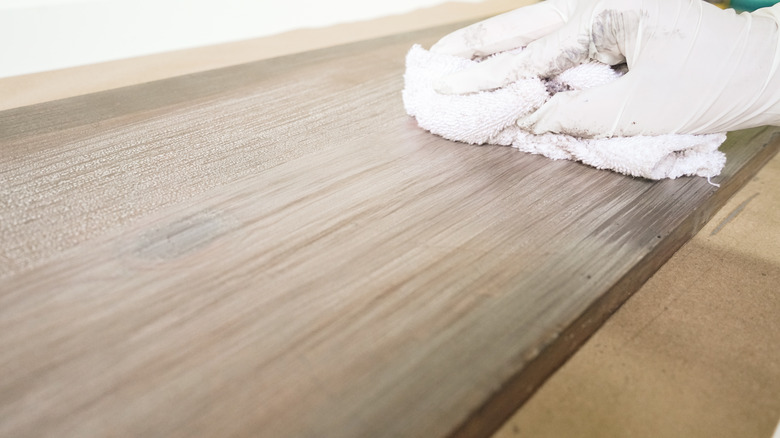
4. Blend and wipe.
Again, following the grain of the wood, drag your cloth rag over the surface in long sweeps to blend the stain streaks together as shown. Apply enough pressure to remove excess stain and to make sure that the color is absorbed by the wood. Repeat until you've wiped off any excess stain from the surface.
 Maya Marin
At this stage, if you'd like your finish to look more gray or more brown than it currently does, apply a few more streaks of that desired color evenly over the wood, then repeat the blending and wiping-off process. Be careful not to apply too much of the same color stain over your blended streaks (you want a multi-toned surface) or you won't have that weathered look you're going for. Once you're done applying, blending, and wiping your wood stain, allow it to dry.
 Maya Marin
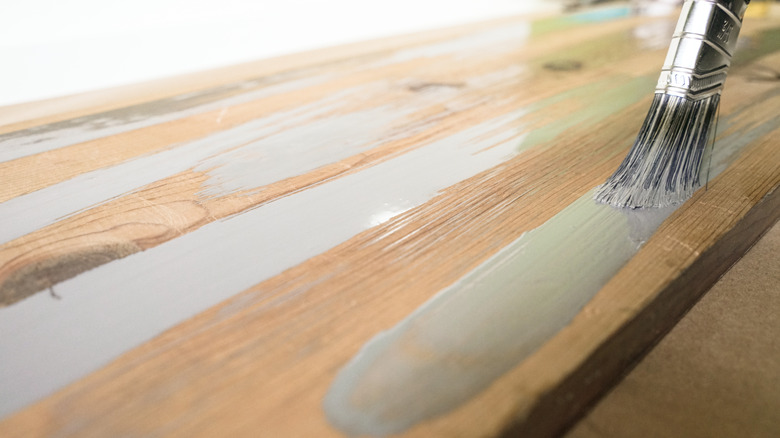
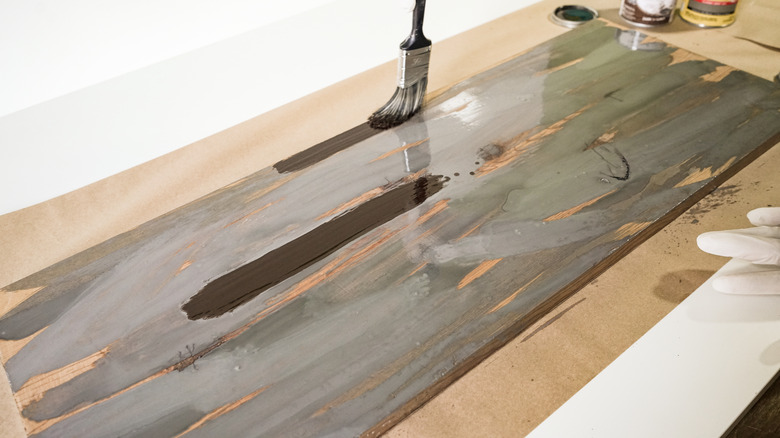
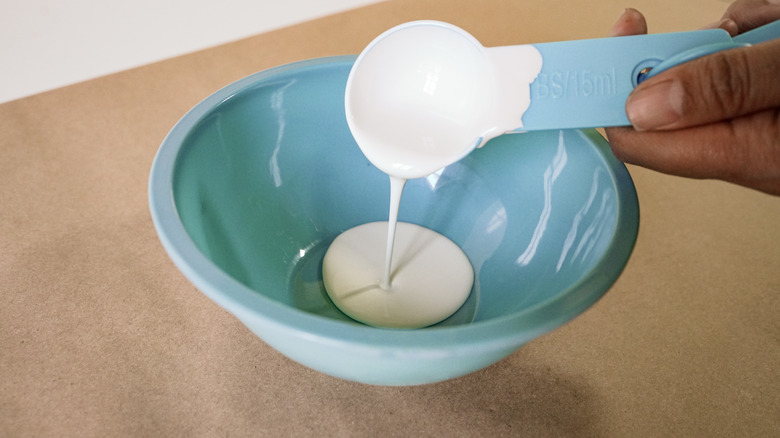
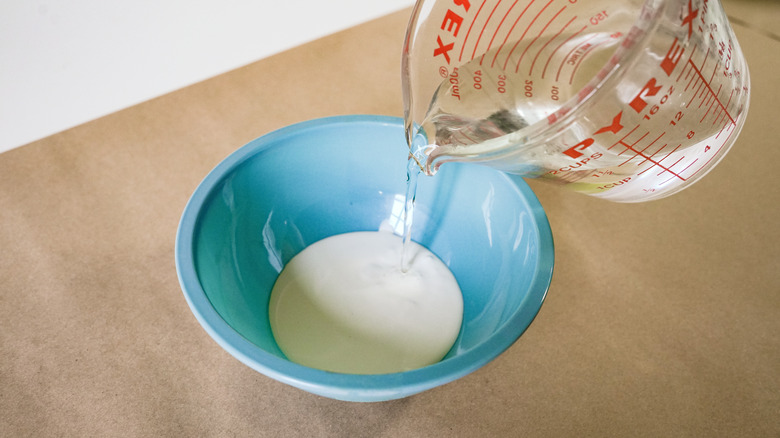
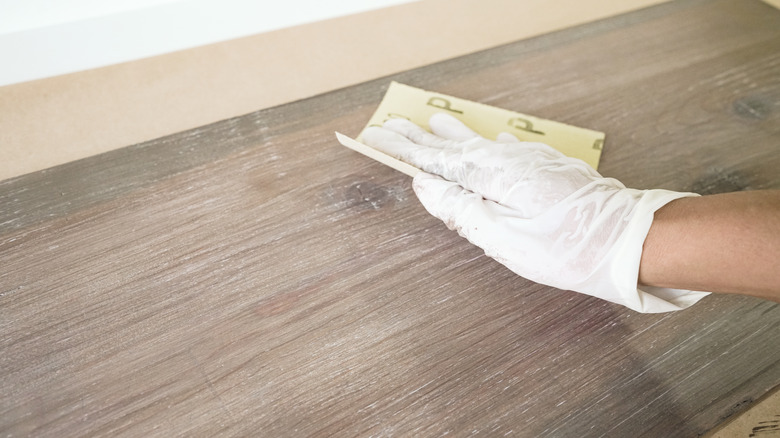
5. Add the whitewash.
Lightly whitewashing over the stained wood with a highly-diluted paint solution will give your faux barnwood more of that characteristic sun-bleached look.
Mix two tablespoons off-white paint and one cup of water in a bowl.
 Maya Marin
 Maya Marin
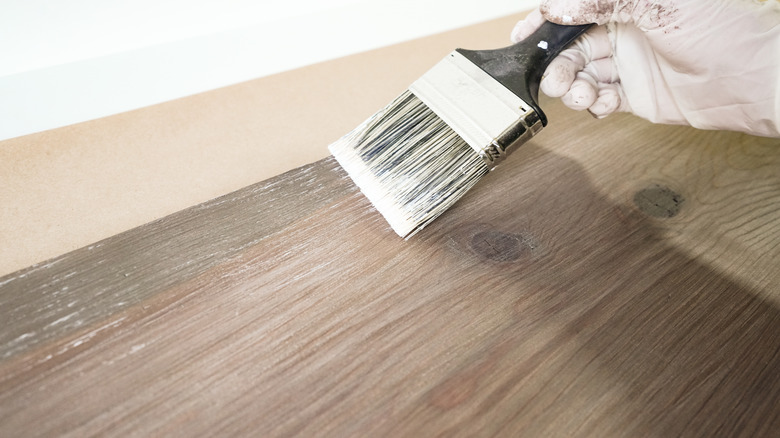
Dip your paint brush into the whitewash solution, then dab the tips of the bristles onto a paper towel or rag to ensure that the brush isn't dripping wet. You want to brush on a very thin layer of whitewash at a time.
 Maya Marin
Drag the brush lightly across the length of the wood in long, edge-to-edge strokes along the grain. Your goal is to leave very light traces of white on the surface. Droplets will pool on the surface and color will not be deposited evenly, but this is normal and desirable.
 Maya Marin
6. Blend the whitewash.
Now take your rag and lightly blend the whitewash into the stained wood, similar to what you did with the stain in Step 4 — just enough to absorb any pooled liquid.
 Maya Marin
Repeat Steps 5 and 6 until you achieve your desired result.
 Maya Marin
Let dry.
 Maya Marin
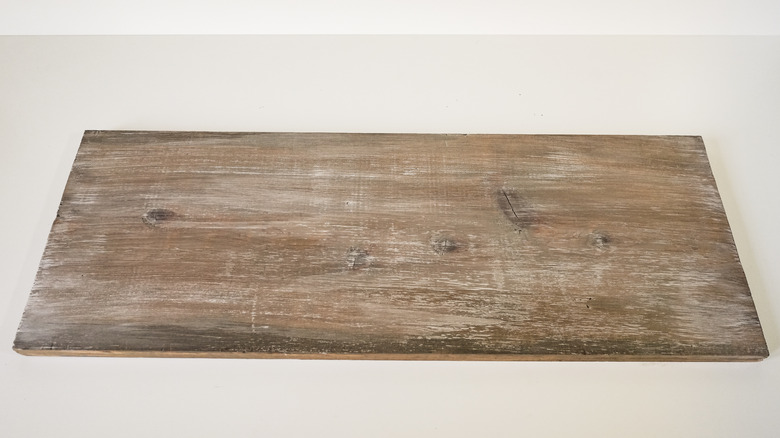
7. Spot sand (optional).
If there are any spots that you've either whitewashed and/or stained too much for your liking, you can choose to sand those down as needed. You can also choose to spot sand if you'd just like to add some additional "weathering" to your finish.
 Maya Marin
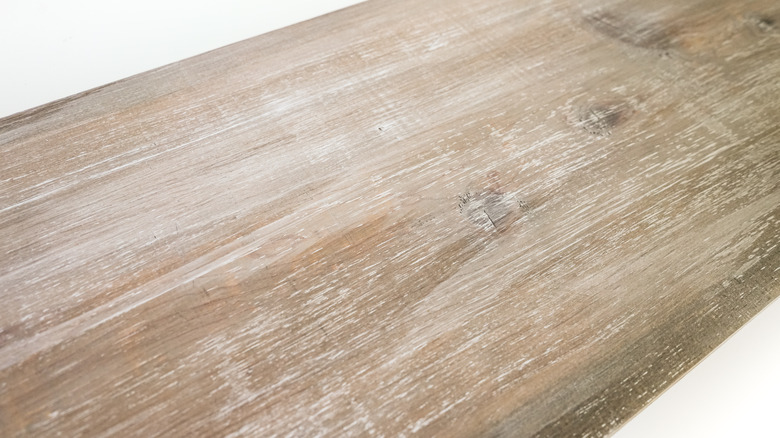
Your faux weathered wood finish is now complete!
 Maya Marin
TIP: Want the full reclaimed wood effect? Add a few random nicks and scratches to the surface using the corner of a flat metal tool like a flat edge screwdriver or paint scraper. For even more fun fakery, hammer in some nails at the edges of your wood and then remove them to give the illusion that the planks have been pried off from a dilapidated building!
Weathered Wood Pics for Inspiration
Weathered Wood Pics for Inspiration
Below, some of our favorite ways you can design and decorate with weathered wood.
1. Pair a wood plank with brushed metal shelf brackets for an industrial-style wall shelf.
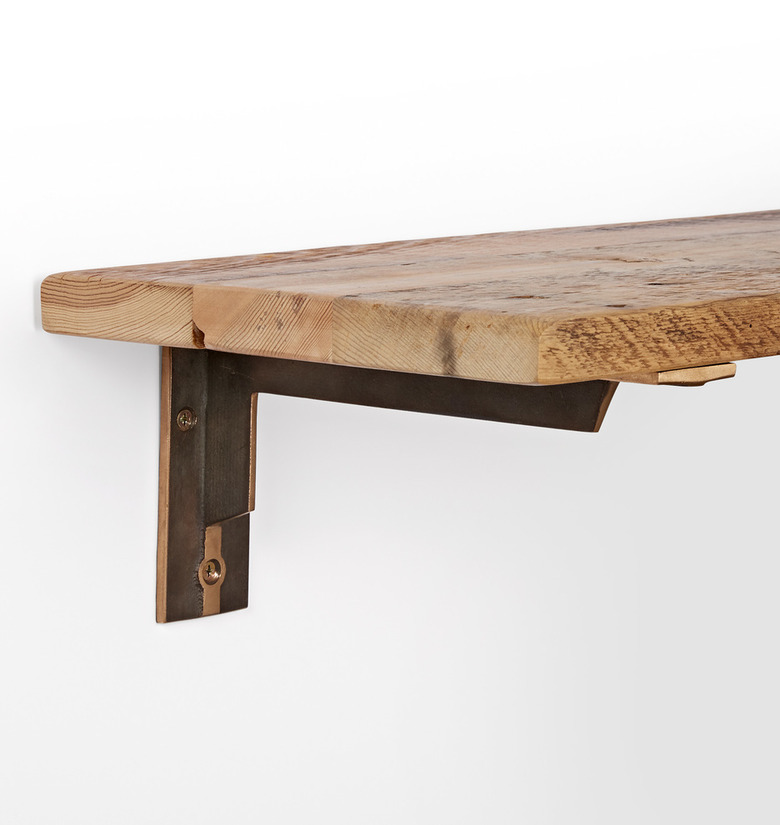 Rejuvenation
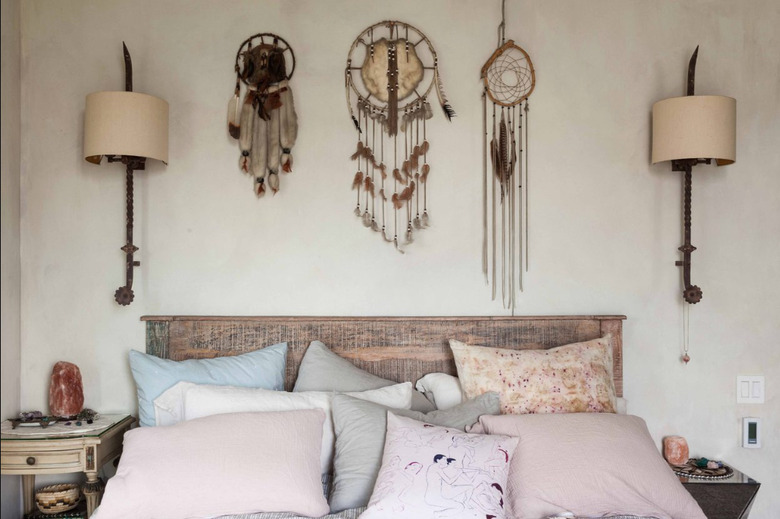
2. Apply a faux weathered wood finish to a headboard to emulate the eclectic boho style of this Omaha Heights home decorated primarily with reclaimed materials.
 Stephen Paul
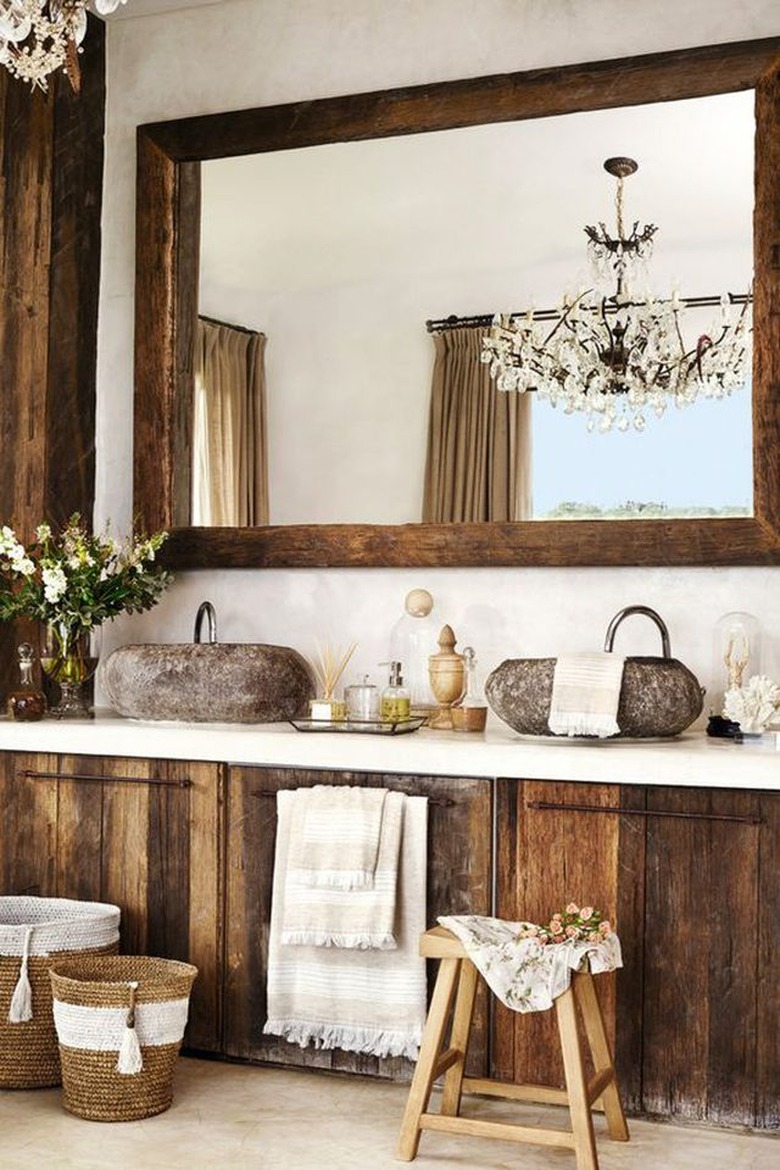
3. Instead of painting your cabinetry, use a faux reclaimed wood finish to achieve the earthy, back-to-nature look of this rustic bathroom. (Check out more rustic bathrooms here for additional inspo.)
 Zara Home
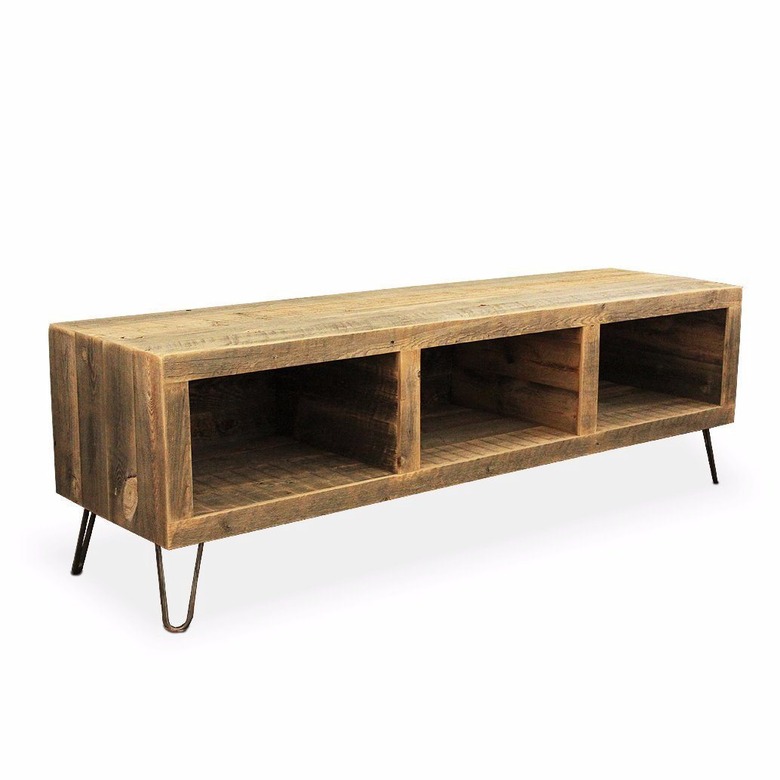
4. Unsure how to use the reclaimed wood look in your midcentury modern home? Add hairpin legs to a reclaimed wood piece (like the entertainment console below or coffee table) and voilá — a modern look that's also surprisingly rustic!
 JW Atlas Wood Co.
References
- North Dakota State University; Painted Finishes for Special Effects; Annette L. Bach; April 1993
- It's a Shabby Thing; Grunge It Up!; January 2009
- "Paper Crafts Workshop: A Beginner's Guide to Techniques & Projects"; Marie Browning; 2007